Want to see the world's smallest hair straightener? Well... not quite, but it IS an ultra-compact and precise temperature controlled hair-clip.
I know, I made a weird thing but the reason for making it has nothing to do with hair! See, there was a time when the idea of glueing important electronics circuits together made sense. The problem is, over time that glue gets weak. A lot of people are settled to throw these things away but I thought it would be a fun challenge... made even more "fun" by the extremely limited space where the repair needed to be made.
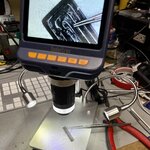
What you see is 0.15mm Kanthal wire which I carefully bent into a resin printed mold. This wire is just under 6-thou for anyone in the world of imperial units.
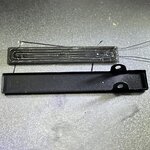
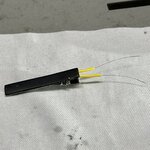
With the wire affixed to the mold I can seal it all into the top of the hair clip with high-temperature epoxy resin. We see the top is painted black, this is a high-temp black paint which is intended to electrically isolated the temperature probe.
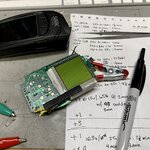
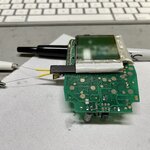
Initially I thought I could get away with 3 watts of power across the kanthal for 100c to gently soften the old adhesive on the heat seal connectors. Double that and a little more later, I had 7 watts for 150c. The temperature changed the resistance of the kanthal slightly but I believe it ended up being in the range 16 ohm.


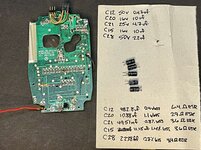
After all of that, and a quick recap, I had all but a few lines fixed. These last few were stubborn and I decided to "cut my losses" and live with them before I scorch the delicate polyester heat seal connectors.
I found JohnDevin Duncan's comment on Hackaday was a very handy reference for temperature and general concept. His instructions are arguably safer than the article which it belongs to, where you can see the burnt polyester ribbon connector. The space I was working in was far too small to safely fit a soldering iron.
Additionally, I've attached a zip with the SolidWorks source files for the following parts:
I know, I made a weird thing but the reason for making it has nothing to do with hair! See, there was a time when the idea of glueing important electronics circuits together made sense. The problem is, over time that glue gets weak. A lot of people are settled to throw these things away but I thought it would be a fun challenge... made even more "fun" by the extremely limited space where the repair needed to be made.

What you see is 0.15mm Kanthal wire which I carefully bent into a resin printed mold. This wire is just under 6-thou for anyone in the world of imperial units.


With the wire affixed to the mold I can seal it all into the top of the hair clip with high-temperature epoxy resin. We see the top is painted black, this is a high-temp black paint which is intended to electrically isolated the temperature probe.


Initially I thought I could get away with 3 watts of power across the kanthal for 100c to gently soften the old adhesive on the heat seal connectors. Double that and a little more later, I had 7 watts for 150c. The temperature changed the resistance of the kanthal slightly but I believe it ended up being in the range 16 ohm.


After all of that, and a quick recap, I had all but a few lines fixed. These last few were stubborn and I decided to "cut my losses" and live with them before I scorch the delicate polyester heat seal connectors.
I found JohnDevin Duncan's comment on Hackaday was a very handy reference for temperature and general concept. His instructions are arguably safer than the article which it belongs to, where you can see the burnt polyester ribbon connector. The space I was working in was far too small to safely fit a soldering iron.
Additionally, I've attached a zip with the SolidWorks source files for the following parts:
- A jig I used to hold the clip in location while I filed the teeth off the clip.
- The wire-form insert for the top of the clip.
