

I saw this one, and thought it would really translate well to a modern design (LCD, Pi running OS 7 emulation, etc). I also had temporary access to the latest Claude frontier model. I couldn't figure out the name for this concept design - I found one reference in an Apple Design PDF that is could be named "Happy" after one of the dwarves, or possible part of a collection called ""Macintosh Studies.
AI disclaimer: I know this some people will be put off by my use of AI, but I got into computers because I was fascinated by what it could do. So for me, exploring the boundaries of new technology is why I got into computers. So if it's not for you, I understand. No need to announce it. I'm not encouraging anyone else to participate in this project or even to consume it. I suspect there needs to be a feature for us users to tag posts that are AI adjacent and an ability to filter those out for people who don't want it in their feed.
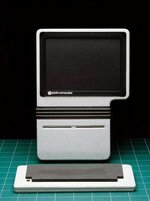
Onto the process. Having spent weeks (months) building a custom case for my Lisa Mini. I was curious while I was out of town, how close I could get making a model that would house an iPad LCD, LCD controller board, raspberry Pi, and some power hardware (a 12v USB-C input and a buck converter to power the Pi). I didn't have access to my home computer, so I just was using my phone and access to Claude Fable 5.2, temporarily included with the regular $20/mo paid plan. I also wanted to view the progress, so I asked the agent to provide animated visuals of the assembly of the device. I provided an initial prompt and an image of that I wanted the case to roughly look like. It created a device, and I provided some follow up clarifications, some corrections to work done, but I think it was all done in about 15 prompts. And it created a really nice, well thought out model that was actually optimized to be printed in pieces (without supports).
OK, so that looks really cool. But what about printing this thing - does it actually work when made physical?
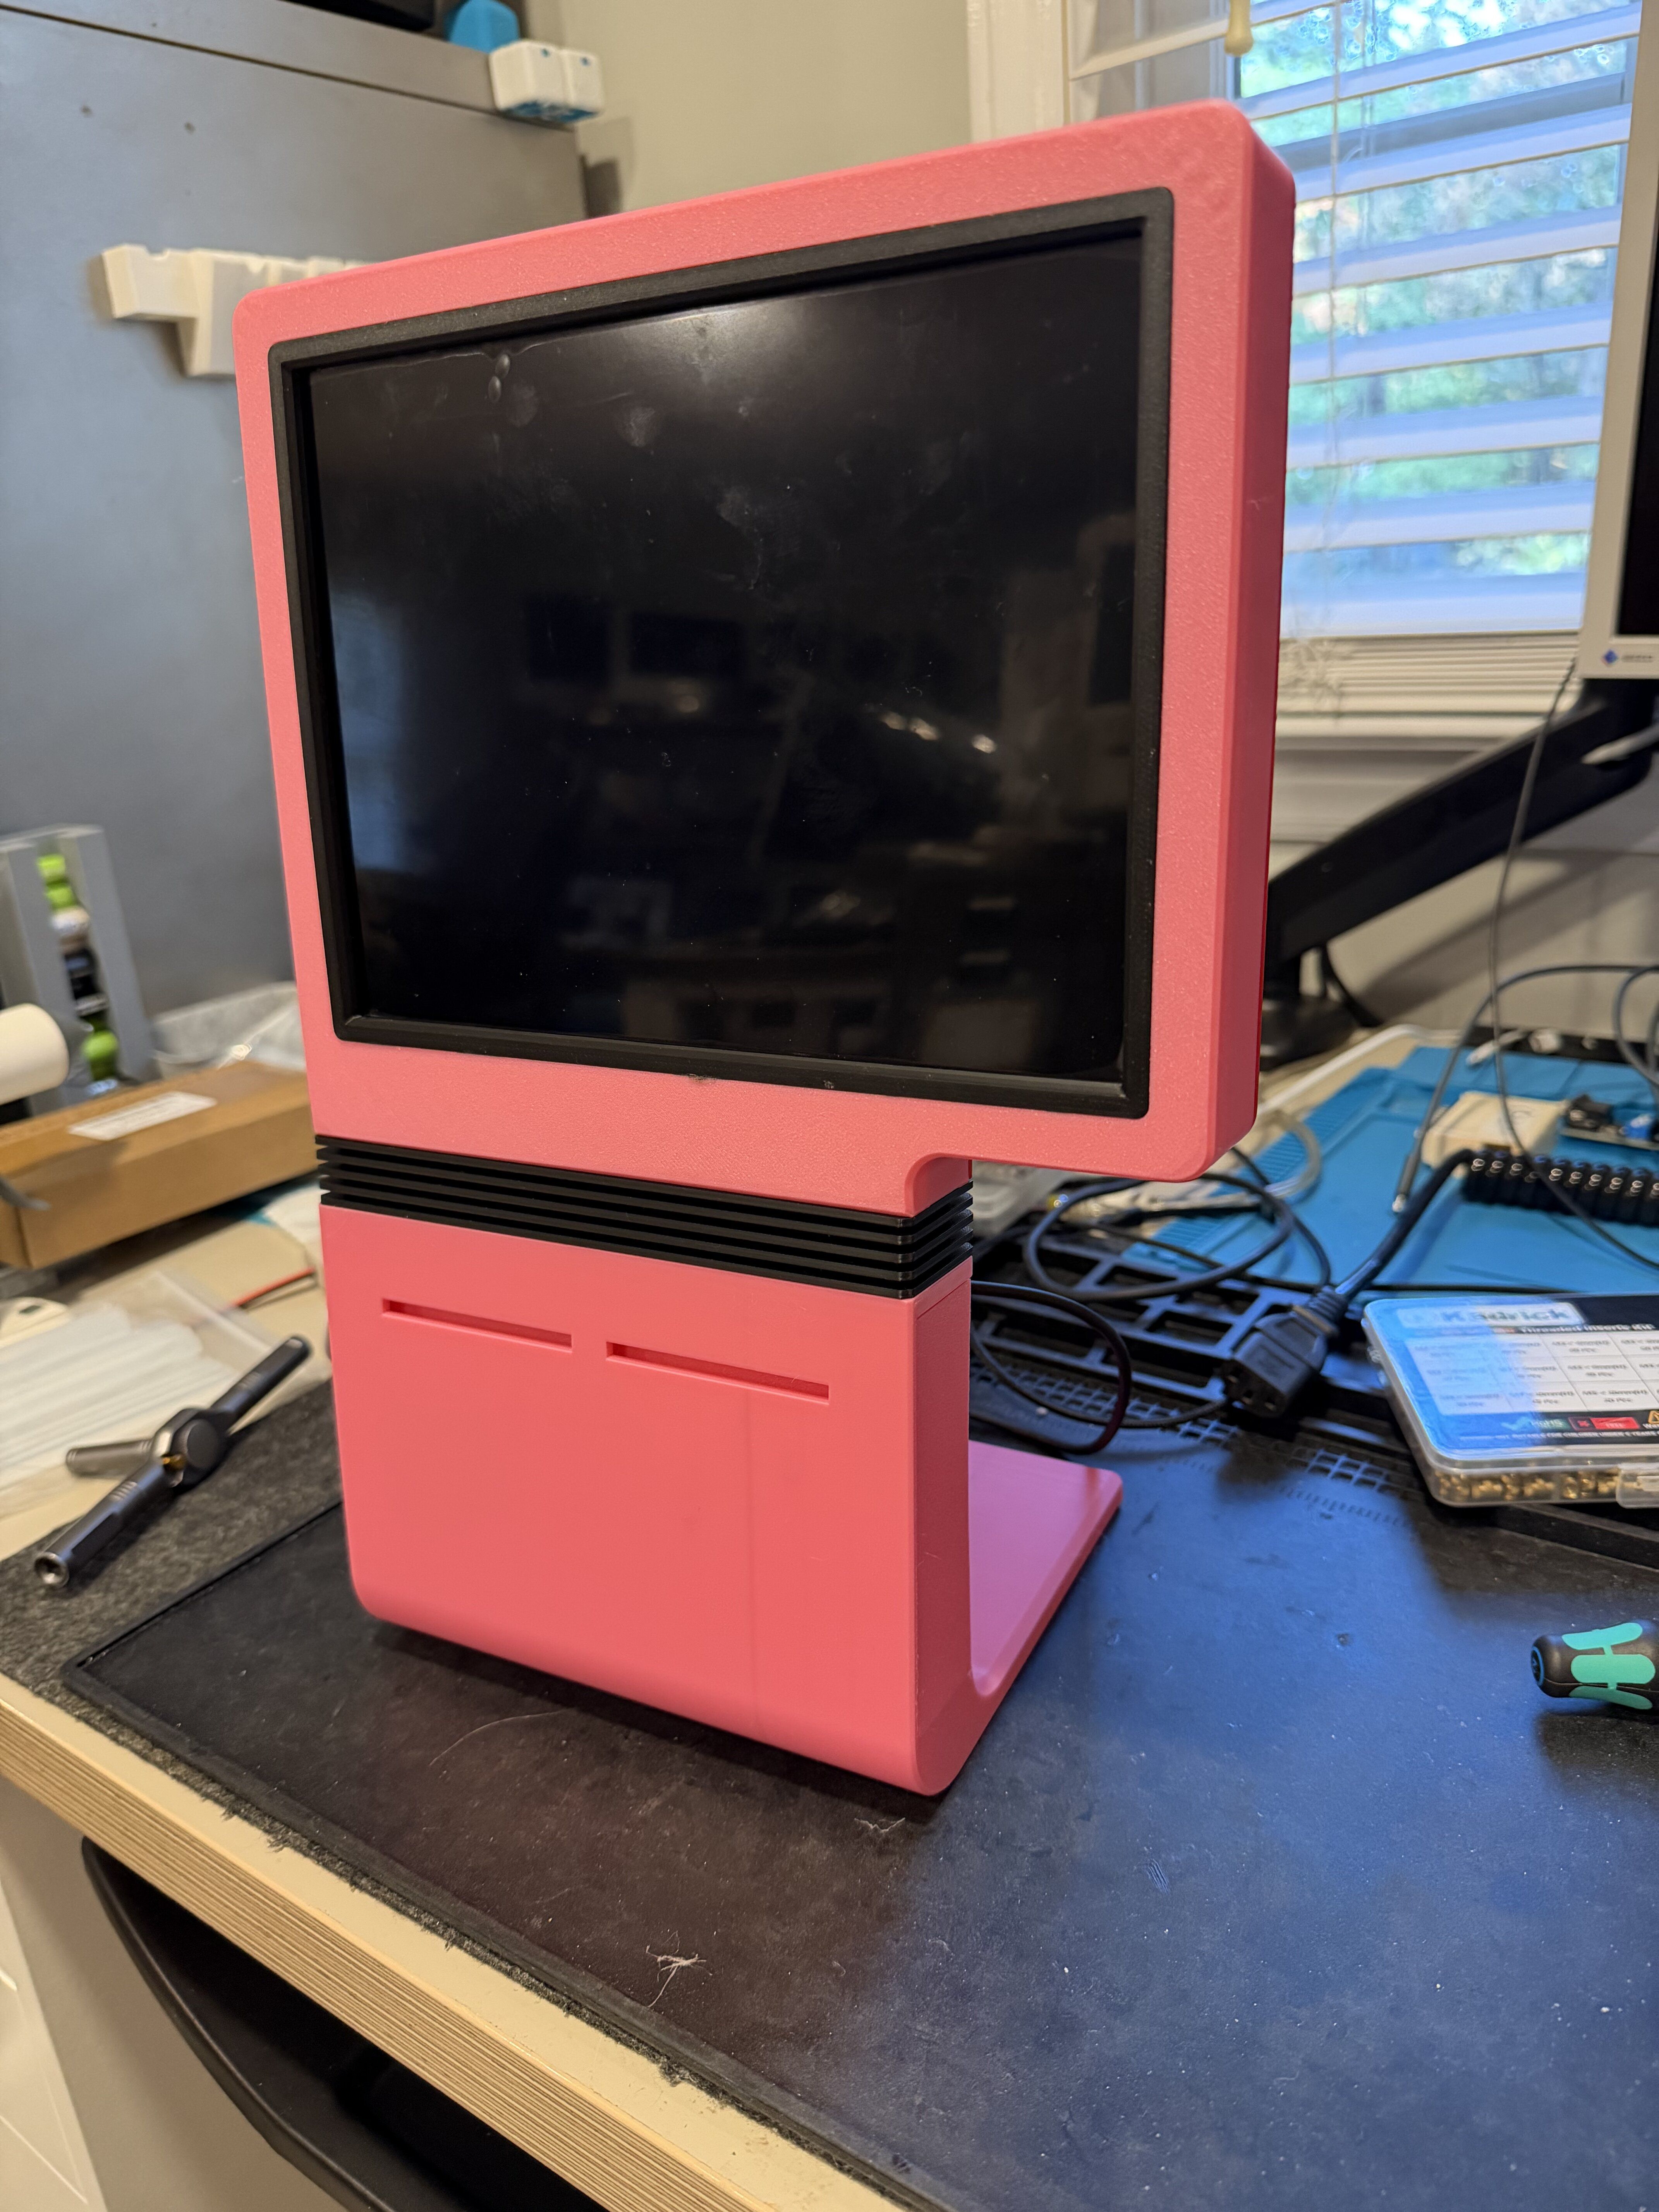
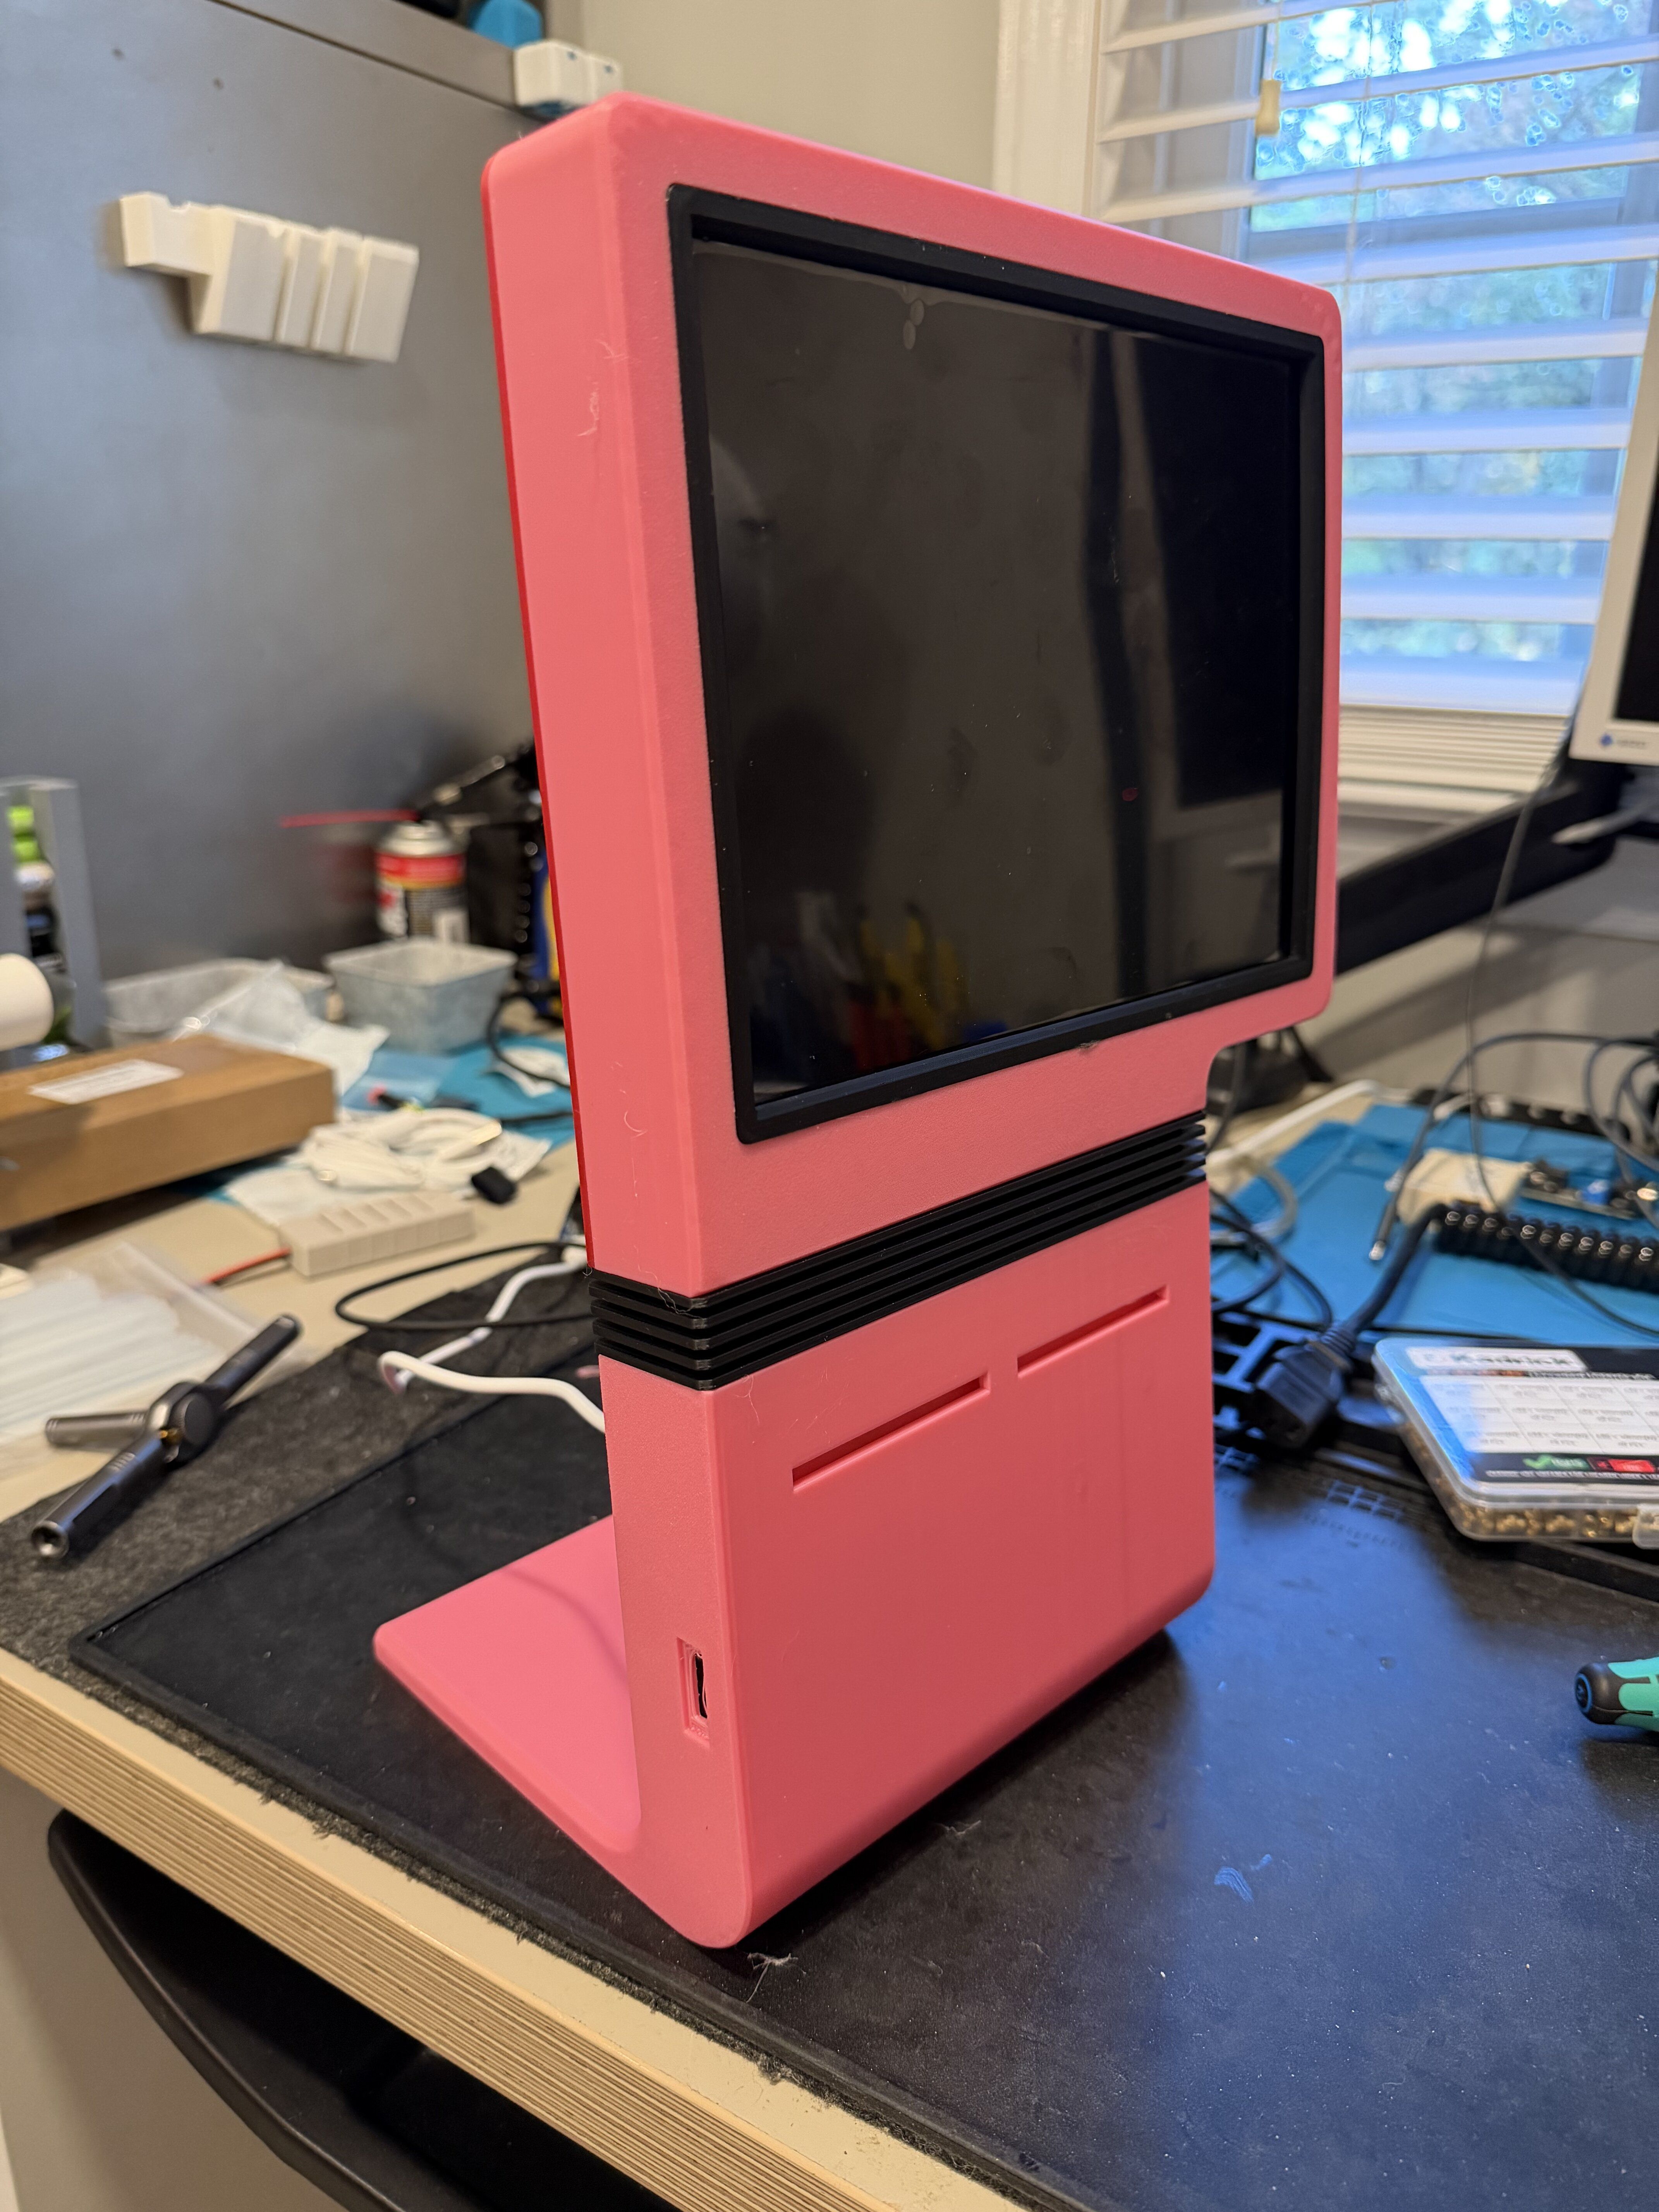
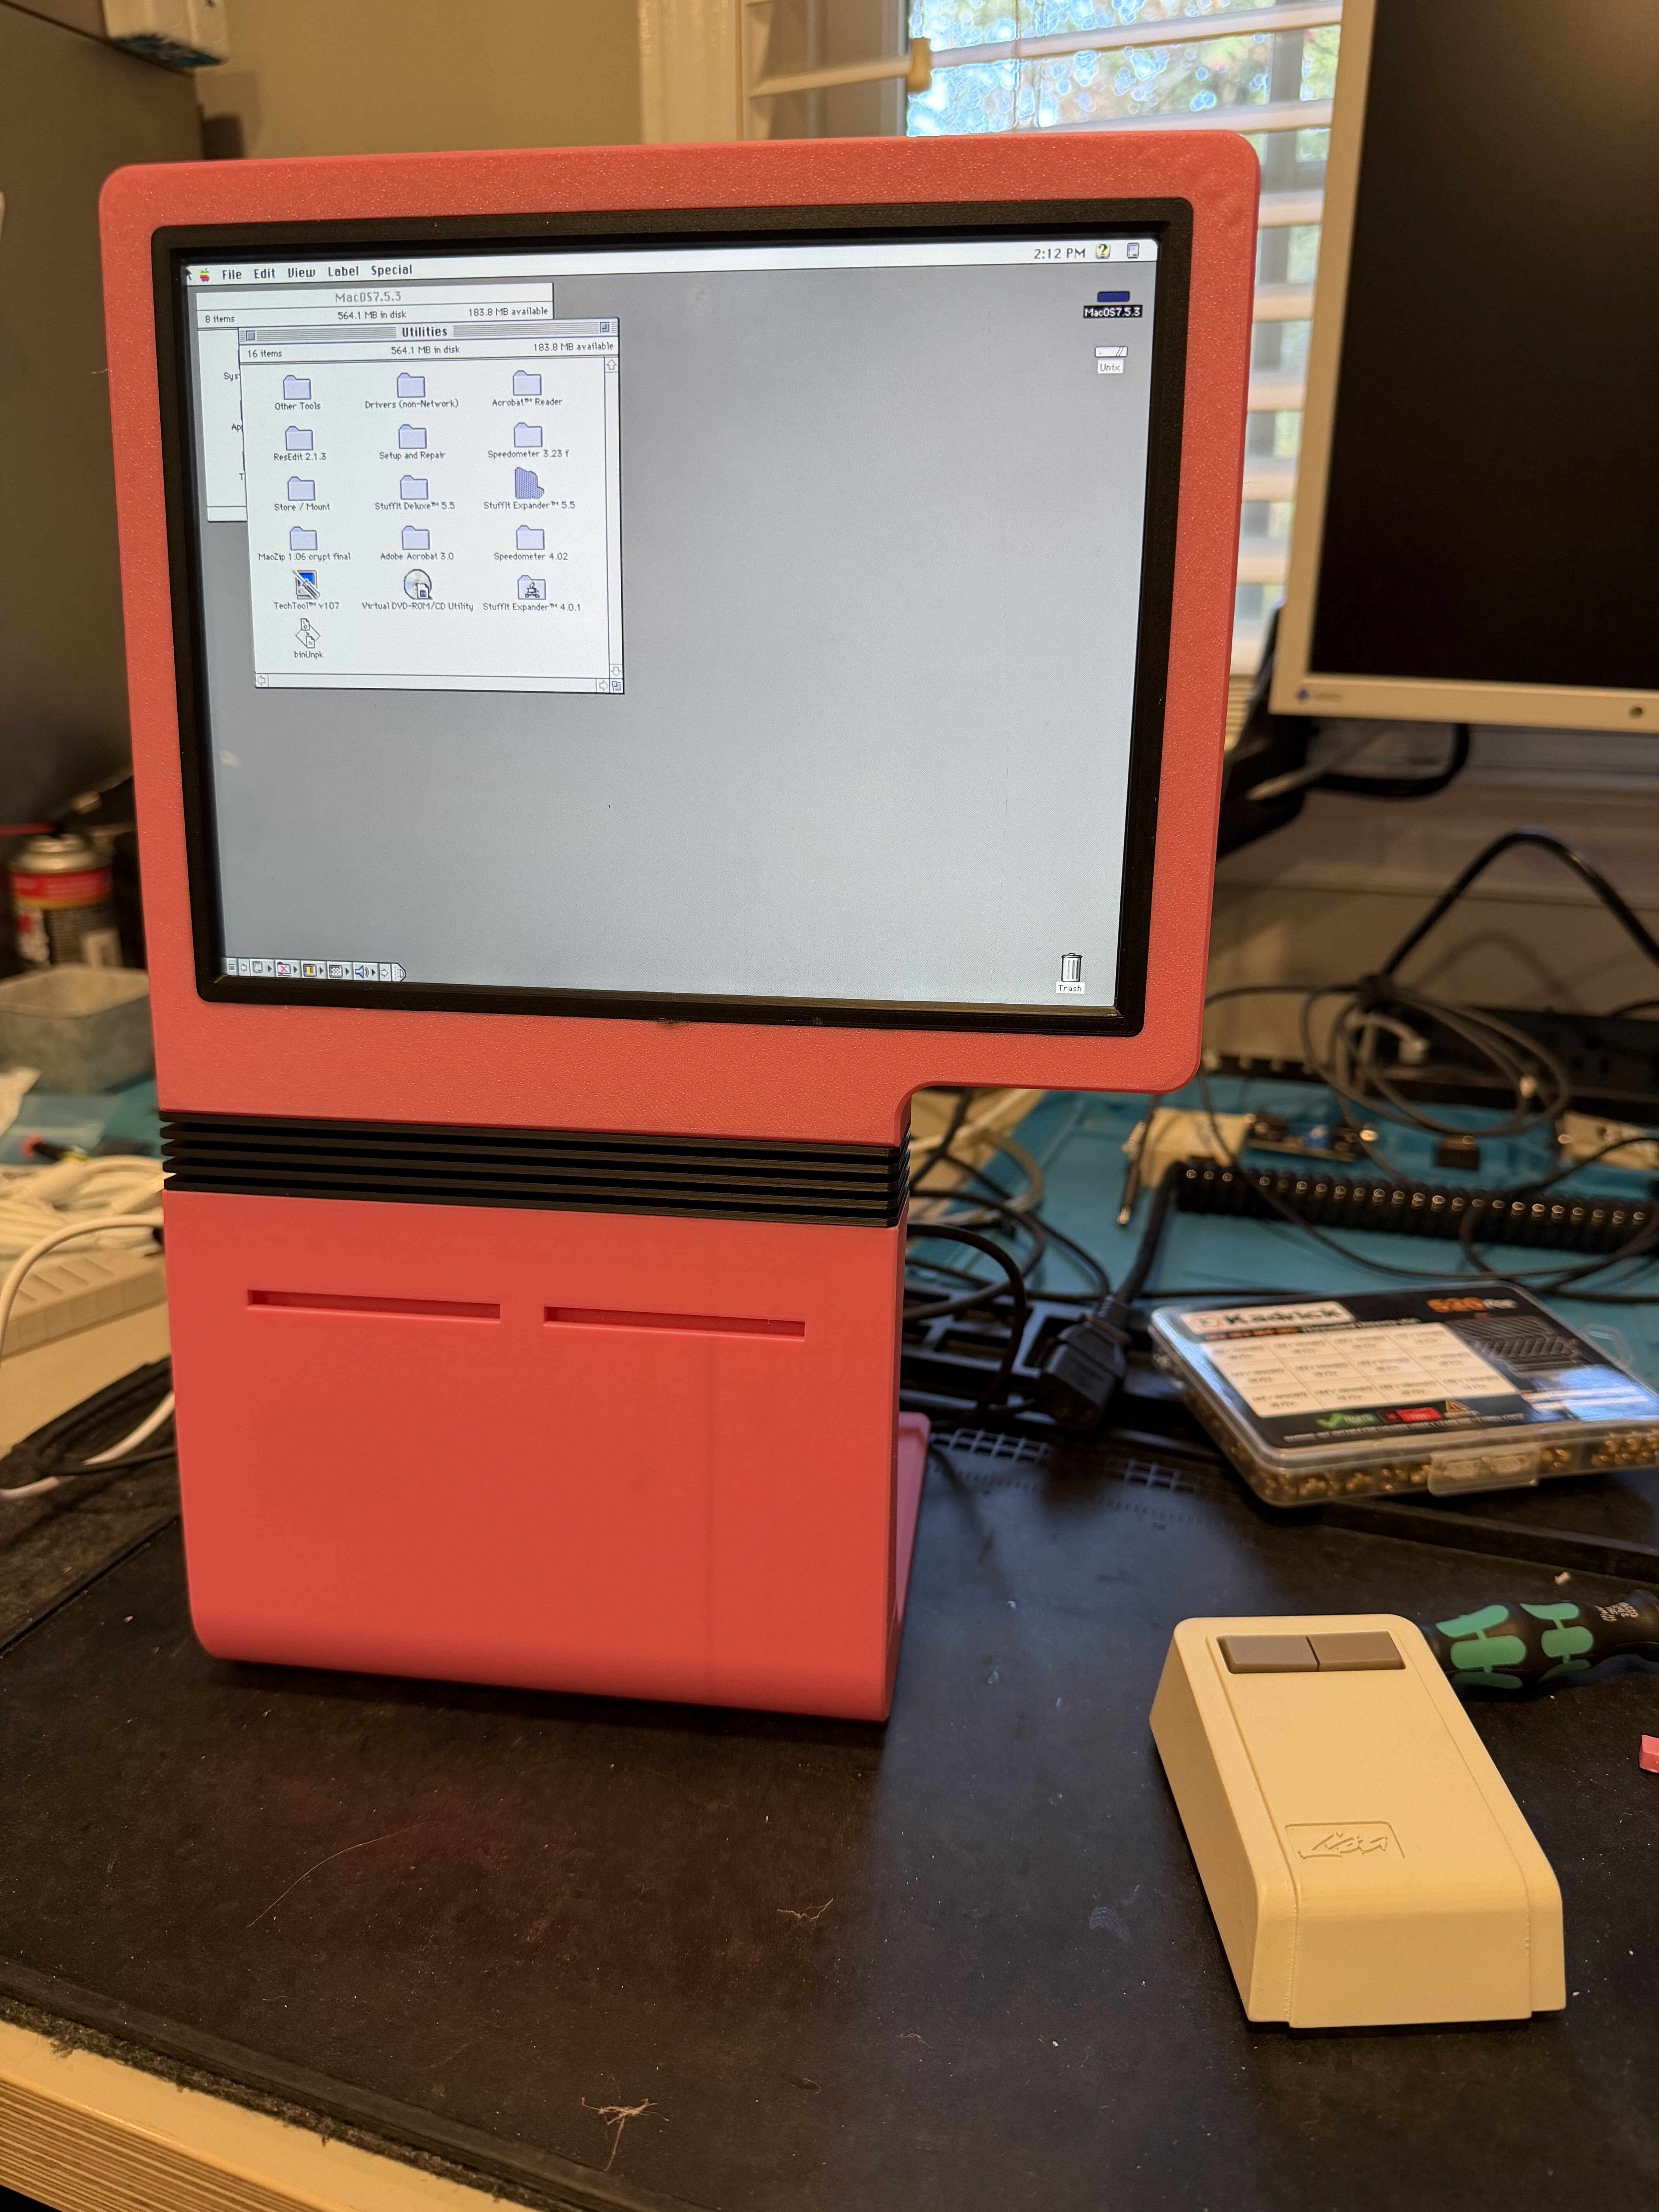
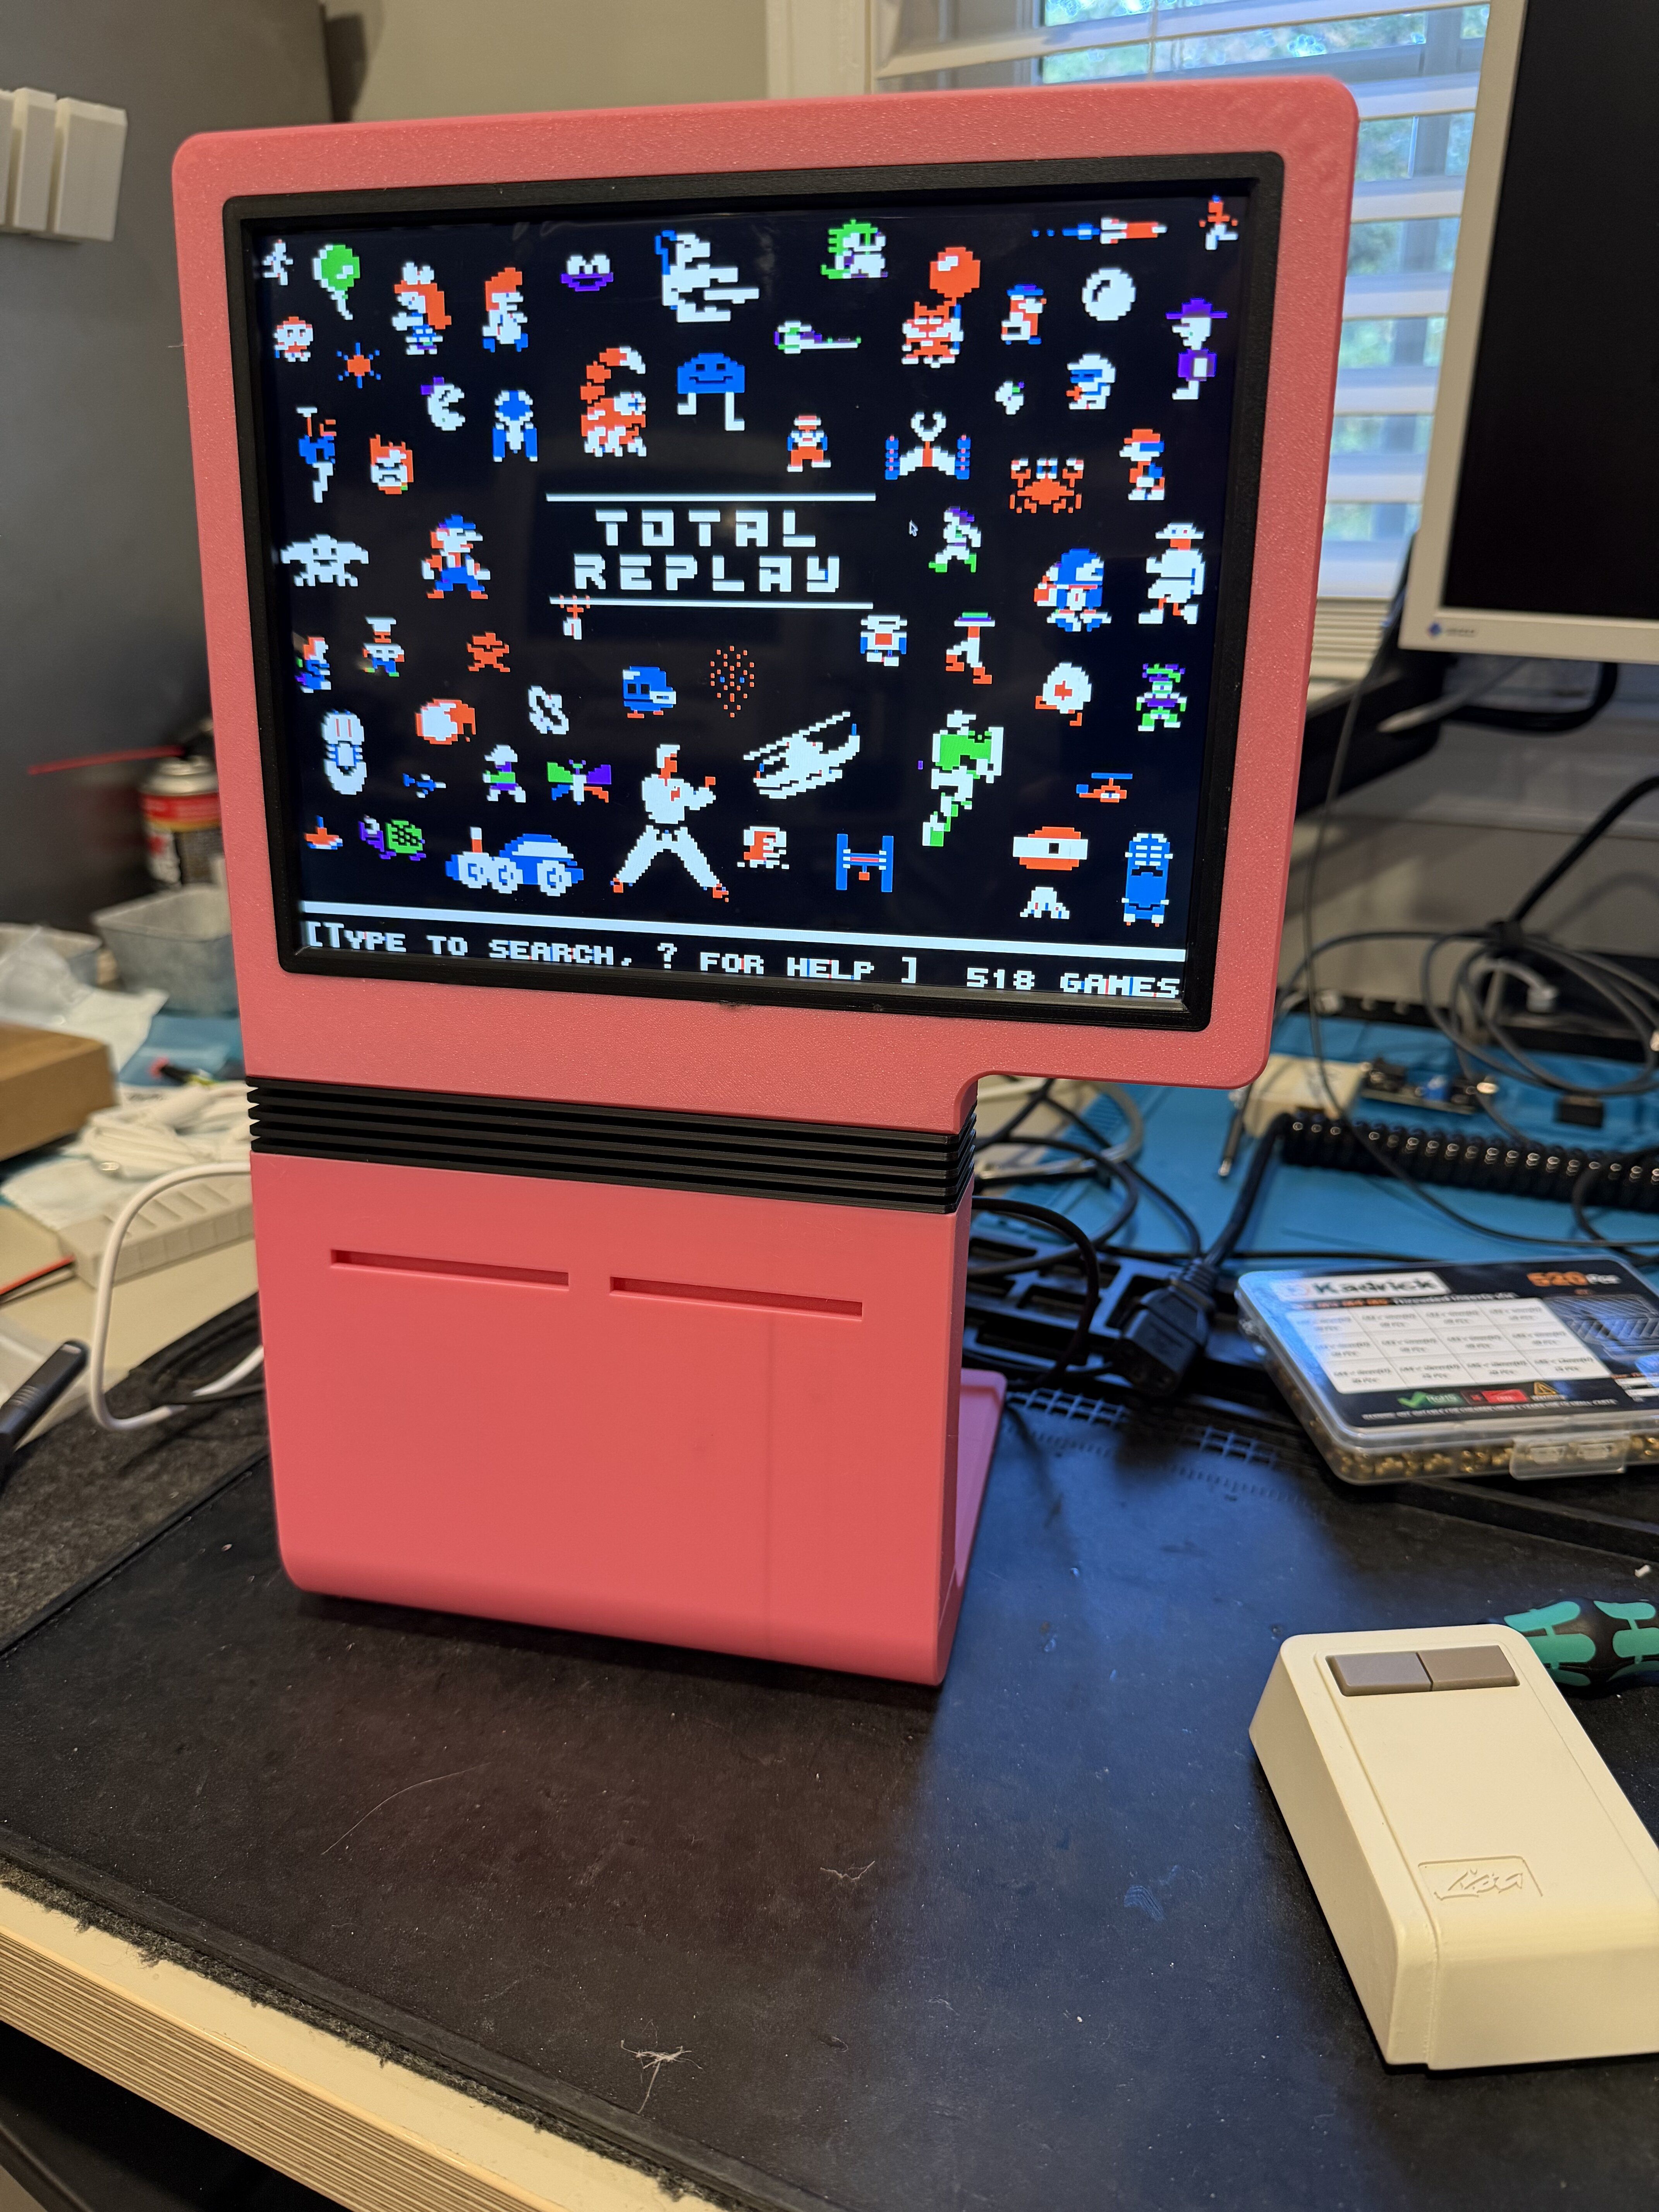
Turns out, it did a really good job (excuse the color - I printed in filament I don't use often in case it didn't work). The Pi mounted properly, as did the USB-C trigger board I used. The fin assembly in the middle (which was one of the reasons I liked the design because it felt like a merging of Apple and NeXT) worked on the first print. The components went together and the slot for the SD card was in the proper spot.
Were there some issues? Yes. There were screws for connecting pieces that were inaccessible due to other parts being in the way. A side panel was secured on two sides, but not a third to give it a solid joint. Originally it made it way too thick. It would have made cable management and assembly much easier, but I had it narrow it to optimize for style. It noted the device could have a tendency to tip forward, so I had it put a weight slot on the back base piece that will allow me to slide a piece of steel in there to give the base some weight.
But, largely, it worked just fine on the first shot. I probably wasted 2-3 spools of retro platinum PLA on my Lisa Mini build. While I enjoyed the iterative process of making the Lisa Mini case, ultimately, when the output is costly in terms of 10s of hours of print time, and filament costs, it turns out these latest powerful models can really help get it right earlier in the process. Another nice thing about this process is I asked it to optimize for printing, including allowing it to be printed on a 250mm print bed (the most common full size 3d printer bed). My Lisa Mini unfortunately requires a large format printer. But this one can be printed by most people on their existing printer.
I'll be publishing all the files, along with my custom emulator setup that I used on the Lisa Mini, which allows you to run a variety of Apple (and Apple adjacent) emulators on the Pi.
AI disclaimer: I know this some people will be put off by my use of AI, but I got into computers because I was fascinated by what it could do. So for me, exploring the boundaries of new technology is why I got into computers. So if it's not for you, I understand. No need to announce it. I'm not encouraging anyone else to participate in this project or even to consume it. I suspect there needs to be a feature for us users to tag posts that are AI adjacent and an ability to filter those out for people who don't want it in their feed.
Onto the process. Having spent weeks (months) building a custom case for my Lisa Mini. I was curious while I was out of town, how close I could get making a model that would house an iPad LCD, LCD controller board, raspberry Pi, and some power hardware (a 12v USB-C input and a buck converter to power the Pi). I didn't have access to my home computer, so I just was using my phone and access to Claude Fable 5.2, temporarily included with the regular $20/mo paid plan. I also wanted to view the progress, so I asked the agent to provide animated visuals of the assembly of the device. I provided an initial prompt and an image of that I wanted the case to roughly look like. It created a device, and I provided some follow up clarifications, some corrections to work done, but I think it was all done in about 15 prompts. And it created a really nice, well thought out model that was actually optimized to be printed in pieces (without supports).
OK, so that looks really cool. But what about printing this thing - does it actually work when made physical?
Turns out, it did a really good job (excuse the color - I printed in filament I don't use often in case it didn't work). The Pi mounted properly, as did the USB-C trigger board I used. The fin assembly in the middle (which was one of the reasons I liked the design because it felt like a merging of Apple and NeXT) worked on the first print. The components went together and the slot for the SD card was in the proper spot.
Were there some issues? Yes. There were screws for connecting pieces that were inaccessible due to other parts being in the way. A side panel was secured on two sides, but not a third to give it a solid joint. Originally it made it way too thick. It would have made cable management and assembly much easier, but I had it narrow it to optimize for style. It noted the device could have a tendency to tip forward, so I had it put a weight slot on the back base piece that will allow me to slide a piece of steel in there to give the base some weight.
But, largely, it worked just fine on the first shot. I probably wasted 2-3 spools of retro platinum PLA on my Lisa Mini build. While I enjoyed the iterative process of making the Lisa Mini case, ultimately, when the output is costly in terms of 10s of hours of print time, and filament costs, it turns out these latest powerful models can really help get it right earlier in the process. Another nice thing about this process is I asked it to optimize for printing, including allowing it to be printed on a 250mm print bed (the most common full size 3d printer bed). My Lisa Mini unfortunately requires a large format printer. But this one can be printed by most people on their existing printer.
I'll be publishing all the files, along with my custom emulator setup that I used on the Lisa Mini, which allows you to run a variety of Apple (and Apple adjacent) emulators on the Pi.

