Hi, Everyone - This is my first post on the forum. I've attached two photos and a considerable amount of text describing the resurrection of my late-2009 27-inch iMac, including the graphics card bake inspired by JDW's YouTube videos. It's a comprehensive read, but perhaps someone can learn from my experience.
The Saga of My Late-2009 27-inch iMac
It was sometime in the year 2017, and I ran upstairs after getting home from work one day to jump on my late-2009 27-inch iMac for a little Farming Simulator action. To my dismay, my computer wouldn’t boot up (white screen with Apple logo for an eternity, and finally, gray horizontal lines). After a few frustrating hours of booting to safe mode, booting to recovery mode, and using every start-up key combination known to man; I gave up and went to bed.
After multiple attempts to figure out the issue during the next several years and failing, I resigned myself to using my iMac as a nice piece of digital display art (running in safe mode and rotating through the beautiful nature screensaver photos). I just couldn’t bear to throw it away (such a stylish design – even by today’s standards).
Fast forward to October 2021. I’m sitting at my desk gazing lovingly at my iMac as it shakily transitions from one beautiful nature photo to the next, sometimes freezing and having to be rebooted into safe mode, but mostly just quietly waiting to die. I couldn’t take it. There had to be a way to restore my majestic desktop companion to its former glory. So, I headed back to Google again with “white screen of death,” “only boots in safe mode,” and “help, my late 2009 27-inch iMac doesn’t work.”
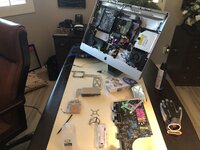
And I found JDW’s videos. Whoa, what does it mean to “bake” a graphics card? I mean, is it some computer nerd term? Well, I watched all four of JDW’s bake videos plus his updates and FAQ – some multiple times. Based on what I learned, my hope was renewed, and I decided to go all out. I called OWC and ordered up a new 1TB SSD with adapter kit plus 32 GB of RAM. I sourced the thermal paste (K-4/K-5 pro), a computer repair tool kit with magnetized Torx screwdrivers (to maintain sanity), a static-free work mat, and a BR2032 PRAM battery from Amazon. Finally, I ordered a new optical drive (the original bit the dust circa 2015) through eBay. Total cost: Approximately $490. Please note that there is no graphics card included in the items I purchased because I was determined to try the bake first.
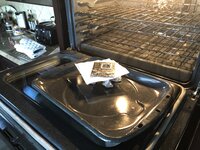
October 31, 2021 - Using JDW’s videos to guide me through the disassembly, the cleaning (a zillion swabs continually “black as the night”), the baking (9 minutes at 392 degrees F cooled down on open oven door), and the reassembly; as well as two other videos for the RAM and optical drive replacements (I was saving the SSD upgrade for later); I buttoned up the computer and switched it on…chime sounded, but black screen. Ugh!!! It figures that I would be the only person in the world for whom the bake did not work.
It was too late to quit after all the work invested, so...I unscrewed the eight Torx screws and tilted the screen forward to discover…IDIOT!!!...I forgot to plug in the power supply connector to the screen. OK, that was a relief. I plugged in the connector, replaced the screen, pushed the power button, and voila - a lighted screen and chime sound. But wait, it’s taking forever to boot. Talk about a roller coaster ride of emotion. So, now I’m back to booting in safe mode, recovery mode and every start-up key combination known to man. In a last-ditch effort, I try to reinstall High Sierra on my hard drive. The system refused the reinstall because the hard drive had a S.M.A.R.T. error (?!?). I guess I shouldn’t have saved the SSD upgrade for later.
What next? I dove into the machine again. Thankfully, I just needed to pull the glass and unscrew/remove the screen to replace the HDD with the new SSD, which only took about 20 minutes. Done. OK, here we go again. I switched the power button on. After waiting an indeterminable amount of time on the white screen, what should appear but a blinking folder with a question mark. You’ve got to be kidding!!! Now it’s back to Google with “blinking question mark folder” search.
Great. According to the search results, my iMac can’t find a disk with a bootable OS. Really? Alright, let’s try out that new optical drive with my original Mac OS X “Snow Leopard” installation disk (yes, I still have it!). Hard power off. Insert installation disk and power up. Hold down the “C” key. Wait a long time. Blinking folder with question mark. Hard power off and on. Hold down the “Alt/Option” key. Wait a long time. Blinking folder with question mark. Hopes fading fast…need a bootable USB stick or?
Regroup. According to OWC instructions, I need to have the old HDD connected to the computer as well as the new SSD when rebooting to install the OS to the new SSD and transfer data. I reason that the old HDD is trashed and won’t work for this purpose. But I’m desperate, so I order an external hard drive dock for overnight delivery from Amazon.
The Sabrent single bay external drive docking station arrived the next day according to schedule. It was November 10, 2021. I opened the package, connected the docking station to my iMac, and slid my old, trashed HDD into the bay. Another moment of truth coming right up…
After 5-plus hours of data transfer with a dying (extremely hot) HDD in the external docking station, I waited anxiously to see if all of the work had been worthwhile. Data transfer rate went down to 7 MBps from an already slow 20 MBps – it even dropped as low as 3 MBps at one point. It seemed like Mac OS High Sierra was successfully installed on the new SSD, but without being able to get past the data transfer stage, I really didn’t know what was going to happen.
I am happy to report that I now have my majestic, fully functioning and much faster late-2009 27-inch iMac back from the almost dead! A million thanks to JDW for his inspiration and instruction.