
Macintosh Portable Power Supply CR-76U

campbellashe

New Tinkerer
Sep 8, 2025
36
14
8
Asheville, NC
Working on various parts of my Macintosh Portable as I await RAM to replace on my board.....
This is the M5136 (CR-76U) from my non back lit version.

Is this salvageable? Should I just Dremel the lower part off and re-tin it....
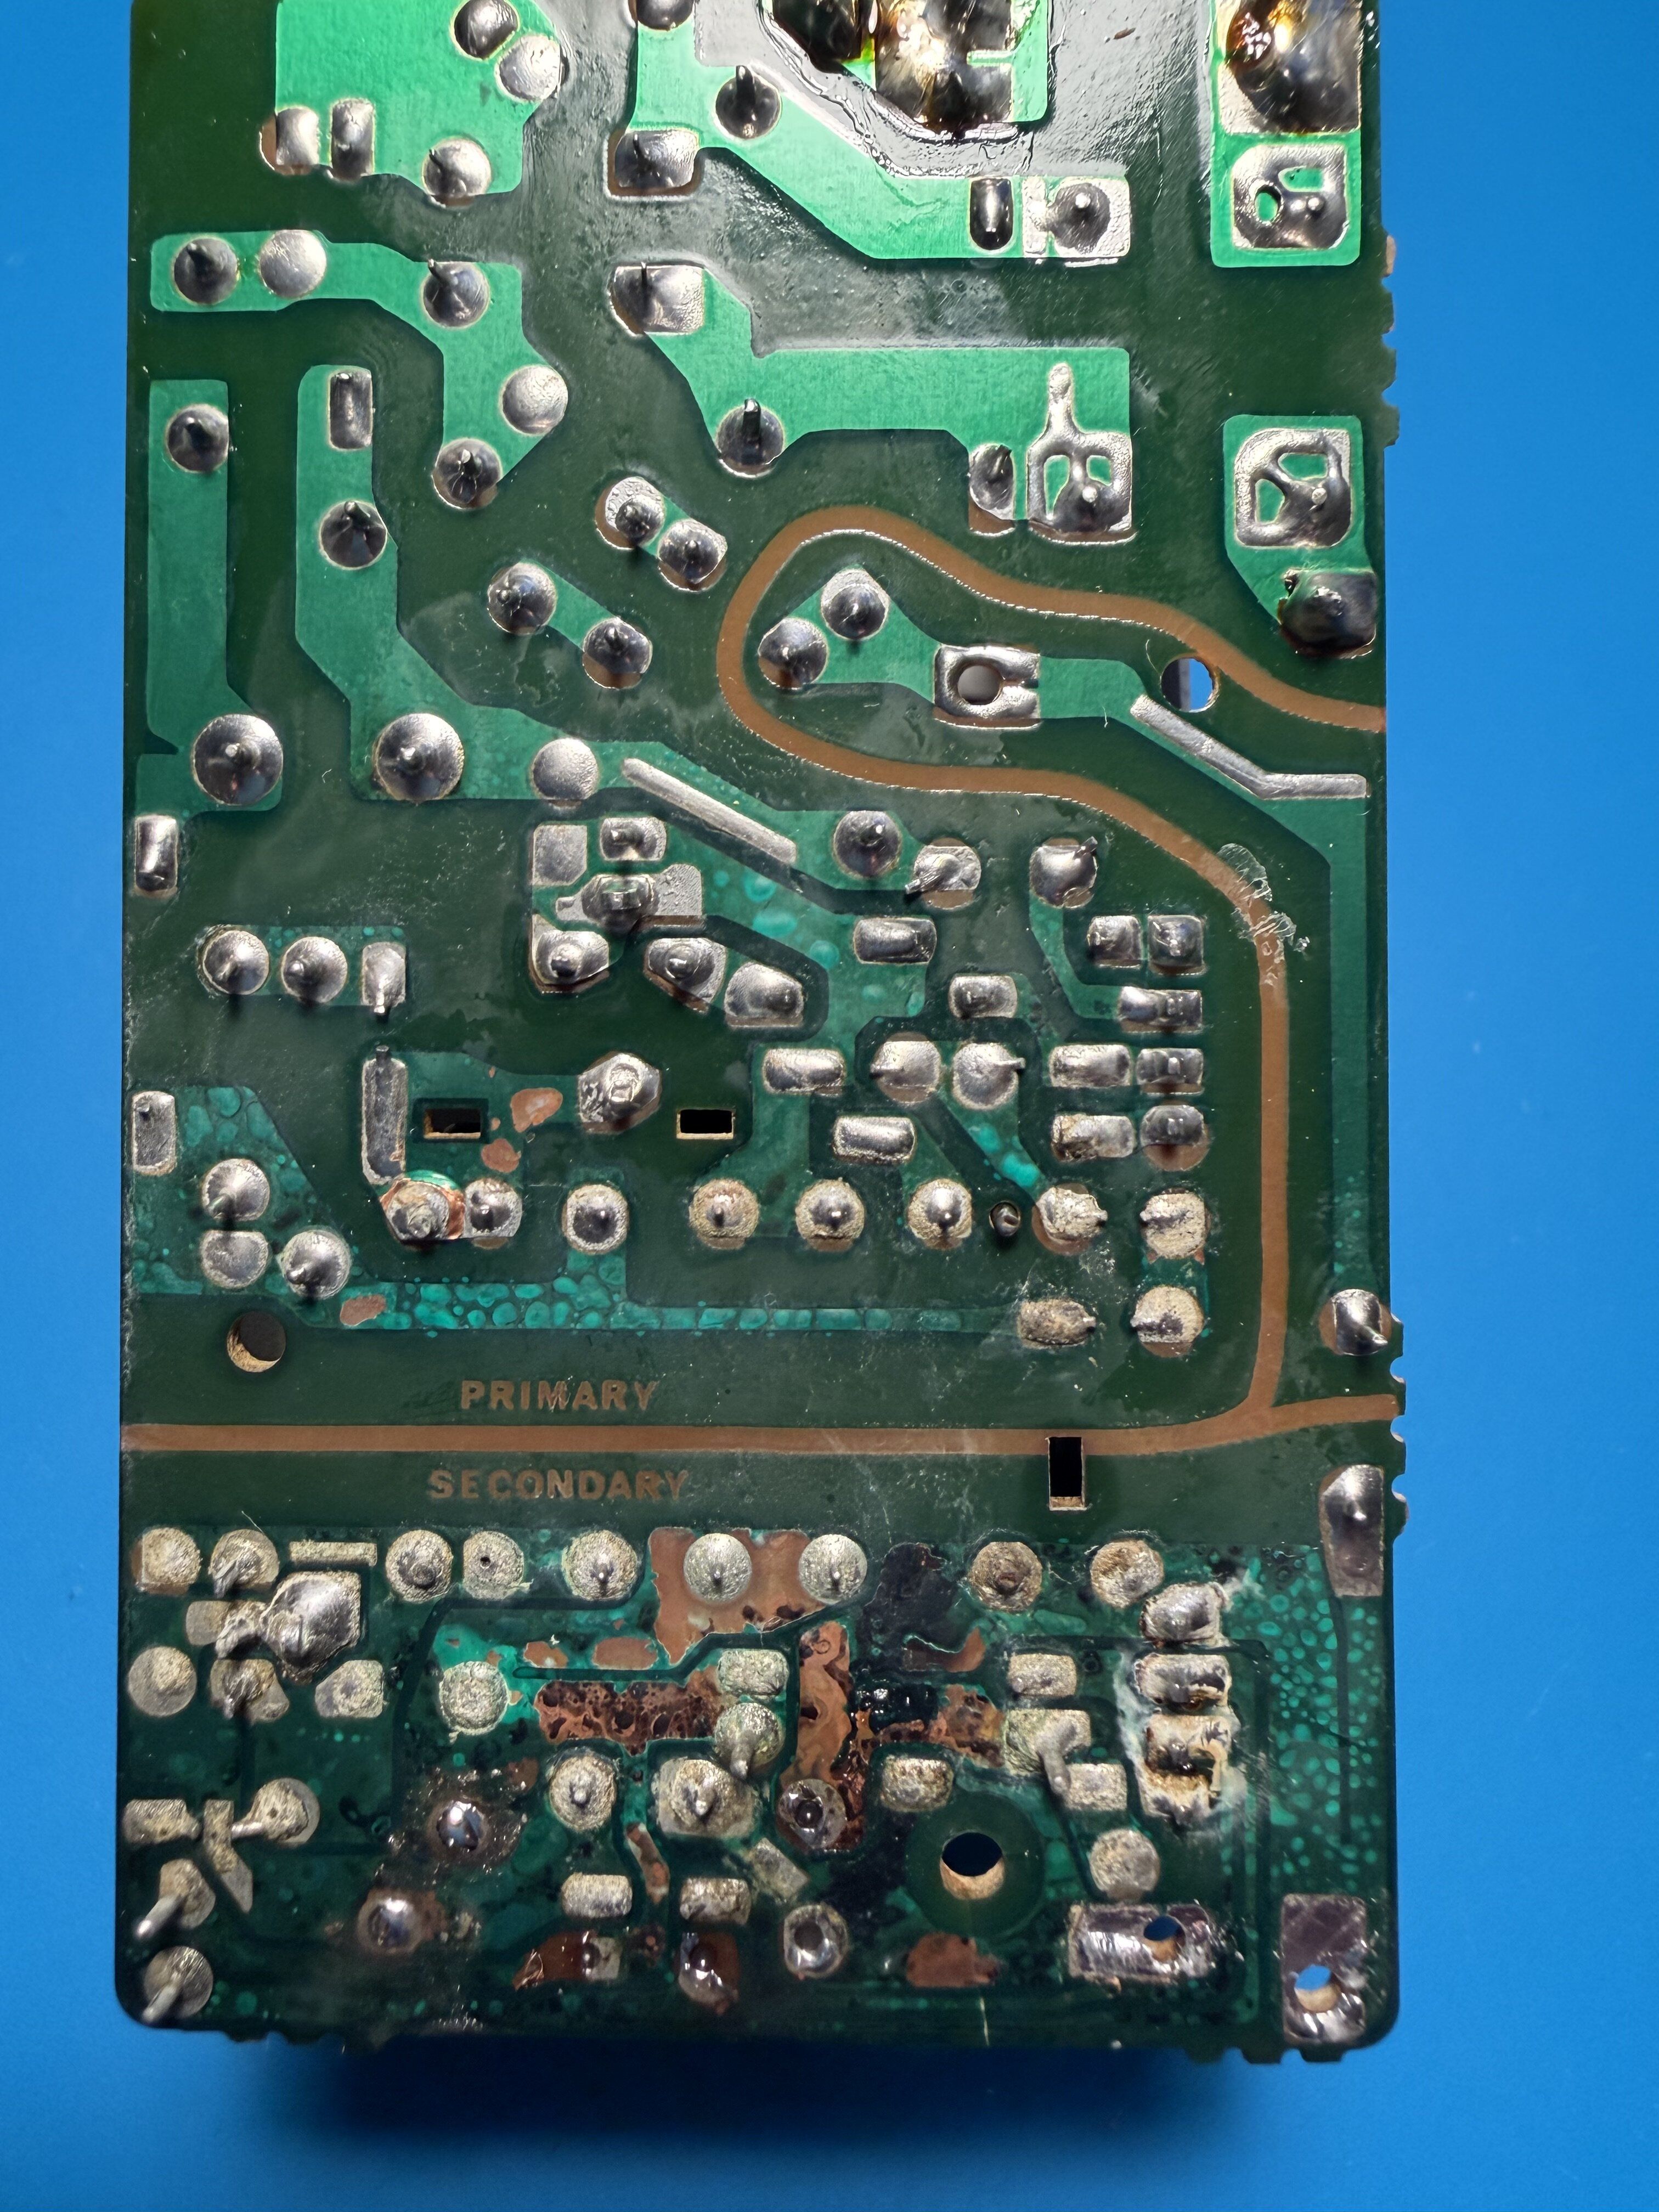

IMG_1672.jpeg
 

PL212

Tinkerer
Dec 25, 2022
56
41
18
I recap'ed my Portable power supply that was in similar/worse condition... one tip is to (carefully!) do an output voltage test before you re-glue the case together, in case any adjustment is needed. Be careful of course as the line voltage is right there and lethal until the case is re-sealed.
 

campbellashe

New Tinkerer
Sep 8, 2025
36
14
8
Asheville, NC
Well. I just placed some small wires to extend the areas broken. The transformer fit fine with some careful guidance. Power supply is fully functional. This is the repair -- not pretty but functional. I didn't end up using the Dremel, just checked continuity and fixed some areas where the board had been eaten away and cracked. All components replaced and new caps. Then checked the output at 7.5 V before I used it.... charging my Mac portable battery just fine.

Here is a picture of the "repaired" board.


IMG_1698.jpeg
 

Froggy814

New Tinkerer
May 6, 2026
79
21
8
Squaw Valley, CA
No, I was to afraid to open the original brick (because of the glue and snapping it). But I can take measurements for you. I've also almost completed the 3d model/print for it.

EDIT: It looks like it would fit with room to spare.
 

campbellashe

New Tinkerer
Sep 8, 2025
36
14
8
Asheville, NC
The case survived my screw driver prying method from the entry point of the cable. I used some small shims to get it open. Nothing cracked but I just worked it slowly. There is one screw at the bottom holding the board down once you are inside the case, it was rusted well as it is right where the capacitor carnage occurred.

Here is the picture of my reassembled brick.... not too bad but for some scratches....


IMG_1708.jpg
 

Froggy814

New Tinkerer
May 6, 2026
79
21
8
Squaw Valley, CA
I got mine taken apart and cleaned up. I just put in all the caps today and set the volts and amps! I sealed it with hot glue... I hope it holds!
(Not meaning to brag I am just really happy about it) Mine was really clean inside, like really clean. I was surprised to see that only the elna cap had really leaked, and thusly weakening and taking a lot of the coating above the pcb traces off. But other then that it works, so that's a plus!
 

daanvdl

New Tinkerer
Feb 8, 2023
12
11
3
Netherlands
I recreated this power supply board a while ago, in case anyone needs a replacement PCB for a CR-76E/CR-76U supply.
The project files are available here:


It may be useful when the original PCB is too badly damaged by capacitor leakage or corrosion to repair reliably.
 
  • Like
Reactions: PL212

wottle

Active Tinkerer
Oct 30, 2021
898
626
93
49
Fort Mill, SC
FYI, I used a usb-c power board and a buck converter and combined them to make a replacement power supply run fully off usb-c.

These are the parts I used.
and

I did something similar for my PB1xx machines. However, be careful using that buck converter with the USB-C trigger board. It will supply the correct voltage, but it is not current limited the way the original power supply is (to 1.5A), so it can potentially feed more current than the Portable is meant to handle.

If you're using something like @Androda's Portable Battery Eliminator, you'll probably be ok. Otherwise, I'd stick to the original power supply (after a recap) or a power supply that is limited to 1.5A or can be with a current limiter.
 

wottle

Active Tinkerer
Oct 30, 2021
898
626
93
49
Fort Mill, SC
Before I got the battery eliminator, I had a relatively cheep 7.5v 1.5A generic power supply I got off Amazon. The 18W version should give you 1.5A, then set the dial to 7.5v: https://www.amazon.com/dp/B08FZLQ5LJ?ref_=ppx_hzsearch_conn_dt_b_fed_asin_title_14&th=1


Also, I used one of these to see the voltage and amps being pulled to make sure the Power Supply wasn't lying about the amps it would supply.

Alternatively, you could throw one of these into a bigger enclosure to get 7.5v at 1.5A: https://www.amazon.com/dp/B089ND7PTH?ref_=ppx_hzsearch_conn_dt_b_fed_asin_title_8&th=1