
Hi All,
New to the forums here! Over the coming weeks, months, and possibly years, I am on a mission to dedicate a portion of my free time to get as many of my Newtons back up into working order. Here is a photo of my personal line-up:
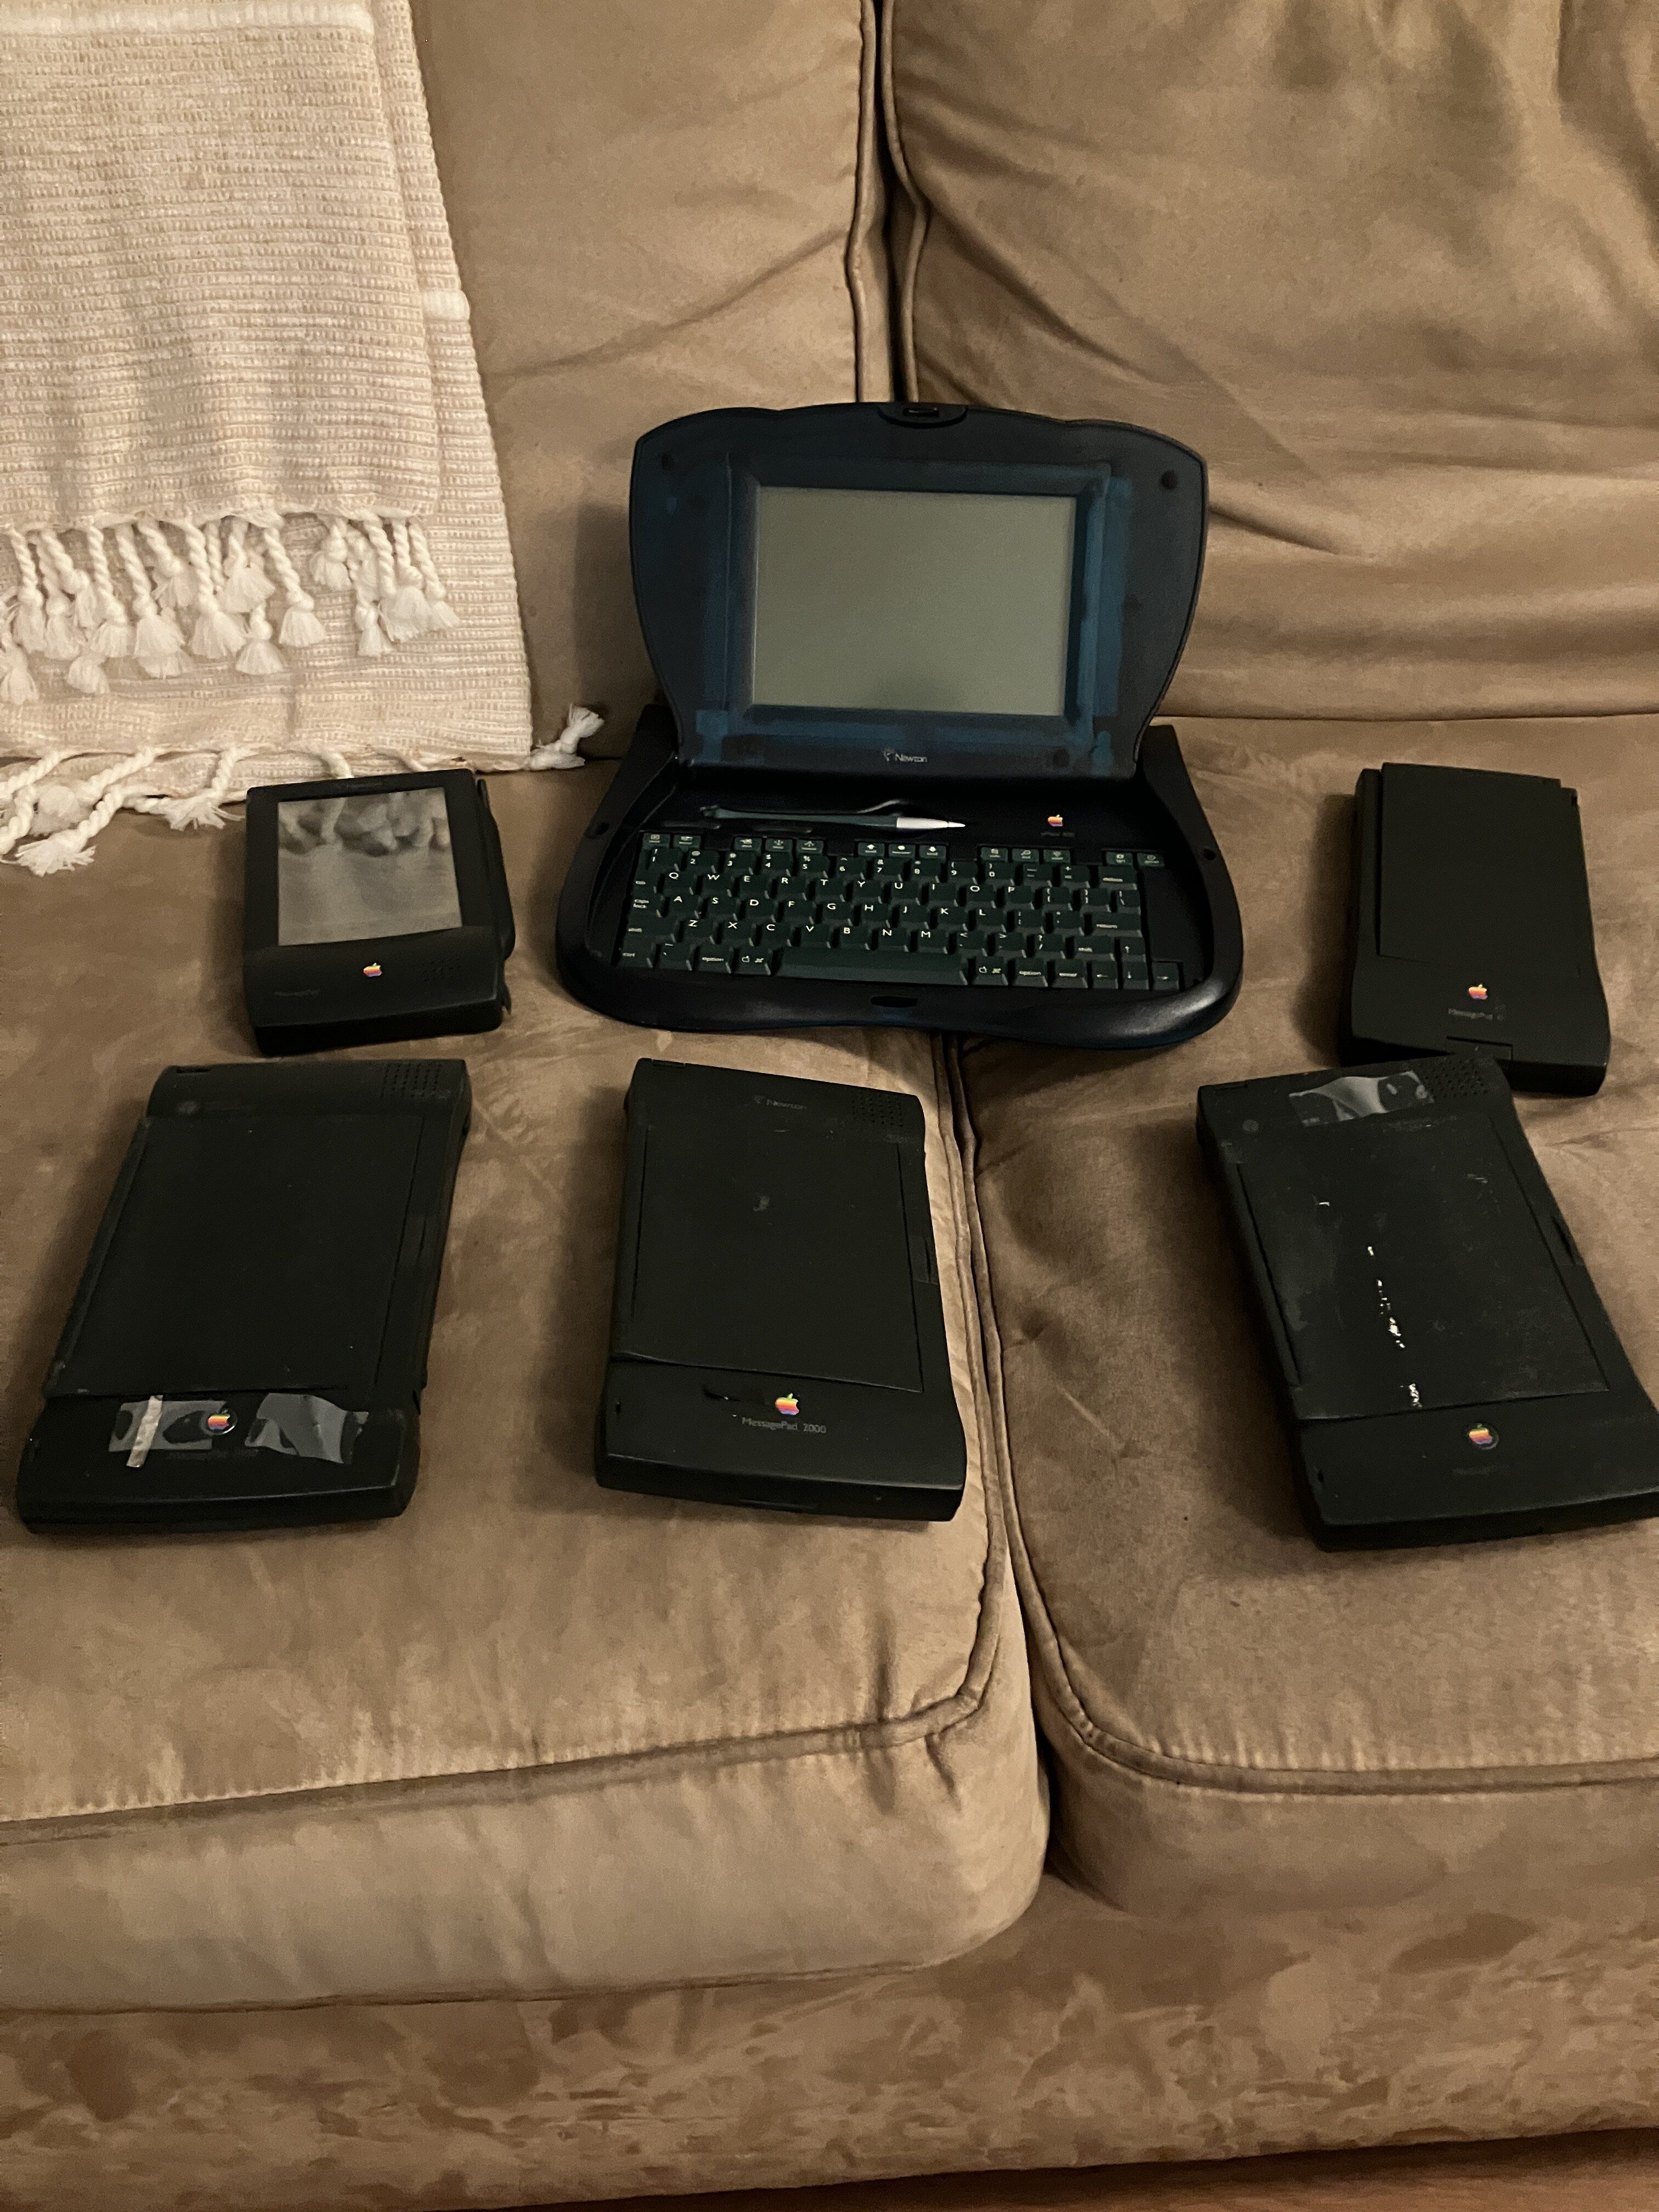
Included are three MessagePad 2100s, an eMate, a MessagePad 120, and a MessagePad 100. All power on with a power cord, and over this past weekend I managed to get the 2100 to the lower right to work for the first time with a battery rack (it was heavily corroded and needed internal and external clean-up). But, it now can be used as a mobile unit again, without a cord!
The middle 2100 has a stripped screw, so I"m working on getting tools so that I can fix that and actually open it to clean. The 2100 to the left is missing a piece of the internal charger where batteries are inserted--likely some soldering or spot welding is needed there (TBD). And, of course, all the rechargeable battery packs need re-doing. Those will be my first efforts, so I hope y'all stay tuned and watch as I bring these Newton devices back to working life!
Very nice to meet all of you!
Idomeneus
New to the forums here! Over the coming weeks, months, and possibly years, I am on a mission to dedicate a portion of my free time to get as many of my Newtons back up into working order. Here is a photo of my personal line-up:
Included are three MessagePad 2100s, an eMate, a MessagePad 120, and a MessagePad 100. All power on with a power cord, and over this past weekend I managed to get the 2100 to the lower right to work for the first time with a battery rack (it was heavily corroded and needed internal and external clean-up). But, it now can be used as a mobile unit again, without a cord!
The middle 2100 has a stripped screw, so I"m working on getting tools so that I can fix that and actually open it to clean. The 2100 to the left is missing a piece of the internal charger where batteries are inserted--likely some soldering or spot welding is needed there (TBD). And, of course, all the rechargeable battery packs need re-doing. Those will be my first efforts, so I hope y'all stay tuned and watch as I bring these Newton devices back to working life!
Very nice to meet all of you!
Idomeneus
