tinkering with compacts all winter?

KennyPowers

Active Tinkerer
Jun 27, 2022
248
295
63
Looks like I will be :) 
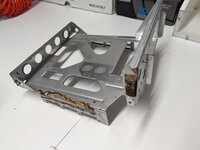
I recently discovered that another forum member lives less than an hour away and needed to downsize their collection. After making a carefully prepared and well researched presentation to my wife, she gave me the green light to go pick these up:

PXL_20231208_165552395.jpg

There's a 128k, 512k, Plus with keyboard, Color Classic, and two SE/30s. The Color Classic and Plus both work as they are, and the 128k and 512k likely need simple repairs. Both SE/30s were bombed (known before purchase and one only suffered relatively minor damage), but I think one logic board can be salvaged, and the screens, PSUs, and analog boards all work. Hope to get one working machine out of the SE/30s, and if I can't, I've got two donors for a reloaded :)

Anyways, I'll post updates and questions here as I go through and restore these machines one at a time. Of course I've already opened them all and ensured that batteries have been removed and there's nothing requiring immediate attention. This is my first time owning any of these specific compacts, but I've brought several other retros back to life at this point (with ya'lls help), so I can stumble my way through it with the occasional dumb question.

I should soon be receiving a big box-o-caps from console5, along with some parts from mouser and jameco, so I'll be ready to get started after the holidays. First up will be the 128k:

PXL_20231216_193930278.jpg
 
Last edited:

KennyPowers

Active Tinkerer
Jun 27, 2022
248
295
63
Starting working on the 128k today. The logic board looks like it previously had a RAM upgrade installed (pin sockets installed at E3 above the CPU, something previously soldered to a few CPU pins, and sockets installed for the DRAM chips themselves). Also...no RAM :):

PXL_20231210_032950857.jpg

So, I installed sixteen 4164 DRAM chips and replaced the three axial capacitors:

PXL_20231230_205523209.jpg

Then I turned my attention to the analog board. I recapped it, replaced the optocoupler, and reflowed some visibly cracked solder joints. After all that, it was still flupping when powered on. After consulting the DMS, I narrowed it down to the voltage pot at R56 being set to high. I turned it all the way down, powered on the system, and started slowly increasing the voltage. At around 4 volts on the 5v rail, I got the sound I'd been waiting for...a crisp "bong" and the machine came to life:

PXL_20231230_183210055.jpg

The CRT is crisp and bright with no burn-in :)

Then I thoroughly cleaned and lubed the floppy drive that was completely seized with dried grease. @JDW , I watched your video on recapping these 400k drives where you describe the differences between the various models. This 128k has "A ROMs" which you and others say are incompatible with internal drives labeled "OA-D34V-22". The drive in this machine is labeled "OA-D34V-22", but has all of the discerning characteristics of the unlabeled mechanism you pulled from an external drive in your video. The manufacture date is April 1985. The drive works with the "A ROMs".

Going to clean the grime off the exterior of the case, make a boot disk for it, and then take this minty-fresh mouse on its maiden voyage :)

PXL_20231026_135350111.jpg
 
  • Like
Reactions: eric and phunguss

JDW

Administrator
Staff member
Founder
Sep 2, 2021
1,296
1,147
113
53
Japan
youtube.com
@JDW , I watched your video on recapping these 400k drives where you describe the differences between the various models. This 128k has "A ROMs" which you and others say are incompatible with internal drives labeled "OA-D34V-22". The drive in this machine is labeled "OA-D34V-22", but has all of the discerning characteristics of the unlabeled mechanism you pulled from an external drive in your video. The manufacture date is April 1985. The drive works with the "A ROMs".
Not sure what to say. Either the label doesn't match the controller PCB, or this new info turns what once was fact into fiction.
 

KennyPowers

Active Tinkerer
Jun 27, 2022
248
295
63
Not sure what to say. Either the label doesn't match the controller PCB, or this new info turns what once was fact into fiction.

Ya I'm not sure either. Here are some photos of the drive (all caps and components are original AFAIK):

PXL_20231231_183343977.jpg PXL_20231231_183402827.jpg PXL_20231231_183534267.jpg PXL_20231231_183708861.jpg

I also found this thread where two other people claim to have OA-D34V-22 drives that work with -A ROMs, but only when adequately shielded:


KennyPowers

Active Tinkerer
Jun 27, 2022
248
295
63
128k had a bath and is done for now...moving on to the 512k. I didn't have a cord for the keyboard, so I temporarily soldered one end of a phone cord to the keyboard PCB while I acquire the correct cable 🙃

PXL_20240103_204532741.jpg
 
  • Like
Reactions: Patrick

KennyPowers

Active Tinkerer
Jun 27, 2022
248
295
63
So the 512K put up a bit of a fight...specifically the analog board. It was flupping upon arrival. Closer inspection showed signs of a previous RIFA explosion and previous attempts at repairs. The legs of the RIFA replacement weren't clipped, and one of them wasn't soldered to anything because the pad had been torn off. There were also gobs of flux in various places and some solder mask corrosion.

PXL_20240106_183736359.jpg PXL_20240106_183746018.jpg PXL_20240106_183756628.jpg PXL_20240107_004117204.jpg PXL_20240107_004559216.jpg PXL_20240107_004612364.jpg PXL_20240107_004619345.jpg PXL_20240109_200104553.jpg

I recapped the entire board, including the filter cap after bypassing the missing solder pad, and replaced the optoisolator. I then cleaned off the wads of flux, verified continuity on any corroded looking traces, and reflowed any iffy looking joints. After plugging it all back in and hopefully flipping the switch...*flup* *flup* *flup*

After consulting the DMS, I went kind of shotgun on it and replaced/upgraded CR1, CR5, CR15, CR18, CR19, CR20, and CR21 using @JDW 's excellent document. That got me a bong and good 5v, 12v, and -12v voltages, but no high voltage and the CRT stayed dark. I stared at the horizontal circuit schematic for awhile and worked backwards from the flyback. Q3 and Q6 both tested good, so I replaced the 74LS38 IC at U2 and...

PXL_20240124_214748778.jpg

I then went to clean and lube the floppy drive and was surprised to find an 800k MP-F51W-03 with the red-lettered label and yellow-striped cable. I looked at the logic board and yup, Plus ROMs. This machine had been upgraded to a 512KE. Neat I suppose. I lubed and recapped the floppy drive and replaced the eject gear that always strips. The three axial caps on the logic board were replaced as well. Then I removed some rust from the chassis, gave the plastic a bath, and reassembled...working great now :)

PXL_20240125_025106272.jpg


I think I might skip over the Plus and work on the Color Classic next...I've got something on the shelf I'm itching to try in it :) Then I'll circle back to the Plus and finish up tackling the battery bombed SE/30's.
 

Attachments

  • PXL_20240113_224045074.jpg
    PXL_20240113_224045074.jpg
    876.8 KB · Views: 43

KennyPowers

Active Tinkerer
Jun 27, 2022
248
295
63
The Color Classic worked, but had the rusty dusties and some fishy smelling caps on the analog board. The logic board was in good shape and was recapped by the previous owner, so I didn't get/have to do that. So, I completely recapped the analog board, including this guy that wasn't part of the console5 kit, but had a nice big split and only tested at half its rated capacitance:

PXL_20240131_205912854.jpg

I then thoroughly cleaned everything, and disassembled, lubed, and recapped the incredibly dusty, seized-up floppy drive. I used Evaporust to remove the rust from the metal shielding with pretty good results:

PXL_20240202_181311959.jpg PXL_20240207_185615523.jpg PXL_20240207_185620941.jpg

I replaced the fan with a Noctua (thanks for that video @JDW ) and the battery with a Meowtoast. Your video on adjusting the Color Classic's CRT was also immensely helpful @JDW . It seems like whatever I need to do, you've already done an incredibly detailed video on the topic :). I replaced the hard drive with a BlueSCSI v2 wifi with the SD card routed outside the case with an extender. I also added a 256K VRAM SIMM to max the video memory and enable 16bit color. After reassembly, here she is cruising the interwebs like it's 1995:

PXL_20240210_061027861.NIGHT.jpg

But...she's a little pokey in System 7.5.5. Since I didn't have to put a NIC in the PDS slot thanks to the BlueSCSI's incredible DaynaPORT emulation, I think what she needs is moar Mhz and moar RAM 😁

PXL_20240210_061220167.jpg PXL_20240210_061241790.jpg

I've had this accelerator sitting here for awhile, and I don't know if it works, but what better time to find out? I've only seen one other picture of a ThunderCachePro with the SIMM slots on the back like that, and the layout on that one was slightly different too. I also wonder if the hand-labeling on several of the components means anything. None of my other MicroMac accelerators have anything like that.
 
  • Love
Reactions: JDW

JDW

Administrator
Staff member
Founder
Sep 2, 2021
1,296
1,147
113
53
Japan
youtube.com
It seems like whatever I need to do, you've already done an incredibly detailed video on the topic :).
I'm thrilled to see you have your Color Classic working nicely, Kenny. @Kay K.M.Mods kindly got me started with the Color Classic a few years ago, and I've been hooked since. The machine is almost like a drug. Before owning one, I didn't think much of the industrial design, but then after having one for a while, it really grew on me. I've found it to be more expandable than the SE/30. And because upgrades and hacks are so much fun to do, that's what ultimately led me to do 13 videos on the Color Classic alone:


I still have more planned. Sadly, I accidentally killed my Mystic motherboard about a week ago. The worse part is I really don't know how. I was merely taking resistance measurements in the vicinity of the XC88916DW55 clock driver chip, and then when I put it all back together and powered on, there was no boot chime, no boot, and a black screen. I've narrowed it down to what I think is the root problem — the XC88916DW55 chip, but I won't know until I've swapped that chip out. @trag very graciously has mailed me some replacement chips to try, so fingers crossed that will solve the problem. I hope it will because my CC has become my main vintage Mac machine these days. I do nearly everything on it. Even has an Apple IIe Card installed!
 

KennyPowers

Active Tinkerer
Jun 27, 2022
248
295
63
Sadly, I accidentally killed my Mystic motherboard about a week ago...
Ya, I read about that in your other thread. I'm sure you'll get it going again :)

I'm really liking the Color Classic so far. When I got it, I briefly thought about swapping in a 575 board, but they're expensive anymore, and I want to give this accelerator something to do besides gather dust. That's why I opted not to do a 640x480 mod when I had the analog board apart. If I could have done the relatively simple VGA mod, I probably would have, but as you know, that's incompatible with the original logic board.
 

JDW

Administrator
Staff member
Founder
Sep 2, 2021
1,296
1,147
113
53
Japan
youtube.com
Ya, I read about that in your other thread. I'm sure you'll get it going again :)

I'm really liking the Color Classic so far. When I got it, I briefly thought about swapping in a 575 board, but they're expensive anymore, and I want to give this accelerator something to do besides gather dust. That's why I opted not to do a 640x480 mod when I had the analog board apart. If I could have done the relatively simple VGA mod, I probably would have, but as you know, that's incompatible with the original logic board.
I thought long and hard about which VGA mod to do. Because I lacked experience, I deferred to the experts and did the standard VGA mod, which is a low voltage mod that puts less strain on the Analog Board. But if I were to do it again, I probably would have just swapped out the spinning hard drive for an SD card drive solution (reducing strain on the Analog Board), then done the high voltage VGA mod. Why? Because only the high voltage VGA mod allows use of the original Color Classic motherboard AND other motherboards like the LC520. Makes little sense to use the original CC when you have an LC575 board like I do (did?), simply because the stock CC board is so slow. But the LC520 is fast enough to be usable. I still have the stock CC board and an LCD520 board, but I can't use either because of my low voltage VGA mod. Sometimes you may want to test something on a different board, so having the means to display video is important for such testing.

I can't do anything on my CC until I get my Mystic board fixed, but I may do a future video about how to convert the standard VGA mod to the high voltage mod. So long as you reduce some of the strain on the analog board AND beef up some of the really hot components, the analog board should be able to handle it long-term. I actually bought some replacement components to beef up the Analog board months ago, but I've not had time to do a video about that. Most are just physically larger components that dissipate heat better.
 

KennyPowers

Active Tinkerer
Jun 27, 2022
248
295
63
It took some tinkering and running in circles, but I finally got this 50Mhz ThunderCachePro working in the Color Classic:

PXL_20240217_213835226.jpg PXL_20240217_213848864.jpg PXL_20240217_213940647.jpg PXL_20240217_214331466.jpg PXL_20240219_215921505.jpg

When it didn't work on the first try, I moved it to my LCII so I would have at least some access to the card while it was running. Just like in the CC, it was chiming and then hanging on the initial white screen. My scope showed that the CPU was getting a 50Mhz clock signal but was being held in reset. I had noticed just the faintest hint of cap leakage under a couple of the 22uf caps (no apparent damage though), and the 50Mhz oscillator was kind of rusty, but I wanted to try it before replacing anything. So, I replaced the caps with some tantalum polymers and I happened to have a new 50Mhz oscillator, so I replaced the rusty one. Same behavior...still hanging on the white start-up screen. I triple-checked my work and scratched my head. Then I came across this blurb in the MicroMac FAQ. The CC has 10MB of RAM installed, but my LCII's SIMM slots were empty. Maybe it hadn't worked in the CC because it needed recapping, and it would be working in the LCII now if it had 10MB of RAM installed? So, I shoved two 4MB SIMMs into the LCII and fired it up...death chimes. This is where the rabbit hole started :rolleyes:. I pulled the accelerator and the LCII still death chimed with the SIMMs installed. That LCII board had extensive cap damage that required multiple bodge wires and replaced ICs to repair. Maybe I missed a broken trace since I'd never installed SIMMs in the board? Using @max1zzz's sanded board scans, I eventually found a broken RAS line going to the first SIMM slot. After repairing it, the LCII booted right up showing 10MB of RAM. I then put the accelerator back in and it booted, showing 26MB of RAM! I still had my scope attached to the CPU's reset pin, and you can see it go out of reset when the MicroMac extension loads. I moved the accelerator back to the CC and it fired right up.

System 7.5.5 was already noticeably faster, but the first thing I did was run Speedometer to see just how much faster. Shortly after the FPU tests began, it crashed with an "error type 11" (the CPU tests flew though):

PXL_20240219_220652457.jpg

The stability problems are definitely specific to the FPU. Non-FPU tests never fail and the FPU tests always fail. I tried all of the usual things (clearing PRAM, reseating/replacing RAM, etc) with no effect. Then I broke the seal on my unopened 50Mhz DiiMO 030 and borrowed the FPU from it, swapping it onto the ThunderCachePro. For the first time, all of the Speedometer FPU tests completed successfully...a couple times. It eventually did crash in the same way, but the 68882 from the DiiMO seemed "more stable" than the FPU that came on the ThunderCachePro. I could run the FPU tests more often than not whereas they never completed with the original FPU.

My first thought was to just try running the ThunderCachePro without an FPU, but it wouldn't boot after removing it. Then I read that the 68882 could run at a different frequency than the CPU. That got me looking at a number of resistor footprints on the PCB next to the FPU:

PXL_20240219_191212716.jpg

The left sides of R334 and R337 connect to the FPU's clock pin. From the factory, R337 is closed with a zero ohm resistor as shown. I removed the resistor and beeped out all of those solder pads. I came up with something like this (excuse my beginner-level diagramming skills):

thundercache_pro_FPU_clk_jumpers.png


So, R334 and R337 seem to select between sending the logic board's clock signal (16Mhz in this case) and the accelerator's 50Mhz clock to the FPU. Maybe someone can tell me what R333, R335, R336, and R338 are for? To my untrained eye, they look like they could pull the FPU's clock signal up or down depending on which one you populate? Or maybe they're involved if you want to run without an FPU? Anyways, I moved the zero ohm resistor to R334 and confirmed with my scope that the FPU was now underclocked to 16Mhz. I was hopeful...but, insta-"error type 11" with either FPU the instant I started the FPU tests :( So, I put everything back the way it came...FPU clock at 50Mhz with original FPU installed. It runs very well unless I do something FPU intensive:

PXL_20240219_223107823.jpg

Given that the DiiMO's FPU seemed to work better, I'm inclined to think that the 68882 on the ThunderCachePro is just having trouble running at 50Mhz? Anyone know where I can get a PGA 68882 that's likely to work at 50Mhz and wasn't re-marked in China?
 
Last edited:

KennyPowers

Active Tinkerer
Jun 27, 2022
248
295
63
I replaced the FPU on the ThunderCachePro and stability improved, but still had the occasional nondeterministic crash. Then I found the reason that MicroMac puts those fancy gold stickers on all of their CPUs and FPUs:

PXL_20240220_203519222.jpg

That's a 33Mhz part on a 50Mhz accelerator 😬. I swapped in a real 50Mhz 030...and...rock solid stable! It's no Mystic, but a noticeable bump over a stock Color Classic, and the extra RAM is nice:

PXL_20240301_220300469.jpg PXL_20240301_220556538.jpg

On to the Plus!
 

KennyPowers

Active Tinkerer
Jun 27, 2022
248
295
63
PXL_20240306_012329853.jpg

The Plus was kind of like the Color Classic in that it already worked somewhat, but was just really rusty and dirty. It would boot to the ? and off a FloppyEMU, but not from SCSI or a real floppy. It got the full recap treatment...analog board, logic board, and floppy. The floppy was also completely disassembled, cleaned, lubed, eject gear replaced, etc. Similar to the 512k, I found more signs of previous repairs on the analog board, and more sticky mountains of flux:

PXL_20240307_203432527.jpg PXL_20240306_204042446.jpg PXL_20240306_195717535.jpg

All of that has been cleaned up and reflowed. I'm really liking Evaporust for any rusty metal pieces:

PXL_20240306_014711622.jpg PXL_20240308_225100028.jpg

This guy is the yellowest of the bunch, but some of that is just dirt. Here's the untouched front panel compared the rear bucket fresh out of the bath, and then after wiping down the front to match:

PXL_20240312_172312440.jpg PXL_20240312_173142845.jpg

There might be a peroxide bath in his future, but not today. Anyways, I scavenged a diode to add termination power to the SCSI port, plugged in a BlueSCSI, and he's running great (TD calendar cameo) :)

PXL_20240312_173612751.jpg
PXL_20240312_173759521.jpg
 
  • Like
Reactions: RetroTheory

KennyPowers

Active Tinkerer
Jun 27, 2022
248
295
63
Ok, I've been saving these two bombed SE/30's for last. I don't know if that was saving the best for last, or just putting off the most potential frustration :) Hopefully I can get at least one working machine out of them. Anyways, here they are:

PXL_20240314_204843178.jpg PXL_20240314_205224462.jpg PXL_20240314_205658672.jpg PXL_20240314_203123126.jpg PXL_20240314_203149121.jpg PXL_20240314_204333852.jpg PXL_20240314_204349227.jpg

The analog boards, PSUs, and CRTs all work, and the battery damage didn't reach either floppy drive. The damage to the socketed CPU board doesn't look like it was as bad as the other board, though the previous owner also did a good job of cleaning that board up. I think the socketed CPU board is the one I'm going to focus on first. A cursory visual inspection shows some discolored component legs near the battery, but the traces in that area all look pretty decent. I'll of course still verify continuity on anything going through questionable areas. Fingers crossed that the battery goo having been cleaned up isn't hiding the extent of the damage. Y1 and UD1 are both missing, but I have replacements. The caps were removed by the previous owner, so they'll all obviously be replaced. C9 is missing a solder pad.

Also, @tcole was nice enough to send me a pristine metal chassis, shielding, cables, and speaker for the cost of shipping 😮

PXL_20240314_204735071.jpg

That will save me a lot of rust repair work. And, if I can't get either of these boards working, then I can always build a reloaded board :)
 
  • Like
Reactions: ouroboros

KennyPowers

Active Tinkerer
Jun 27, 2022
248
295
63
Working on the mildly-bombed SE/30 board...I removed the battery holder and buzzed out a bunch of stuff before attempting to boot, and found and fixed a few broken traces. I then installed new caps, replaced the missing Y1 and UD1, installed RAM and ROM and fired it up. I got a chime followed by immediate death chimes and this simasimac pattern:

PXL_20240410_195317695.jpg

I've since buzzed out damn near the entire board, including the entire address and data bus matrices here, and haven't found any more broken traces. I've also ensured that all of the SIMMs are making good contact in the slots. The scope shows what look like sensible inputs and outputs on all of the RAM and video muxes. I've basically been going over the board for days and haven't found a fault. I've tried multiple sets of known-good SIMMs.

If it helps narrow down the cause, it will chime and then simasimac with just the ROM installed and no RAM. If I add known-good RAM, it chimes and then immediately death-chimes in addition to the simasimac. So, it knows I installed RAM...it just doesn't like it :) I've buzzed out every pin on the SIMM slots and haven't found an issue. Scoping the SIMM slots without RAM installed shows activity on all address and data lines as well as good RAS and CAS signals.
 
Last edited:

JDW

Administrator
Staff member
Founder
Sep 2, 2021
1,296
1,147
113
53
Japan
youtube.com
Wow! Those boards look fabulous!

Did you have PCBWay or JLCPCB (whoever made them) solder all those tiny components on the bottom side of the boards so you won't need to deal with that?