Hi everyone! I am posting my experience replacing the optical drive in my G4 cube. I hope that it helps someone with their own upgrade project. I have gathered some information from different sources and listed them here. Disclaimer: this is based on my own experience. Keep in mind that that there may be a variance on parts design or quality of the procured parts that may result in some additional adjustments or troubleshooting.
Before I started, I had done research on which drives were suitable to use for a replacement for the G4 Cube. I came across this Ifixit post by Mayer that listed compatible drives:
https://www.ifixit.com/Answers/View...+other+Mac+devices+can+be+used+in+replacement
The compatible drive models listed in the post were:
Matshita UJ-815-B
Matshita UJ-85J
Matshita UJ-845-C, UJ-845-CA (RPC1)
Matshita UJ-875-B (RPC1)
Sony Optiarc AD-5630A (RPC1)
Sony Optiarc AD-7630A-01 (aka Sony AW-G630A; RPC1)
Sony Optiarc AD-7633A (= 7630A + Labelflash; RPC1)
Sony Optiarc AD-7640A (= QSI TDW-081 = AD-7670A ?)
For my choice of the drive, I settled on the Panasonic UJ-85J-C. I got this model from eBay for about $16
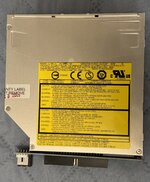
Next thing to look up is the drive connectivity and how to install the drive. In the G4 cube, it uses an IDE interface board to connect the drive to the IDE cable. Unfortunately, the stock board that comes with G4 cube is layout is different and will not work with the replacement drive. There is a video on YouTube that was very informative. Though it was in German, the author demonstrated an adapter for the IDE connectivity and he also offered a STL file to 3D print a mounting bracket for the replacement drive.
Here is the link to the YouTube video:
iMac G3 nach 20 Jahren - Interner DVD-Brenner, Bildschirmschärfe und -helligkeit
In the video, the IDE adapter he used had a connection for a laptop IDE connector and made a custom cable IDE cable. I wanted to make things a little simpler so I looked for one that offered a standard desktop IDE connector. In my search, I settled on this one that I acquired from Ebay.

Here is Ebay link for the part. Looks like the seller still has some in stock at the time I post this:
https://www.ebay.com/itm/271340030850?mkcid=16&mkevt=1&mkrid=711-127632-2357-0&ssspo=aXSId9wMThC&sssrc=4429486&ssuid=vo_lR5CuTba&var=&widget_ver=artemis&media=COPYthe
Update: This part is no longer available for purchase (at least from this vendor). A compatible part can be purchased from this EBay seller:
https://www.ebay.com/itm/142288879608
Thanks to @TJ812 for testing and letting us know!
The reason I chose this one because this was the only one that I found that had the option to select the Master/Slave drive option via jumpers (more on this later). I also took a chance on this version since it was not a “slim” model and it stuck out more one one side. When I 3D printed the bracket, I soon discovered it would not fit with my choice the drive IDE adapter.
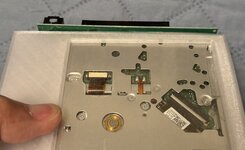
I went and remixed the model so it would fit the IDE adapter I chose.
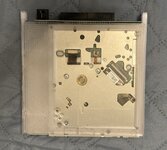
In case anyone is interested in it, here are the links to the remixed model. Theoretically, this model should work fine with the slim versions of the IDE interface board too. If printing one, I recommend printing using either PETG or ABS. It can get quite warm inside the G4 Cube and PLA has a lower melting temperature and it is possible that it warp inside the computer.
Printables:
https://www.printables.com/model/1029745-imac-g3-powerbook-g4-g4-cube-slimline-optical-driv
Thingiverse:
https://www.thingiverse.com/thing:6788450
I realized that I did not have the right screws to affix the drive to the bracket. Since I do a lot of retro repair projects, I ordered a set off off Amazon. Here is the set I ordered:
https://a.co/d/4rGCYTI
Here is the the drive screwed into bracket. I believe I used 2mm diameter laptop screws. The ones on the side were 4mm in length and 6mm in length to mount the IDE board.
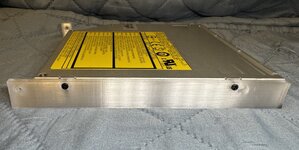
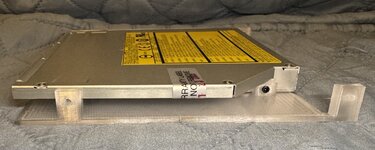
As a precaution, I before I mounted the IDE board, I used kapton tape on the side with the leads to prevent any chance of an accidental short.

I needed some spacers for the IDE board, so I improvised them by cutting some PFTE tubing that I had from my parts bin for my 3D printer. This is how it looked when it was screwed in:

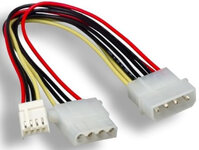
The IDE board uses a power connector that is similar to the old school floppy drives so I had to get an adapter cable to connect it to power. I ordered this part from Amazon. It was a little long, but it still worked. Here is the link to the one I used:
https://a.co/d/9OXdwLJ
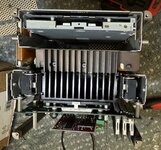
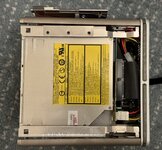
Next came to install The drive into into the computer. I have to give kudos to the original designer of the drive bracket. It fit like a glove in the G4 Cube. Here It is installed in my G4 Cube. I used the original screws from the old drive to install. I was concerned about width of the IDE board sticking out or not fitting because it was not slim, but I was relieved that it was not an issue and fit very well. Next to the power cable of the drive, is the the IDE jumper. It is the green jumper. I currently have it set to "slave".
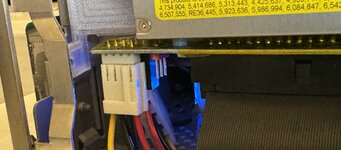
So, next came the power on test. I power up the G4 Cube, and IT DID NOT BOOT!!! It just hung on a grey screen. So I thought a little bit. I recall that the G4 Cube IDE cable had one cables wires was cut (if you look at the cable, it looks like there is a "hole" in the cable.) I recall in the past that in some IDE setups, the drives are set to "cable select" in which the cable determines if the drive is slave or master. Remember the jumper in the beginning of this post? To test this, I went back to the jumper, and removed it.
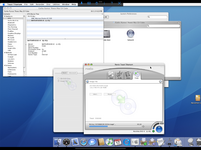
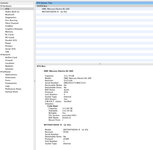
I powered up the computer and….. IT BOOTED RIGHT UP! I went into the system profiler, this what it showed up correctly with the correct ID number.
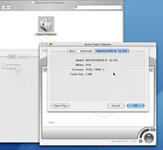
When inserting disks a couple of times, the drive needed a little effort for the discs to insert and take. But after a couple of times, it works now perfectly. It may be that the mechanism sat for a little bit. The drive now inserts and ejects the disks perfectly. I have been able to play DVD's and burn discs with out issue. I was able boot off of a CDROM/DVDROM without issue. Here is a screen shot of Toast recognizing the drive:
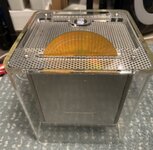
Here is my G4 Cube with it's replacement optical drive:
I hope this walkthrough helps someone with their own project in replacing the G4 Cube optical drive!
Before I started, I had done research on which drives were suitable to use for a replacement for the G4 Cube. I came across this Ifixit post by Mayer that listed compatible drives:
https://www.ifixit.com/Answers/View...+other+Mac+devices+can+be+used+in+replacement
The compatible drive models listed in the post were:
Matshita UJ-815-B
Matshita UJ-85J
Matshita UJ-845-C, UJ-845-CA (RPC1)
Matshita UJ-875-B (RPC1)
Sony Optiarc AD-5630A (RPC1)
Sony Optiarc AD-7630A-01 (aka Sony AW-G630A; RPC1)
Sony Optiarc AD-7633A (= 7630A + Labelflash; RPC1)
Sony Optiarc AD-7640A (= QSI TDW-081 = AD-7670A ?)
For my choice of the drive, I settled on the Panasonic UJ-85J-C. I got this model from eBay for about $16

Next thing to look up is the drive connectivity and how to install the drive. In the G4 cube, it uses an IDE interface board to connect the drive to the IDE cable. Unfortunately, the stock board that comes with G4 cube is layout is different and will not work with the replacement drive. There is a video on YouTube that was very informative. Though it was in German, the author demonstrated an adapter for the IDE connectivity and he also offered a STL file to 3D print a mounting bracket for the replacement drive.
Here is the link to the YouTube video:
iMac G3 nach 20 Jahren - Interner DVD-Brenner, Bildschirmschärfe und -helligkeit
In the video, the IDE adapter he used had a connection for a laptop IDE connector and made a custom cable IDE cable. I wanted to make things a little simpler so I looked for one that offered a standard desktop IDE connector. In my search, I settled on this one that I acquired from Ebay.

Update: This part is no longer available for purchase (at least from this vendor). A compatible part can be purchased from this EBay seller:
https://www.ebay.com/itm/142288879608
Thanks to @TJ812 for testing and letting us know!
The reason I chose this one because this was the only one that I found that had the option to select the Master/Slave drive option via jumpers (more on this later). I also took a chance on this version since it was not a “slim” model and it stuck out more one one side. When I 3D printed the bracket, I soon discovered it would not fit with my choice the drive IDE adapter.

I went and remixed the model so it would fit the IDE adapter I chose.

In case anyone is interested in it, here are the links to the remixed model. Theoretically, this model should work fine with the slim versions of the IDE interface board too. If printing one, I recommend printing using either PETG or ABS. It can get quite warm inside the G4 Cube and PLA has a lower melting temperature and it is possible that it warp inside the computer.
Printables:
https://www.printables.com/model/1029745-imac-g3-powerbook-g4-g4-cube-slimline-optical-driv
Thingiverse:
https://www.thingiverse.com/thing:6788450
I realized that I did not have the right screws to affix the drive to the bracket. Since I do a lot of retro repair projects, I ordered a set off off Amazon. Here is the set I ordered:
https://a.co/d/4rGCYTI
Here is the the drive screwed into bracket. I believe I used 2mm diameter laptop screws. The ones on the side were 4mm in length and 6mm in length to mount the IDE board.


As a precaution, I before I mounted the IDE board, I used kapton tape on the side with the leads to prevent any chance of an accidental short.

I needed some spacers for the IDE board, so I improvised them by cutting some PFTE tubing that I had from my parts bin for my 3D printer. This is how it looked when it was screwed in:

The IDE board uses a power connector that is similar to the old school floppy drives so I had to get an adapter cable to connect it to power. I ordered this part from Amazon. It was a little long, but it still worked. Here is the link to the one I used:
https://a.co/d/9OXdwLJ

Next came to install The drive into into the computer. I have to give kudos to the original designer of the drive bracket. It fit like a glove in the G4 Cube. Here It is installed in my G4 Cube. I used the original screws from the old drive to install. I was concerned about width of the IDE board sticking out or not fitting because it was not slim, but I was relieved that it was not an issue and fit very well. Next to the power cable of the drive, is the the IDE jumper. It is the green jumper. I currently have it set to "slave".


So, next came the power on test. I power up the G4 Cube, and IT DID NOT BOOT!!! It just hung on a grey screen. So I thought a little bit. I recall that the G4 Cube IDE cable had one cables wires was cut (if you look at the cable, it looks like there is a "hole" in the cable.) I recall in the past that in some IDE setups, the drives are set to "cable select" in which the cable determines if the drive is slave or master. Remember the jumper in the beginning of this post? To test this, I went back to the jumper, and removed it.

I powered up the computer and….. IT BOOTED RIGHT UP! I went into the system profiler, this what it showed up correctly with the correct ID number.

When inserting disks a couple of times, the drive needed a little effort for the discs to insert and take. But after a couple of times, it works now perfectly. It may be that the mechanism sat for a little bit. The drive now inserts and ejects the disks perfectly. I have been able to play DVD's and burn discs with out issue. I was able boot off of a CDROM/DVDROM without issue. Here is a screen shot of Toast recognizing the drive:

Here is my G4 Cube with it's replacement optical drive:

I hope this walkthrough helps someone with their own project in replacing the G4 Cube optical drive!
Attachments
Last edited:

