The Macintosh Minus - pi-powered mini Mac Plus clone with 5" CRT display

vorg

Tinkerer
Sep 3, 2022
69
61
18
As long as the case is PETG, it should not warp. You should be fine. :)

You have the RPi board on the side and then the CRT's analog board on the bottom. I am wondering whether the analog board can be placed on the side and the RPi board on the bottom as an option or does the analog board have to be under the CRT due to the CRT design and connection?

I'll probably end up putting the pi underneath the analog board; where the batteries would be in the original case.
The problem with the board on the side is that it just doesn't work with the shape of the Mac Plus. I would have to change the bezel size and compromise how much it looks like a Mac.

I'd also have to lengthen some of the wires going to the tube, but that's not impossible. It's mainly the board simply being too big.
 

vorg

Tinkerer
Sep 3, 2022
69
61
18
The "frame" isn't working exactly due to the crappy implosion band on this set. I don't even think it technically counts as an implosion band, it's worse protection than my DIY band on the first board based on its location. It warps when putting pressure on the glass, so my original measurements where slightly off. That said, it warps enough to work on the "upper frame" (my STL name for it) that connects the CRT to the front "fascia". So that works and the effort of measuring, modelling, remeasuring, remodelling, and repeating paid off big time.

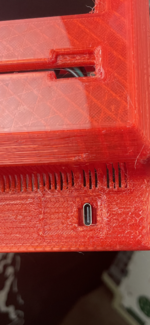
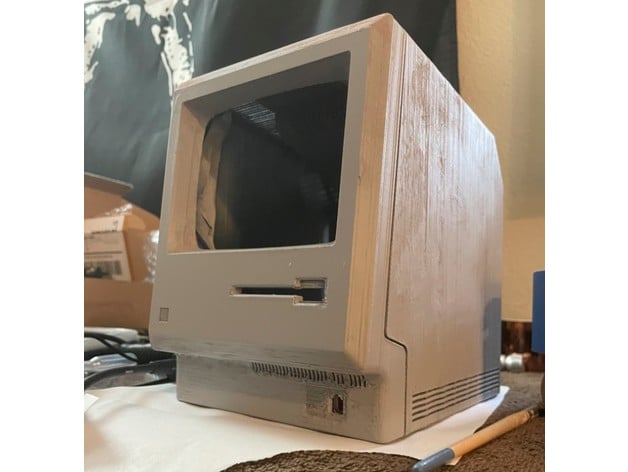
I think there is too much variance in the TVs for me to make one that fits every type, so I think I will just add the final details to the rear case and publish the rear and fascia to share with you all. The rear case just needs the air vents in the handle (I'm being that OCD, why not?— it's a file you press print on), a fake security hole, and the power input / on/off "plate" needs to be made a separate piece like I did with the lower port section. The fascia has m2 holes to interface with a frame that fits whatever TV. People are going to have to model their own internal stuff to fit their components, but at least this one will have the difficult CRT curves the smaller 3.5 inch LCD screen "Mini Macs" lack, so it's something new.

I could probably scale down the fascia a percent or two in order to hide the blackness of the edges of the glass. You might be able to see what I mean in the video, but that also may be an unavoidable effect of the thickness of the glass. If you can find a 5 inch monitor, it will probably have a darker phosphor, which would look even more like a real Mac.

I'm still waiting for a replacement Pi Zero, although I can test with my pi 4, but it's basically full speed ahead again. The pressure from the implosion band (which also is the main thing holding the glass tube) pulled the m3 screws out, so I've ordered some threaded inserts. I either didn't reduce the diameter of the printed holes enough or I simply screwed them in or out too many times, but threaded inserts should be nicer for repairing the thing anyway. And I can epoxy them, so the plastic fails first.


EDIT: since I'm using this as a bit of a journal for this build; I also need to add the "grooves" to the "handle" on the rear case. Are they grooves, or are they a type of knurling? IDK, I studied advertising.
 
  • Like
Reactions: -SE40-

retr01

Senior Tinkerer
Jun 6, 2022
2,469
1
778
113
Utah, USA
retr01.com
In the 3D program, you can make it a frame only for the CRT, adjust the curves and test it. Trial and error until you get it right. I think CRT curves vary from one CRT to another.

The curve radius is the measurement needed.
 

retr01

Senior Tinkerer
Jun 6, 2022
2,469
1
778
113
Utah, USA
retr01.com
If you have a curved segment less than 180 degrees, you need geometry to verify the radius because you can’t directly measure the diameter.
  1. Begin by selecting an appropriate straight edge to use as the chord—the longer the chord, the more accurate the measurement.
  2. Push the straight edge up to the inside of the curve.
  3. At the middle of the straight edge, measure the distance from the straight edge to the curve—called “rise on chord” or “mid-ordinate.
  4. Use the geometry: Radius = ½ (rise² + ¼ chord²) / rise.
Source: https://www.cmrp.com/blog/faq/how-to-check-the-radius-on-a-curved-segment.html

This calculator may help you to get the values to input into the 3D program:

 
Last edited:
  • Like
Reactions: vorg and -SE40-

vorg

Tinkerer
Sep 3, 2022
69
61
18
If you have a curved segment less than 180 degrees, you need geometry to verify the radius because you can’t directly measure the diameter.
  1. Begin by selecting an appropriate straight edge to use as the chord—the longer the chord, the more accurate the measurement.
  2. Push the straight edge up to the inside of the curve.
  3. At the middle of the straight edge, measure the distance from the straight edge to the curve—called “rise on chord” or “mid-ordinate.
  4. Use the geometry: Radius = ½ (rise² + ¼ chord²) / rise.
Source: https://www.cmrp.com/blog/faq/how-to-check-the-radius-on-a-curved-segment.html

This calculator may help you to get the values to input into the 3D program:


With no truly flat edges, my measurements were never perfect, so it took a bit of trial and error.

To finally get it, I took a photo of the front, straightened it in photoshop, then traced the curves in CAD.

From there, all that’s needed is the front curve. I measured a delta of 5-6mm from the center to where I wanted the edge of the bezel to be and sized a sphere accordingly; then cut to the outline shape.

I don’t know this for a fact, but my intuition tells me the front of CRTs will always be spherical if curved since that would mean the least distortion from the point source of the electrons.
 
  • Like
Reactions: retr01

retr01

Senior Tinkerer
Jun 6, 2022
2,469
1
778
113
Utah, USA
retr01.com
With no truly flat edges, my measurements were never perfect, so it took a bit of trial and error.

To finally get it, I took a photo of the front, straightened it in photoshop, then traced the curves in CAD.

From there, all that’s needed is the front curve. I measured a delta of 5-6mm from the center to where I wanted the edge of the bezel to be and sized a sphere accordingly; then cut to the outline shape.

Nice. Did that fit the CRT perfectly?

I don’t know this for a fact, but my intuition tells me the front of CRTs will always be spherical if curved since that would mean the least distortion from the point source of the electrons.

Yeah. I think the radius varies a bit, though. Not all CRT screens are created equally.
 

vorg

Tinkerer
Sep 3, 2022
69
61
18
Nice. Did that fit the CRT perfectly?


Yeah. I think the radius varies a bit, though. Not all CRT screens are created equally.

Definitely an improvement over V1:

1663964302662.png


Found a good mini keyboard as well. I considered a 40% mechanical, but I don't want to go down that rabbit hole yet. I can just paint this little guy. Hopefully once I gut the mouse, I can make it smaller; I'll have to see how big it really is when it arrives.

1663977371738.png


I tested the screen a bit more on my Pi 4, but the AV out wasn't working very well, so I used an HDMI converter and it was bugging out.

The USB 2.0 USB-C port fits (I can’t solder it to C standard lol)

1663977918544.png


It's 4 pins, so I'm actually temped to use the phone style jack and just rewire a USB keyboard. V3 will be inevitable!
 

Attachments

  • 42268639-B133-4C2C-9B2B-7FF5033F2F49.png
    42268639-B133-4C2C-9B2B-7FF5033F2F49.png
    1.2 MB · Views: 58
Last edited:
  • Like
Reactions: retr01

retr01

Senior Tinkerer
Jun 6, 2022
2,469
1
778
113
Utah, USA
retr01.com
Yay, @vorg! The CRT fits in the front bezel very well with the curve. :)

Grab a mini USB-C mouse. Print a tiny mouse housing. Hopefully, you can cram the internal parts from the mini mouse into the tiny printed red mouse with the wheel. When you print the mouse, be sure the click panels can depress to hit the toggles inside with the internal mouse guts. :sneaky:
 

vorg

Tinkerer
Sep 3, 2022
69
61
18
Get this keyboard or similar. Paint the housing RED! Then make the USB cable curly. :) The mouse should plug in the back like the Mac Plus.


View attachment 8889
That's the exact one I ordered!

Even before the Mac Minus project, I was curious about that thing. And converting it to a curly usb-c cable?— we're literally on the same wavelength.

I bought a mini wireless mouse. Might swap it for a wired one after I figure out the case, but wireless was actually cheaper.
 
  • Like
Reactions: retr01

vorg

Tinkerer
Sep 3, 2022
69
61
18

Published the STLs of the case.

So sad that there isn't more standardization in the TVs.

After I finish this and repairing my Mac Plus, I really want to work on making a rear projection screen for my raster scanning laser projector that has the CRT curve.

I'm thinking I can use a clear resin to make the basic shape and structure; with a laminate layer of a white plastic film; like a plastic shopping bag kind of material.

I can't find any documentation on the "field of throw" of the projector, so I need to do some testing. My biggest fear is that it will need at least one mirror to be large enough for the screen to depth ratio of a real CRT. I'm not totally opposed to this though; as it could mean a little sliding door in the back of the case that lets you bypass the mirror and use it like a traditional projector.

The problem is a lot of dead space:

1664152759160.png
 
  • Like
Reactions: -SE40-

vorg

Tinkerer
Sep 3, 2022
69
61
18
So, @vorg, I can see the projector's pink beams reflecting on the rear mirror to the front screen. What is that green beam going out the back?
I figure I could put a door that you open and it moves the mirror; so you can project it onto the wall instead. I'd hate to use a projector and then limit it to 5 inches permanently :p
 
  • Wow
Reactions: retr01

retr01

Senior Tinkerer
Jun 6, 2022
2,469
1
778
113
Utah, USA
retr01.com
I figure I could put a door that you open and it moves the mirror; so you can project it onto the wall instead. I'd hate to use a projector and then limit it to 5 inches permanently :p

Yeah. A Macintosh projector! Is it bright? What will the lumens rating be? Can the screen size go REALLLLYYYYYY BIIIIGGG to about 100 inches on the wall?

Imagine a small projector crammed in a SE/30, and you arrive at a party. You pull the SE/30 from the Mac bag with gawkers looking. Then you turn it on and flip the projector switch. Suddenly, the gawker's mouths drop further wider and down as they see the late 1980's Macintosh pop up on the wall. :D(y)📽️