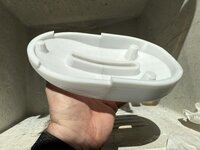
There was a time when I was seeking a decent price on an eMac base. I have come to realize that I should have just been satisfied finding a base at any price. You can get them attached to an eMac if you are lucky, or you can sometimes find folks selling just the base for about $100. Not long ago, I picked up a ”pair” of eMac swivel bases, only to realize when they arrived that I did not look at the pictures in enough detail. They were literally just the base part—one half of a swivel base. I chalked it up to my own fault for not paying enough attention.
Recently, I realized that it would not be that hard to 3D print the upper half—the part that attaches to the eMac itself. I have a complete base to work from as a reference, so I took some measurements and went to work in CAD.
Now, I am not giong to make any claims for being a great modeler. In fact, I do most of my work in TinkerCAD which I have always thought of as the Nickelodeon of CAD software. But I like it because I can usually get what I need out of addititve and subtracive primitives and I can do the work solely on my iPad. Given the fact that I used TinkerCAD, I think my eMac base part came out pretty nice!
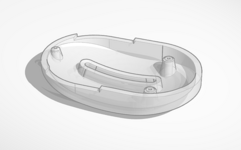
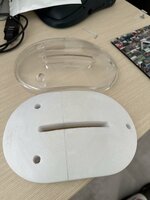
Now that I had a model, I printed a few sub-sections to ensure the holes lined up and made some final adjustments. I finally printed the whole part, but I had to cut it in half since I own a Prusa Mini+ which has a 180mmx3 build volume. While the original is molded in crystal clear acrylic, I used white PETG.
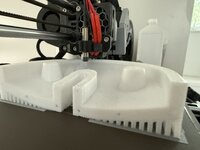
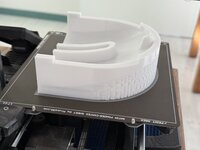
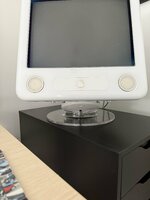
To my astonishment, it actually works! The white plastic is fine against the existing white shell of the eMac, and with a set of original hardware, it functions just a well as the real thing (the bottom section IS the real thing, of course).
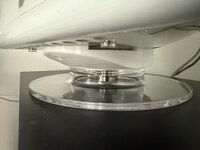
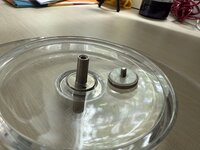
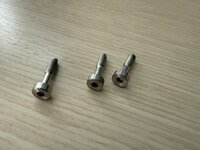
The final step is to get some appropriate hardware. I have the base screw which presents a short threaded rod from the bottom. I will need to check the thread size but I am thinking I can secure it to the base with a washer and a F-F coupling standoff. You saddle my 3D part over this standoff, then, add a short screw with a washer to cap it off. For attaching to the eMac I will need three (3) screws—maybe they are M4? They are about 17mm and probably don’t need the unthreaded section. I think I can get away with 20mm hex bolts. Here is the apple hardware that I will try to duplicate from the hardware store:
Does anyone have any specific details on what works here? Or maybe you want to swap an upper section and hardware for a lower section? In any case, once I figure out the screws etc. I will post my model if anyone cares.
Recently, I realized that it would not be that hard to 3D print the upper half—the part that attaches to the eMac itself. I have a complete base to work from as a reference, so I took some measurements and went to work in CAD.
Now, I am not giong to make any claims for being a great modeler. In fact, I do most of my work in TinkerCAD which I have always thought of as the Nickelodeon of CAD software. But I like it because I can usually get what I need out of addititve and subtracive primitives and I can do the work solely on my iPad. Given the fact that I used TinkerCAD, I think my eMac base part came out pretty nice!

Now that I had a model, I printed a few sub-sections to ensure the holes lined up and made some final adjustments. I finally printed the whole part, but I had to cut it in half since I own a Prusa Mini+ which has a 180mmx3 build volume. While the original is molded in crystal clear acrylic, I used white PETG.


To my astonishment, it actually works! The white plastic is fine against the existing white shell of the eMac, and with a set of original hardware, it functions just a well as the real thing (the bottom section IS the real thing, of course).


The final step is to get some appropriate hardware. I have the base screw which presents a short threaded rod from the bottom. I will need to check the thread size but I am thinking I can secure it to the base with a washer and a F-F coupling standoff. You saddle my 3D part over this standoff, then, add a short screw with a washer to cap it off. For attaching to the eMac I will need three (3) screws—maybe they are M4? They are about 17mm and probably don’t need the unthreaded section. I think I can get away with 20mm hex bolts. Here is the apple hardware that I will try to duplicate from the hardware store:


Does anyone have any specific details on what works here? Or maybe you want to swap an upper section and hardware for a lower section? In any case, once I figure out the screws etc. I will post my model if anyone cares.
Last edited:

