If you own a Hakko portable desoldering gun you may already know the single status LED doesn't show power status. Instead, it shows if the iron is up to target temperature and will turn off when the temperature is reached. This is an unusual choice, as it invites two immediately obvious safety concerns — touching the iron when it's hot or accidentally leaving the iron powered on.
These two issues are reasonably easy to avoid... don't grab the iron (duh) and ALWAYS make sure it's unplugged when you walk away. That second one is dangerous for me because I'm sometimes scatter brained — I need a power status light.
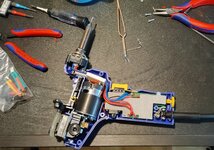
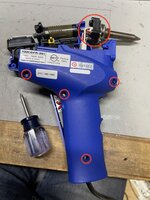
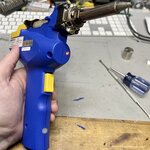
Thankfully, the gun is pretty easy to disassemble. You will find a total of 8 phillips screws at the locations marked in red below.
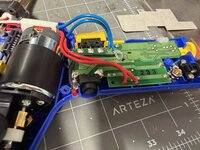
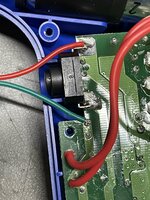
Inside the handle is a small control board with a thin piece of cardboard-like material which is held in by a single small phillips screw. With the cardboard removed you will see the two points where I've attached my thinner red and green wires, such as the photo below. You can see this is at the rear power switch.
On the other side of these new wires I attached a 120v neon bulb which I had laying around (inside an old switch). You can also buy 120v LEDs, though this example LED's long housing may get in the way.
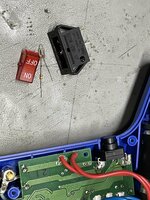
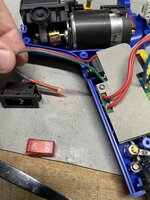
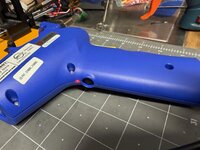
Now I must do that which cannot be (easily) undone... drill a small hole and then route the wires into their new home. Thankfully, there's a bit of extra room at the front but if you don't like this location then you will find a few alternatives — just use your imagination.
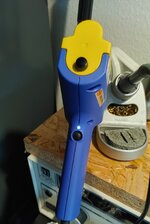
The image above is a great example of the problem. This Hakko FR-301 is powered on but the provided white lens near the bottom isn't lit up.
Happy hacking!
These two issues are reasonably easy to avoid... don't grab the iron (duh) and ALWAYS make sure it's unplugged when you walk away. That second one is dangerous for me because I'm sometimes scatter brained — I need a power status light.
Thankfully, the gun is pretty easy to disassemble. You will find a total of 8 phillips screws at the locations marked in red below.

Inside the handle is a small control board with a thin piece of cardboard-like material which is held in by a single small phillips screw. With the cardboard removed you will see the two points where I've attached my thinner red and green wires, such as the photo below. You can see this is at the rear power switch.

On the other side of these new wires I attached a 120v neon bulb which I had laying around (inside an old switch). You can also buy 120v LEDs, though this example LED's long housing may get in the way.


Now I must do that which cannot be (easily) undone... drill a small hole and then route the wires into their new home. Thankfully, there's a bit of extra room at the front but if you don't like this location then you will find a few alternatives — just use your imagination.

The image above is a great example of the problem. This Hakko FR-301 is powered on but the provided white lens near the bottom isn't lit up.
Happy hacking!

