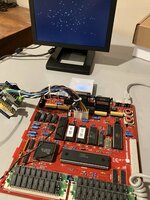
I am the same person that runs CayMac Vintage and here is a great problem solving story for you all related to posts in this thread.
I recently received the SE Reloaded board for
@fred1212 discusses in this thread and privately shared that info with JDW for feedback. A few other people who had tried to repair the board were unsuccessful. JDW suggested that sharing details of my repair would likely help other people avoid the same mistakes in their own SE Reloaded builds. I have written all the details below. The links to my live videos related to this board are here:
Enjoy the videos and music that you love, upload original content and share it all with friends, family and the world on YouTube.

www.youtube.com
Enjoy the videos and music that you love, upload original content and share it all with friends, family and the world on YouTube.

www.youtube.com
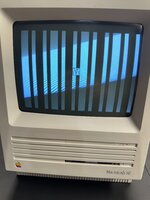
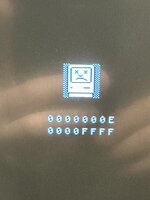
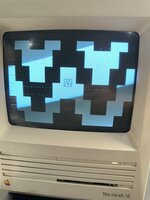
PROBLEMS: When I received the board, it would not boot. I eventually got it to boot, but then there was a strange 10 second delay with a checkerboard screen before the bong finally sounded. Then it would boot, but it crashed when doing Snooper 2.0 CPU & Accelerator tests.
REPAIRS:
1. BBU had a broken pin/leg so it was not usable. Good thing I had a few donor boards.
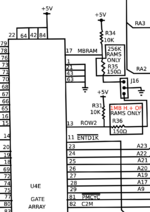
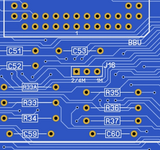
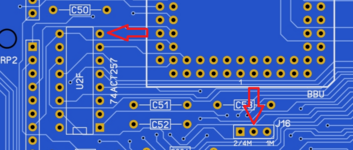
2. The builder mistakenly soldered in R32 & R33, but they are not needed. I removed them.
3. A broken trace was found in SIMM sockets 1 & 3. I repaired it.
4. A broken trace was found for the BR signal on the CPU to its resistor. I repaired it.
5. Two resistors were the wrong values. I swapped them out for the correct values.
6. The 0.1uF caps that were used all over the board were not the recommended axial type, so I changed them all to axial. While doing this, I found that many of the blue caps used for the 0.1uF were cracked and the legs loose on the cap itself. I guess this happens when you take legs and stretch them that much to use as axials. I also replaced the others caps that were not axial of different values that I took from a donor board.
7. I tried a complete new set of chips on the board and still had the same problems. This tells me that what I have done so far and the chips is not the solution. (Well, one chip was found to have issues, which I will mention below).
8. I contacted JDW to ask for his thoughts. I also watched JDW’s SE Reloaded videos again and checked over all resistors over the entire board. Used JDW’s BOM as a guide along with the videos so I could check all the values. All were good.
9. Checked both sides of the motherboard again for broken traces and none were found. The board was booting at this point, thanks to the fixes mentioned above, but the board still had a 10-second delayed chime and checkerboard screen before it would finally boot. That problem could no longer be blamed on bad traces or any of the chips I swapped out.
10. I ultrasonic cleaned the board again and let it dry out.
11. When booting into System 6.0.8, I ran snooper but it kept getting locked-up (crashing) at the end of the CPU tests.
12. I changed main crystal but made no change.
13. I decided to check the normal axial 33uF 16v capacitors on the board and HERE IS WHERE THINGS GET STRANGE!!!!
14. The markings on the caps was VERY hard to read on these Vishay caps, but I noticed ALL of them were 33uF 16v; yet C36 should be a 1uF 50v cap.
15. I tested all the Vishay caps with a meter and noticed that they were ALL saying 50uF or more and not 33uF.
16. I removed all the Vishay caps and re-tested with a proper tester, and all were showing to be 50uF or more.
17. The 1uF 50v was not there! Instead, I found it was a 33uF marked capacitor, but it also was measuring to be 50uF. This cap is on pin 7 of the sound chip, and this is how the sound chip monitors the power rail to be sure it is ready to start up and take reset high. With this cap being WAY over value, it was taking longer to charge it up to reach the level needed for the chip to say “OK I am here and can wake up now.”
18. I had a few cap kits from Console5 for the SE, so I cleaned up the holes and put in the new caps.
19. Plugged all in and turned it on and VIOLA, instant chime!!!! No more delay. So this solved the main issue but still had another issue.
20. With it booting now, I booted into 6.0.8 and ran Snooper 2.0, but the CPU test at accelerator test would still lock-up the machine.
21. It was then discovered that the CPU used was not 68000 but instead a 68010.
22. Also found out that System 6.0.8 and Snooper 2.0 do not play nice together, so I booted into 7.5.5 and ran Snooper but the CPU test continued failing.
23. Replaced the CPU with a real 68000 because TechStep was also saying there was a CPU mismatch, and I did not notice it until one of my viewers on my live stream said the lock-ups related to using a 68010 CPU.
24. With a 68000 CPU and 7.5.5 and Snooper running, the CPU test and all other tests passed! Seems the 68010 is damaged or has some issues with it.
25. TechStep passes all tests and the machine is ROCK SOLID with all items working well. REPAIR FINISHED!
@fred1212 also send me a damaged SE30 to be reloaded and a Iici to repair but the issues where internal on this board so a reloaded transfer was also done for the Iici. Both of these boards work 100% now so this is a 3 for 3 for the owner. One thing, make sure your Iici PSU is in great condition when using nubus cards.
