I was using my SE/30 earlier to run some benchmarks with and without a Daystar '030 40mhz accelerator. The machine has a MacSD and recently recapped logic board. The battery has been removed. It was working fine for a couple hours. I was running Speedometer 4.02 to compare some benchmarks, and when I tried to quit the program I received an error, something about a bus error that I didn't think to write down, with a restart button. When I clicked restart, nothing happened. I powered the machine off and back on, and there was no chime, just a grey screen. I removed the accelerator to see if somehow that was causing a problem, and there was no change. I've attached a photo of the screen.
Does anyone have any suggestions where to start trouble-shooting? I was thinking of re-seating the RAM and ROM, but ran out of time. I know this simasimac screen usually rears its head when there is battery or capacitor leakage, it seems strange that it happened to a working machine in the middle of use. Thanks for any suggestions!
Does anyone have any suggestions where to start trouble-shooting? I was thinking of re-seating the RAM and ROM, but ran out of time. I know this simasimac screen usually rears its head when there is battery or capacitor leakage, it seems strange that it happened to a working machine in the middle of use. Thanks for any suggestions!


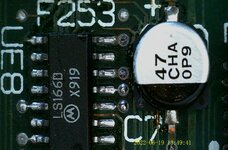
 I inspected the C7 area in the photograph you provided. Here is what I noticed:
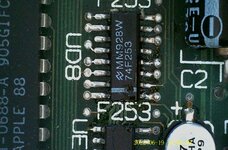
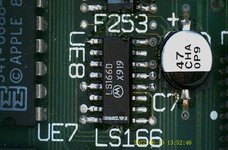
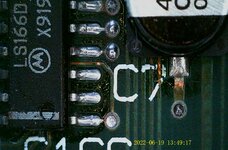
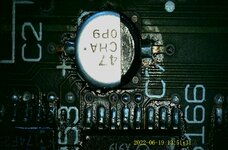
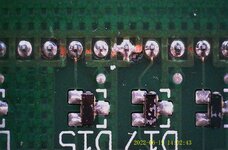

 I am concerned about the circuitry path. You are using 99% IPA to clean that area, right?