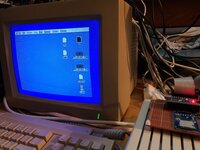
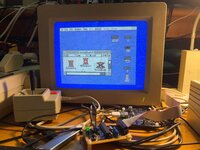
I recently saw a post about the SmartPortSD project. I found some of the instructions had a few gaps, which I hope to document here for the next people who'd like to build one!

What is it?:
SmartPortSD is a cheap, simple device based on the Arduino Nano v3.0 that allows you to store up to four 32mb SmartPort drives on an SD card by just dropping files onto a FAT32 SD card (sound familiar?)
It can be used with a SmartPort compatible Apple II systems - //c, //e, IIgs.
//c ROM note:
The original //c ROM does not support SmartPort - you can see if yours is the original by running `PRINT PEEK(64447)` - if it is 255 you will need to upgrade the ROM.
History:
Robert Justice created the initial SmartPortCFA (compact flash) code base that this project is based on.
Andrea Ottaviani did the initial port of the CFA to the SD version.
Katherine Stark fork made some updates and fixes and allowed it to work with total reply.
Chris Tersteeg's fork is the one I'm using which adds LED and button support to the board he provides.
My fork, added some niceties described in this post.
The PCB I'm using is also from Chris and can be found here: https://github.com/djtersteegc/smartportsd-nano-shield
Assembly:
Chris provides a great interactive BOM and a components choices page. It's quite easy to assemble, all through hole.
I ordered my PCB's from JLCPCB and all the parts from Amazon. As with all chips the Nano's are a bit overpriced these days.
Cable:
This is the hardest part - there is no good source of DB-19 and just one connector can cost almost than twice the cost of the entire board! I have not made mine yet but my plan (currently) is to hack up a DB-25 connector.
If you are lucky enough to have a Duo Disk DB-25 to DB-19 cable this board does have a connector for that.
Flashing:
As with any older Arduino project the flashing is trial and error till you get the right combination.
Download code and setup
Download the code from Chris's repo https://gitlab.com/tersteeg/smartportsd
Extract and rename the folder to SmartportSD-1.15 - Arduino needs the main ino file to be in a folder with the same name as the file.
Arduino Settings:
Windows 10 Desktop with
Arduino IDE 1.8.x
My Nano's were clones with a clone bootloader so you need the now defunct manufactures driver. I was only able to find it on a random Google Drive but I scanned it and it seems legit and worked. I've also attached it to this post.
Board Settings:
Board: Aruduino Nano
Processor: Atmega328p (depending on the board you get you may need to select Atmega328p (Old))
Programmer: AVRISP mkII
Add SDFat Libarary
Tools -> Include Library -> Library Manager
Install SDFat - latest 1.x version
Flash:
Plug in the Nano to a USB Port - check device manager on windows if it is unknown install the drivers provided. Note the COM port.
Select the COM port in Arduino IDE
Click Upload
You're now ready to load an SD card up and try it out!
Usage:
Grab a premade PO file from Total Reply, apple-2.com, or build your own with CiderPress to make/load/convert your own images.
Copy them to the SD card with names `PART1.PO`...`PART4.PO` - You can have one or up to four images at a time.
See the README for the complete usage instructions.
I'll update once I get the cable made. I plan to build two for myself, one for my IIgs and another for my //c (after I upgrade the ROM)
Attachments
Last edited:


