3D Printing & MacEffects Appreciation

caver01

Tinkerer
Oct 30, 2021
197
141
43
@JDW This is your chance to dive into TinkerCAD!

Or maybe Onshape? Honestly, I find I can knock together almost anything with TinkerCAD on my iPad fairly quickly. This is one of those little projects that’s really hard for someone else to design without being able to take a bunch of measurements to account for your requirements. For instance, I can kinda understand what you are after, but I don’t have the same set of gizmos in mine, so I would surely get it wrong. You don’t want someone else’s arbitrary design decisions as it will result in a bad fit or a lot of back and forth.
 
  • Like
Reactions: JDW

caver01

Tinkerer
Oct 30, 2021
197
141
43
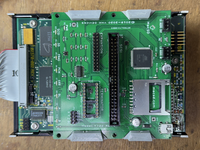
Also, that ”Macintosh SE/30” is unique. . . A stock SE/30 name badge is next to the apple logo, not over on the right like the SE. Still, I love it!
1759363272448-png.23446
 
  • Like
Reactions: Dave928 and JDW

JDW

Administrator
Staff member
Founder
Sep 2, 2021
2,326
1,884
113
54
Japan
youtube.com
@JDW This is your chance to dive into TinkerCAD!
While I certainly appreciate the positive encouragement, I'll stick to filming YouTube videos in top quality 4K. That's what I do best. :) I simply enjoy filming the 3D prints made at JLC from the STL-creating geniuses out there. Working on a new video now, in fact. Some of the 3D prints will be shown in that video (sans a 3D printed drive bracket, of course).
 

caver01

Tinkerer
Oct 30, 2021
197
141
43
Ok, I did a little sleuthing- - - @jmacz stalking on another forum. I am guessing this is another great restoration in a long line them. This is probably a MO drive, am I right?
 

jmacz

Tinkerer
Mar 21, 2025
75
82
18
Ok, I did a little sleuthing- - - @jmacz stalking on another forum. I am guessing this is another great restoration in a long line them. This is probably a MO drive, am I right?

That is correct! :)

The case is a stock case that was beat up and badly yellowed. I fixed the cracks and then painted it matte white.

The little bevel on the floppy drive slot is due to me replacing the floppy drive with a magneto optical drive. The MO disks fit through the normal slot but because they have to be pushed in further, I needed some more room for the tip of my finger hence I cut that little bevel. I carved it in the stock case with an x-acto knife and filed it smooth.

For the logo I could have replaced it with a stock looking one but I was eyeballing @JDW ‘s white Apple IIc and it inspired me to create the logo with the look of the Apple IIc. This is also why I moved it to the right side like the Mac SE instead of a standard SE/30. Just for fun.

It also has ZigZagJoe’s LCD conversion (hence the color), has a TT modern PSU, a ZuluSCSI, a 47MHz Booster, Bolle’s riser card for Ethernet, I think that’s the extent of the mods.
 

jmacz

Tinkerer
Mar 21, 2025
75
82
18
But so far, no one else has replied, most likely because such an STL file doesn't exist. As such, whoever creates the aforementioned bracket would get a lot of digital "street cred" for it. (That's my not-so-subtle way of begging. :giggle: :censored:) Besides, wouldn't such a drive bracket look really cool with the jmacz logo embedded in it?

LOL
 
  • Haha
Reactions: JDW

jmacz

Tinkerer
Mar 21, 2025
75
82
18
Ok, I will bite.

I will try to draft something up this weekend. You basically want stock mount points for a 3.5” drive, stock location for an LED, mounts to a stock metal floppy drive enclosure, but without the long tail that covers the main board cable, correct?

I have a bracket that mates to the floppy enclosure, it’s what I am using for my magneto optical drive. But it’s specific to the MO drive. The only thing tricky is to make it easy to print because there are four points that mate with the floppy enclosure (two teeth and two screw holes) and these make it harder to 3D print as they stick out on the bottom. Anyhow, will try some concepts this weekend.
 
  • Love
Reactions: JDW

JDW

Administrator
Staff member
Founder
Sep 2, 2021
2,326
1,884
113
54
Japan
youtube.com
Ok, I will bite.
Bless you, friend! Please let me know your Paypal donation account so I and others can say a little thank you for your kindness to the community!

You basically want stock mount points for a 3.5” drive, stock location for an LED, mounts to a stock metal floppy drive enclosure, but without the long tail that covers the main board cable, correct?
Correct.

I have a bracket that mates to the floppy enclosure, it’s what I am using for my magneto optical drive. But it’s specific to the MO drive.
Here's a short video (no sound) that shows one of my rusty HDD drive bracket, showing it from all sides...


At the 6 second mark you can see the two short tabs on the bottom front that slide into the slots on the floppy drive metal bracket (on top), and those would probably need to be quite strong to avoid breaking, but my intent would be to print it in PA12-CF carbon fiber reinforced Nylon. However, MacEffects Clear Case Owners would likely want it in 8001 Transparent Resin, which would make a more accurate print, although less durable than PA12-CF.

Anyway, the larger tabs on the back of the bracket which aim downward are used to put screws through and into the floppy drive metal bracket, securing the HDD bracket well. Any part of the HDD bracket that extends outward, beyond those 2 downward-facing tabs, toward the back of the Mac should be cut off, as it is that part which covers the main wiring harness connector.
 
Last edited:
  • Like
Reactions: jmacz

jmacz

Tinkerer
Mar 21, 2025
75
82
18
@JDW can your MacSD mount from the bottom or does it have to mount from the sides?

I'm asking because the walls on the stock drive bracket are 1mm thick and my guess is they will be very brittle if 3D printed (filament or resin). I can make the walls thicker as it looks like there's certainly enough clearance inside the SE and SE/30 cases to have the walls be 2mm or 3mm thick for strength, but that might ruin the aesthetic as it will no longer be flush with the floppy drive casing (as the added thickness needs to be on the outside, not inside).

If the MacSD (and BlueSCSI) can mount using screws on the bottom, then the new bracket can go without walls which would also be cheaper. I can inset the screw holes underneath so that the bracket mounts flush against the floppy drive casing. But then this new bracket will not look like the original and not sure how important that is to you (ie. since it's wall-less).

If we go without the walls, the new bracket will essentially be a plate. It will have holes on the floor (matching the bottom screw positions on hard disks) that are inset so the new bracket mounts flush against the floppy drive casing. You have to mount the SD drive first and then you can mount the new bracket to the floppy drive casing. It will have a small tower at the front for the LED. And the overall length of the plate will be shorter than the stock drive bracket so that you don't have the issue you've been bothered by.

Let me know.
 

JDW

Administrator
Staff member
Founder
Sep 2, 2021
2,326
1,884
113
54
Japan
youtube.com
Thank you very much for the follow-up. I’m outside the home for a few hours right now, but when I return home I will search for another MacSD to see if I can give you an answer. Most of my Mac’s are at the office, and I may have taken the spare MacSD units there too.

I will tag @YMK in case he can reply faster than me.
 

jmacz

Tinkerer
Mar 21, 2025
75
82
18
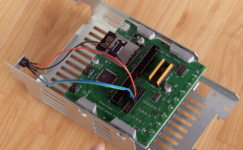
Like this would be the wall-less version. The LED post is removable to make it easier to print, and it takes a standard 5mm LED. But doesn't look anything like the stock bracket. Even though the plate is thick, it should be fine for any of the SD card emulators. Spinning disk should work also unless you had less than 5mm clearance to any add-on cards that are sitting over the floppy drive.

bracket-sample.png
 

JDW

Administrator
Staff member
Founder
Sep 2, 2021
2,326
1,884
113
54
Japan
youtube.com
Wow! You did some incredible work there, @jmacz ! Outstanding! 👏

After arriving back home, I searched and searched, but not a single MacSD to be found! However, I searched the MacSD website and found this page with STL files.


I downloaded the "Standard Mounting Bracket V1" (see attached STL), which is included with all MacSD products, and I see it has holes on the bottom like this...

1759646186735.png


Those 4 holes can be seen from the top of MacSD here too...

1759646253395.png


QUESTION: Do the 4 holes in the STL I've attached below perfectly match the location of your two STL file's holes?


In terms of "printing difficulty," that doesn't matter so much because I don't have a 3D printer and I must instead use JLC3DP. My intention is to have JLC print them in PA12-CF, which is a strong carbon fiber reinforced nylon that is stiff, strong and durable. I've made a fan mount out of that filament and it's quite nice.

If the 4 holes on bottom match, and if I could obtain both of your two STL files, what I probably will do is print each STL in PA12-CF and also 8001 Transparent Resin. That way I can find out how well they will each work and look, then publish my results so MacEffects Clear Case owners can see for themselves.

I think your plate is really neat. But it's also wonderful you made a near copy of the stock bracket (without the extended back side) because some folks may even want to mount a regular spinner drive in it, and so long as your added thickness is OUTWARD (i.e., not inward toward the mounted drive), then your bracket should still fit any 3.5" drive too. Meaning, one could in theory mount any SD card drive or regular hard drive that has a 3.5" for factor mount.
 

Attachments

  • macsd_bracket_std_v1.stl.zip
    23.9 KB · Views: 19
  • Like
Reactions: YMK

jmacz

Tinkerer
Mar 21, 2025
75
82
18
QUESTION: Do the 4 holes in the STL I've attached below perfectly match the location of your two STL file's holes?

I positioned the 4 holes to match the layout of the bottom holes of a standard spinning disk, which is what I believe most of the manufacturers are using for the 3D printed brackets for the SCSI emulators. But if you have a spinning disk lying around, try lining up that MacSD bracket with the holes on the bottom of the spinning disk. If they match, we should be good?

For the walled one, I was able to increase thickness on the inside. Reason being I took a look at the original drive bracket I have and it actually has part of the metal bowed in (where the side screw holes are) and that gives me an additional 2mm on each side so I was able to go from 1mm to 3mm on the outer walls without increasing the external dimensions.

I cannot resin print these brackets as they are too big for my resin printer. But I did print the wall-less one and it works. Gonna see if I can print out the walled one today for test fitting purposes. Need to get creative with supports to print it.
 
  • Like
Reactions: JDW and YMK

YMK

Active Tinkerer
Nov 8, 2021
405
337
63
The wall-less one prints fine with filament 3D printing and the test fit onto a floppy cage was good.

Great work! Were you able to print the rectangular vents without supports? I'd try printing it on its side.

@JDW can your MacSD mount from the bottom or does it have to mount from the sides?

All MacSDs have bottom and side holes. The bottom hole pattern matches a spinning HDD, so it should be possible to mount a HDD without the side rails.
 
  • Love
Reactions: JDW

jmacz

Tinkerer
Mar 21, 2025
75
82
18
The wall less one printed fine flat on the build plate (upside down). It printed without supports but the rear mounting holes were slightly deformed because of it. Should be fine with supports.

The walled one is on my printer right now and about half way through. I printed it pointing up with the rear on the build plate. I am printing that one with supports, it won’t work without supports.

Both prints are using filament printing. I cannot do either in resin as my resin vat is not large enough for these models to be printed in one piece.
 
  • Like
Reactions: YMK and JDW

JDW

Administrator
Staff member
Founder
Sep 2, 2021
2,326
1,884
113
54
Japan
youtube.com
Confirmed my MacSD mounting holes (and PCB holes) align with a standard 3.5" HDD:

tempImagewmLbOy.png
(HDD in photo above is a Conner removed from my Macintosh Portable)

And here's how MacSD looks in the stock metal bracket...

1759738870361.png
 
  • Like
Reactions: YMK

jmacz

Tinkerer
Mar 21, 2025
75
82
18
The test print of the walled bracket was a success. I test fitted it with a spinning disk and the holes lined up properly. I also test fit it onto a standard metal floppy drive case and that also fit well. And then lastly I test fitted it inside a Macintosh SE case and that also worked fine.

IMG_2658.JPG


Picture above is with the supports removed. I got a little spider webbing in the vents (it was too hot today in my garage) but that should clean up fine. Standard 5mm LED fit into the slot well.

I have uploaded both models to Printables. Link to my Printables page is in my signature but I have included direct links below to the models.

Minimal Wall-Less:


Walled:


DISCLAIMER: as in all models for 3D printing, there could be some margin of error given tolerances specific to each printer or printing process. The size/holes/etc were set to what I measured via my calipers of a stock bracket. The LED hole however I gave it a slight 0.2mm extra (5.2mm diameter) to allow a comfortable fit. It fit nice off my printer but note that if it's a little loose for you, I would recommend some hot glue.
 
Last edited:

JDW

Administrator
Staff member
Founder
Sep 2, 2021
2,326
1,884
113
54
Japan
youtube.com
@jmacz
Your work is absolutely magnificent!

No errors at all when uploading your STL files to JLC3DP.

Below are some JLC prices based on different filament types. Clear is obvious for the MacEffects case, but please let me know your thoughts and "recommendations" for a good filament type among those that JLC offers below.

100% Transparent in 8001 Resin (perfect for a MacEffects Clear Case)​


1759713192518.png


1759713221967.png


1759713263632.png


PA12-CF Carbon Fiber Reinforced Nylon​


Silly JLC enforces overly strict minimum size requirements for smaller parts, as you can see below, so "led-post.stl" would need to be printed in something like 8001 Transparent Resin to avoid that. And because it's small, lightweight, and only holds an LED, there's really no reason it needs to be printed in FDM anyway.

1759713388666.png


1759713635401.png


1759713710341.png


However, ChatGPT is recommending JLC's
PA11-HP Nylon over PA12-CF (above) when mounting a spinner drive, especially when looking 20+ years into the future (long term durability).

1759717767352.png


But ChatGPT admits that PA12-HP (not "CF" but "HP) is slightly more rigid than PA11-HP and therefore may be a better choice when printing the HDD bracket (with walls) for use with a normal 3.5" Hard Disk which has substantial weight to it. But PA12-HP(MJF) would be a bit less rigid than PA12-CP(FDM), which means PA-12HP(MJF) would offer greater damping of drive vibrations. And MJF printing would be more precise than FDM too. So I think I may print the walled drive bracket in PA12-HP(MJF) because of that.


Regular PLA (cheaper)


1759713826494.png


1759713890298.png


⚠️ But PLA might be compromised by heat if a regular spinner HDD is mounted on it. Consider...

1759716089263.png


It's therefore probably best to stick with PLA only when printing the Plate.
 
Last edited: