I am still in utter admiration for the energy and dedication you all are putting into fabricating a firmware that helps us getting a decent picture quality out of a seemingly unsatisfying consumer product!  Thank you for that!
I am currently into the hardware side of things and I tried an el cheapo solution for enhancing the resolution my Kodak is getting with its stock lens.
Simply Because I didn't want to spend another 100 € for a new lens, I thought about just bringing the camera closer to the film strip.
After testing a possible distance, where I still was able to focus, I settled on 12 mm.
Which is about the distance between the screw holes of the camera mount. That way I only had to drill four new holes into the metal plate of the scanning assembly.
View attachment 26612
After remounting the camera and connecting it again (don't worry, the ribbon cable should be long enough), I could measure how much of the plastic case below it I had to cut away. (about 5 - 6 mm)
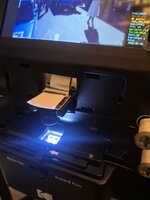
Finally I had to modify the camera cover to fit over the lower hanging lens.
The result now looks like this (cover removed for illustration purposes

)
View attachment 26614
View attachment 26615
With everything in place I refocused the stock lens to match the new height.
Compared to the effort I had put in, I am pretty satisfied with the final result, considering both resolution and overall look of the modification.
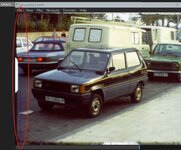
Here is a comparison of before and after - both in 1600x1200 (max zoomed out)
The effective resolution is now at 1152x864, with a small margin around the actual frame.
View attachment 26618
Here is another screenshot of the capture. Given that the actual movie isn't the highest quality, I am still happy with how it turned out
View attachment 26619
Here's my final summary:
Advantages
- sourcing of a fitting new Lens unnecessary (cost saving)
- absolutely no 3D-Printer or other special tools needed,
just a sharp 4 mm drill, a screwdriver and a knive or a dremel
- minimal modification of the case (time saving)
- all can be done within about one hour
- no change of the overall aesthetic of your scanner
- mostly easily revertable, if in the future you should decide to go the full mile (with a new lens)
Disadvantages
- not the full possible resolution of 1600x1200 (only 1152x864)
- the lid of the transport mechanism doesn't open completely
(but still high enough to easily thread the movie through)
I would love to hear your comments about my approach. For me personally it's totally sufficient, especially in connection with the modded firmware and considering the cost and time savings.