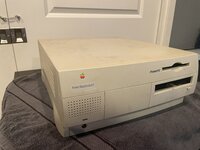
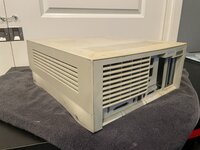
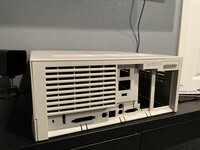
Using the Sun to restore a yellow Macintosh ☀️

I've been looking at the safest ways to restore the color of the Mac without over bleaching the unit or leaving streak marks.

Because the inside of a Mac 128/512/Plus is coated with a conductive covering, I want to avoid submerging the case into hydrogen peroxide as it induces rusting/oxidation. I also want to avoid buying gallons of hydrogen peroxide.

The two methods I tried were using just the sun (nothing else!), and a hydrogen peroxide cream. Here is a before/after gif of a platinum bezel using the two methods.

CreamBrite.gif
SunBrite.gif


Results Overview

As seen in the gif, the center bezel is before and after. The bezel was place between a lightly yellowed bezel on the left and a heavily yellowed bezel on the right just for reference.
The sun was able to restore the color to a modestly yellowed state.
The creme did a much better job and was able to restore the color to a very slight yellowed state.
I was impressed with both results in general

Please note that the cream did NOT over brighten the bezel! From the area under the logo, you can see that the original color was even brighter.
Screen Shot 2022-01-22 at 4.42.03 PM.png


On the negative side for the cream. the bezel color was not evenly restored. On the left side of the inward CRT bend, there's extra yellowing, as highlighted in the image below. This is partially because it's difficult to get all the edges an equal amount of sun in such a short amount of time.
Screen Shot 2022-01-22 at 4.48.28 PM.png

Sun Method

Bezel was placed outside in the sun, in the middle of January, every day between 11am and 4pm (I get limit sun due to surrounding buildings). 2 of the days were sunny and 3 days were cloudy. Temperature was cold, about 6°C/43°F every day. I did check on it everyday and on cloudy days the bezel would get brighter as well. I would place the bezel at slightly different angles every day to ensure all edges got some sun. Only the top side came out a bit darker, but this can be easily fixed by placing it at an angle to focus on top side.

Below is an image of 4 Mac Plus platinum bezels. From left to right:
1. Original Color
2. Brightened via cream, original color can be seen where the logo was removed.
3. Brightened via sun for 5 days
4. Heavily yellowed bezel (right side bezel from above gifs)

Screen Shot 2022-01-22 at 5.34.20 PM.png


Lastly, I'd like to note that the 5 days of sun had no visible affect or discoloration on the badge, however I'm sure that if I did leave it out for a couple weeks it would.


Cream Method

I followed the method described in this youtube video.
Recipe (note this makes enough to do at least 5 macs!!):
  • 500ml 3% hydrogen peroxide
  • 1 tablespoon Xanthan Gum
  • 2 tablespoons Glycerin
  • 1/4 teaspoon Oxiclean power
I used a hand mixer to to mix everything, consistency came out very similar to video. I tried to re-apply cream every 15~20 minutes; I'd recommend every 15 as after 20 minutes it was starting to get a bit hard. It was in the sun for just about 2 hours.

Screen Shot 2022-01-22 at 5.19.00 PM.png
Screen Shot 2022-01-22 at 5.18.51 PM.png


Conclusion​

The sun did a surprisingly really good job! However it seems you'd probably need to leave it out in the sun for a month if you'd like to remove most of the yellowing.
The cream also did a great job, but it can be hard to get even results on a heavily yellowed bezel.
My final suggestion would be to leave the case out for 1~2 weeks in the sun, and then follow up with a 1 hour cream treatment to get that extra final mile.
 
Last edited:

wottle

Active Tinkerer
Oct 30, 2021
548
303
63
47
Fort Mill, SC
I was using the cream and plastic wrap in the sunshine when this happened. I've never had marbling when using the LED panels and liquid.

Here's an old post I made about the problem almost five ago: https://68kmla.org/bb/index.php?threads/retrobrite-failure.7603/

Unfortunately, it seems I'm the top google search result for retrobriting failure right now. 😯Whoops!

The only real risk with my current indoor method is for the computer to float halfway through the retrobriting procedure. This can lead to uneven (and unsightly) results, but it is also fairly preventable if you are careful about positioning or use weights.

My problem with submersion is the amount of peroxide wasted. I've been on the same bottle of 40vol creme and have done probably a dozen cases (from a 512k to a 5400 to a 6100. I also worry about floating.

I need to find a good method for keyboards / keys. keyboard cases are good, and usually only the space bar needs it, but some keyboards I want to do all the keys (I've got some white USB apple keyboards that have gotten pretty yellow). Liquid would make a lot of sense, but I still worry about them floating and only being partially submerged.

As for the plastic wrap, my theory is still that doing the plastic wrap method in the sun is the source of people's problems. I think it can cause small portions where the sunlight is concentrated by any wrinkles / folds in the plastic wrap, resulting in uneven finish. If you use a lower power UV light source, and do it in a space that doesn't get too hot, I think it is safer than the "apply directly in the sun and replace every 20 minutes" method.
 

catboyjack

New Tinkerer
Apr 5, 2022
30
23
8
19
California
My problem with submersion is the amount of peroxide wasted. I've been on the same bottle of 40vol creme and have done probably a dozen cases (from a 512k to a 5400 to a 6100. I also worry about floating.

I need to find a good method for keyboards / keys. keyboard cases are good, and usually only the space bar needs it, but some keyboards I want to do all the keys (I've got some white USB apple keyboards that have gotten pretty yellow). Liquid would make a lot of sense, but I still worry about them floating and only being partially submerged.

As for the plastic wrap, my theory is still that doing the plastic wrap method in the sun is the source of people's problems. I think it can cause small portions where the sunlight is concentrated by any wrinkles / folds in the plastic wrap, resulting in uneven finish. If you use a lower power UV light source, and do it in a space that doesn't get too hot, I think it is safer than the "apply directly in the sun and replace every 20 minutes" method.
Yeah, the high volumes of peroxide get really expensive. I end up having to dilute it pretty heavily too and I end up having nowhere to store it.

I'm a broke student who doesnt have the money for large quantities of peroxide nor the means to store gallons of diluted peroxide.
 
  • Like
Reactions: wottle

Hurry

Tinkerer
Oct 28, 2021
48
33
18
Just wanted to quick report my first experience with Sun Brighting. A solid two day stretch of New Jersey sun in late April (not particularly warm days - peak in the mid 50s F). I'd guess around 20 hours total sun time. I expected it to take much longer to see results. I'm pretty happy as is, but I think a third day wouldn't hurt anything. I'll gladly continue to use this method going forward, I don't care how much longer it takes. No mess, and no risk of marbling or streaking. I'm sold.

sunbright.jpg
 

catboyjack

New Tinkerer
Apr 5, 2022
30
23
8
19
California
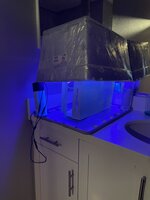
Basically, I just took an old storage bin my son had used for hydro-dipping (hence it looks terrible from the outside), lined the inside of the bin and the lid with heavy duty aluminum foil and reflective foil tape, the got a 50 foot spool of LEDs (https://www.amazon.com/gp/product/B08BLCNL9C/ref=ppx_yo_dt_b_asin_title_o09_s01?ie=UTF8&psc=1) and made a grid pattern.
I use the lid as a platform and then lower the box down on top of the lid. Hits it from all sides.

I just brush on some peroxide creme, wrap it in plastic wrap, try to get any bubbles out and ensure the plastic wrap is fully sealed to prevent it from drying out, and leave it overnight. I take it out and rinse it in the morning.

So far I’ve been really happy with the results. The comparison shot isn't exactly fair because one is a beige 512k and the other is a platinum SE/30. However, they were actually very similar in color before I did the SE/30.
I just constructed a box similar to the one you have. Gonna try it on my SE and if that works well I'll use it on my 512k and Plus and post the results here!

Unfortunatly for me the 40volume cream I was planning on diluting for the process is extermely expsnsive in my area, over $10 for a 4 OZ container!
 
  • Like
Reactions: wottle

Colleton

New Tinkerer
Apr 20, 2022
14
6
3
In my experience, just strong hot sunlight works very well with the beige Macs. I would not use the peroxide creme as it is the most prone to streaking and blooming unless you're very careful. I've used 40 vol liquid peroxide from Sally Beauty Supply mixed in a tub of hot water out in the sunlight to quickly and safely brighten heavily browned cases.
 

wottle

Active Tinkerer
Oct 30, 2021
548
303
63
47
Fort Mill, SC
In my experience, just strong hot sunlight works very well with the beige Macs. I would not use the peroxide creme as it is the most prone to streaking and blooming unless you're very careful. I've used 40 vol liquid peroxide from Sally Beauty Supply mixed in a tub of hot water out in the sunlight to quickly and safely brighten heavily browned cases.
I no longer use peroxide in sunlight as the reaction is too strong. peroxide wrapped in plastic wrap completely to prevent drying, minimal air bubbles and a box lined with UV LEDs gives me perfect results every time. Just finished a Mac Plus and it looks fantastic. I don't like the submersion technique because it wastes a lot of peroxide and if things float they can get uneven results, especially when exposed to the strong UV from the sun.
 

catboyjack

New Tinkerer
Apr 5, 2022
30
23
8
19
California
I've had EXCELLENT luck with the peroxide 40vil cream but I do realize that conditions need to be near perfect for that luck.

I constructed a UV box with some thermal insulating tape and foil to place over the plastic pieces during treatment, outdoors isn't ideal for me because I have little space and little access to direct sunlight so that box i constructed just sits in my restroom during the process.

My process for the cream usually goes as something like this:

- Deep clean the plastic before treatment with 99% IPA.
- Then I put the parts on the tray which I place the UV box over.
- For the cream I just put it in a small container and paint it all over the plastic.
- Exactly every hour I return to the box and paint on more cream, I've found that for me every hour works good for re-application because the cream isn't quite dry but still needs re-application.
- Then usually after 6-7 hours I pull out the plastics and rinse them off, after drying I completely lather the pieces in 303 Aerospace UV protection which helps protect it from re-yellowing and generally makes the plastic look cleaner.

The cream method has always scared me away but since I can only retrobright indoors I went ahead and tried a few different times. From that I found that plastic wrap helps keep the cream from drying, but It adds to the likelihood of streaking greatly, I also found that using the cream isn't really a 'set it and forget it' method either. It takes lots of time and frequent monitorinig so my best advice would be setting aside a weekend for this. During my testing I retrobrighted my //c, Powermacintosh G3, 512k, and Plus all with perfect results I couldn't be more happy with!


Before/After G3

IMG_4149.jpgIMG_4150.jpgIMG_4157.jpgIMG_4158.jpg

Original 512k Test

IMG_4112.jpgIMG_4139.jpgIMG_4140.jpg

I didn't think of it at the time but my box wasnt big enough for the G3 so I had to prop it up with cans and flip it every few hours for even exposure.

IMG_4156.jpg

I'm currnetly In the process of filiming a sorta instructional video on this particular formula I seemed to get working on my Machines, I save my SE which has the WORST yellowing too so that should make it interesting. When it's done I'll link it in the thread.
 

pocketscience

Tinkerer
Apr 29, 2022
261
185
43
Sydney, Australia
My very un-scientific and ignorant question is this, if UV light is what causes the yellowing of these plastics over time then how is UV light alone helping restore the color on the plastics. Its not as dramatic as the HP but still he got results.
I'm interested in understanding the answer to this also - ie how does the sun alone reverse the damage done by the sun...?🤷‍♂️

I've got a battered up SE/30 case that's being replaced by a MacEffects clear case - so I might just give it a shot and see what happens.
 

fehervaria

Tinkerer
Sep 23, 2021
153
161
43
48
North Germany
I've had EXCELLENT luck with the peroxide 40vil cream but I do realize that conditions need to be near perfect for that luck.

I constructed a UV box with some thermal insulating tape and foil to place over the plastic pieces during treatment, outdoors isn't ideal for me because I have little space and little access to direct sunlight so that box i constructed just sits in my restroom during the process.

My process for the cream usually goes as something like this:

- Deep clean the plastic before treatment with 99% IPA.
- Then I put the parts on the tray which I place the UV box over.
- For the cream I just put it in a small container and paint it all over the plastic.
- Exactly every hour I return to the box and paint on more cream, I've found that for me every hour works good for re-application because the cream isn't quite dry but still needs re-application.
- Then usually after 6-7 hours I pull out the plastics and rinse them off, after drying I completely lather the pieces in 303 Aerospace UV protection which helps protect it from re-yellowing and generally makes the plastic look cleaner.

The cream method has always scared me away but since I can only retrobright indoors I went ahead and tried a few different times. From that I found that plastic wrap helps keep the cream from drying, but It adds to the likelihood of streaking greatly, I also found that using the cream isn't really a 'set it and forget it' method either. It takes lots of time and frequent monitorinig so my best advice would be setting aside a weekend for this. During my testing I retrobrighted my //c, Powermacintosh G3, 512k, and Plus all with perfect results I couldn't be more happy with!


Before/After G3

View attachment 5337View attachment 5338View attachment 5335View attachment 5336

Original 512k Test

View attachment 5339View attachment 5340View attachment 5341

I didn't think of it at the time but my box wasnt big enough for the G3 so I had to prop it up with cans and flip it every few hours for even exposure.

View attachment 5342

I'm currnetly In the process of filiming a sorta instructional video on this particular formula I seemed to get working on my Machines, I save my SE which has the WORST yellowing too so that should make it interesting. When it's done I'll link it in the thread.
I like your box-construction, could you please explain a bit more how/what did you do to build it?
Is is completely closed during the procedure?
Do you have reflective inside cover (to reflect back the UV light)?
Why it is covered with plastic bag from outside?
 

catboyjack

New Tinkerer
Apr 5, 2022
30
23
8
19
California
I like your box-construction, could you please explain a bit more how/what did you do to build it?
Is is completely closed during the procedure?
Do you have reflective inside cover (to reflect back the UV light)?
Why it is covered with plastic bag from outside?
It's pretty simple really, I just took a plastic tub from the store and lined it completely with a mix of reflective thermal tape and tinfoil then after that I made a grid pattern with the UV strips. It may just look like it from the lighting but it isn't covered with plastic on the outside.

As far using it during the process I dont keep it airtight sealed, I just loosely rest it over the tray with the plastic pieces. My powermac g3 was actually too big so I had to use cans to stilt up the light box and it worked just fine.

Nothing scientific at all, I just built it with the supplies I had on hand :)

I based it off an older post in this thread, I can link it here.
 
Last edited:

wottle

Active Tinkerer
Oct 30, 2021
548
303
63
47
Fort Mill, SC
I've had EXCELLENT luck with the peroxide 40vil cream but I do realize that conditions need to be near perfect for that luck.

I constructed a UV box with some thermal insulating tape and foil to place over the plastic pieces during treatment, outdoors isn't ideal for me because I have little space and little access to direct sunlight so that box i constructed just sits in my restroom during the process.

My process for the cream usually goes as something like this:

- Deep clean the plastic before treatment with 99% IPA.
- Then I put the parts on the tray which I place the UV box over.
- For the cream I just put it in a small container and paint it all over the plastic.
- Exactly every hour I return to the box and paint on more cream, I've found that for me every hour works good for re-application because the cream isn't quite dry but still needs re-application.
- Then usually after 6-7 hours I pull out the plastics and rinse them off, after drying I completely lather the pieces in 303 Aerospace UV protection which helps protect it from re-yellowing and generally makes the plastic look cleaner.

The cream method has always scared me away but since I can only retrobright indoors I went ahead and tried a few different times. From that I found that plastic wrap helps keep the cream from drying, but It adds to the likelihood of streaking greatly, I also found that using the cream isn't really a 'set it and forget it' method either. It takes lots of time and frequent monitorinig so my best advice would be setting aside a weekend for this. During my testing I retrobrighted my //c, Powermacintosh G3, 512k, and Plus all with perfect results I couldn't be more happy with!


Before/After G3

View attachment 5337View attachment 5338View attachment 5335View attachment 5336

Original 512k Test

View attachment 5339View attachment 5340View attachment 5341

I didn't think of it at the time but my box wasnt big enough for the G3 so I had to prop it up with cans and flip it every few hours for even exposure.

View attachment 5342

I'm currnetly In the process of filiming a sorta instructional video on this particular formula I seemed to get working on my Machines, I save my SE which has the WORST yellowing too so that should make it interesting. When it's done I'll link it in the thread.
I will say since switching to the UV light box method, I've found it to be very forgiving and very much a set it and come back after 10-18 hours, depending on how bad the yellowing is. I wrap because I feel like dried peroxide is a greater risk than plastic wrap.

I think when people see streaking from using plastic wrap over peroxide it's due to one of two things:
1. too strong UV light, hitting creases in the plastic wrap and getting focused more on certain areas (e.g. doing it out in the sun)
- or -
2. Leaving bubbles in the plastic wrap, which allows portions of the peroxide to dry, leaving an uneven color.

At this point my approach is to start at 9-10PM at night, paint on peroxide in a thin, even layer, lay plastic wrap over the whole piece, trying to minimize bubbles and ensuring there is a complete airtight seal to keep anything from drying out, then throw it in the UV box and get it out for a rinse in the morning. Haven't had any streaking or over-bleaching with this technique.
 

LongAlphabet

New Tinkerer
Mar 7, 2022
18
3
3
Well this is just what I have because Minnesota winters really zap your vitamin D.

My very un-scientific and ignorant question is this, if UV light is what causes the yellowing of these plastics over time then how is UV light alone helping restore the color on the plastics. Its not as dramatic as the HP but still he got results.
Without citing anything as I write this, it's that standard window glass filters for a certain type of UV light - harmful to human skin type. However, the plastics still get affected by this part of the spectrum. But when we remove this filter (the glass) by placing the plastics in direct sunlight, the UV part of the spectrum that "bleaches" the plastic (much like bleached-white seawood on shores) it regains it's whiteness.

That said, someone else please help answer @bwicklund and back me up (or correct me if I'm wrong) before I go ahead and try and restore some super-yellowed SE/30 and Mac Plus cases that *really* need some help... 🤞☀️:cool:
 

pocketscience

Tinkerer
Apr 29, 2022
261
185
43
Sydney, Australia
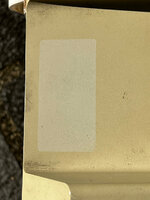
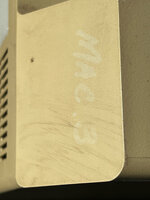
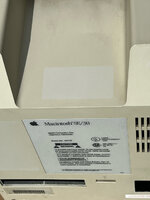
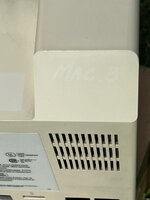
I decided to give the sun a go at a SE/30 case that I'm replacing with a MacEffects clear case. It has a couple of places that will make good reference points. There was a sticker placed on the top of case early in its life, and also someone wrote "Mac.3" with a marker pen, also early on. Both the sticker and marker were gone when I received the machine but you could clearly see where they'd been..
IMG_2077.jpegIMG_2078.jpeg

The weather here in Sydney of late has been atrocious, so over the last few weeks we've only had a handful of nice sunny hours.. but today was pretty nice! So after approximately 12hrs in total the case is noticeably less yellow, to the point where the marker reference point is barely visible. The sun is quite low given it's winter here, so the angle of that piece of the case is more directly facing the sun than the sticker area behind the handle, but still - the results are pretty impressive so far.
IMG_2187.jpegIMG_2186.jpeg

Hoping for a bit more sun tomorrow.. 🤞
 
  • Like
Reactions: AndyDiags

retr01

Senior Tinkerer
Jun 6, 2022
2,474
1
796
113
Utah, USA
retr01.com
I'm currnetly In the process of filiming a sorta instructional video on this particular formula I seemed to get working on my Machines, I save my SE which has the WORST yellowing too so that should make it interesting. When it's done I'll link it in the thread.

Hi @catboyjack, did you do the instructional video and post it on YouTube?
 

pocketscience

Tinkerer
Apr 29, 2022
261
185
43
Sydney, Australia
Honestly I think it's already well described. Step #1 take old yellow Mac and put it in the sun. #2 don't let it get rained on.

I've been following these for all my Macs (currently working on 128K and original kb and mouse). It really works well if you have a bit of patience. These machines have been around for 30+ years, so I don't see the need to rush with something that might end up ruining it.
 

retr01

Senior Tinkerer
Jun 6, 2022
2,474
1
796
113
Utah, USA
retr01.com
Honestly I think it's already well described. Step #1 take old yellow Mac and put it in the sun. #2 don't let it get rained on.

I've been following these for all my Macs (currently working on 128K and original kb and mouse). It really works well if you have a bit of patience. These machines have been around for 30+ years, so I don't see the need to rush with something that might end up ruining it.

Wow! The power of the SUN! 🌞🌅☀️🌇🌄 🤯

😂

Yeah, I figured. Unfortunately for me, it's not easy to get out and leave it out. I don't have my own "fenced" area outside. However, it is on my list to do. :)
 

pocketscience

Tinkerer
Apr 29, 2022
261
185
43
Sydney, Australia
I was skeptical, but you can see a difference after only a few hours. After a few days it makes a massive difference per my earlier photos. I'm sold.

However I received a ruined 400K external drive from @Elemenoh - someone had peroxided it very poorly. The sun is not making one iota of difference to that sadly.
 
  • Like
Reactions: Paolo B

retr01

Senior Tinkerer
Jun 6, 2022
2,474
1
796
113
Utah, USA
retr01.com
I was skeptical, but you can see a difference after only a few hours. After a few days it makes a massive difference per my earlier photos. I'm sold.

Awesome! :)

However I received a ruined 400K external drive from @Elemenoh - someone had peroxided it very poorly. The sun is not making one iota of difference to that sadly.

Yeah. Once a chemical reaction changes the bonds of the atoms, the reversal process is something that someone could dream of, e.g., the reversal of time.
 

pocketscience

Tinkerer
Apr 29, 2022
261
185
43
Sydney, Australia
There are plenty of chemical reactions that can be reversed.

The interesting part of all of this (sun only) is why UV-A alone yellows the ABS, but when the suns natural mix of UV-A *and* UV-B hit the ABS it is somehow restored. I don't think there have been any studies on this. UV-B is blocked by glass, so it's reasonably clear (ha!) that it's the cause of the yellowing in ABS. But what is UV-B doing to (seemingly) reverse that reaction in the ABS structure..
 

retr01

Senior Tinkerer
Jun 6, 2022
2,474
1
796
113
Utah, USA
retr01.com
There are plenty of chemical reactions that can be reversed.

The interesting part of all of this (sun only) is why UV-A alone yellows the ABS, but when the suns natural mix of UV-A *and* UV-B hit the ABS it is somehow restored. I don't think there have been any studies on this. UV-B is blocked by glass, so it's reasonably clear (ha!) that it's the cause of the yellowing in ABS. But what is UV-B doing to (seemingly) reverse that reaction in the ABS structure..

I agree that reversing chemical reactions are possible. For example, the reversal of allergic reactions if acted quickly. Other things can be reversed with suitable catalysts, like color.

I apologize if I was not clear. I am saying that some reactions go too far. We cannot reverse this due to our limitations with scientific knowledge on this planet. I am not saying impossible because reversal IS possible with the CORRECT procedures. Yet, science only can go so far at a given time.

It is remarkable to harness the sun's ultraviolet rays to retrobrite. 🌞 🤓 (y)