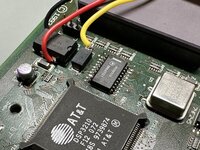
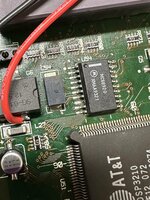
Yeah want it be better than tape.
Forgot to mention that when installing I would recommend slipping it on one edge first and then use a screw driver the bend the clip outward a bit on the opposite edge while pushing down . This will help prevent damage to lip on the clip that holds onto the edge of the 68040. Same procedure in reverse to remove the clip.
@alxlab
What's the best way to
buy one of
your heatsink clips, for people totally brain-dead to 3D printing?

By the way, I found
this 45mm heatsink on Mouser that spans the whole width of the 68040, but sadly it is a whopping 22mm tall, which means you cannot put a 40x10mm fan on top, and there's no room to put the 40mm fan on the side either. Even if there was a custom clip that allowed use of
Thermal Grizzly Kryonaut*, I'm unsure if it would offer better cooling as a purely passive heatsink than the existing
45x10mm gold aluminum heatsink* +
Noctua 40mmx10mm fan* combo I'm using now.
I see you also mentioned the
pure copper 40x10mm heatsink on AliExpress. I don't see a way for a custom 3D printed clip to hold that down, which means you'd need to use thermal tape with it, and we of course know thermal tape doesn't transfer heat well, which is why you created that 3D clip-mount for the gold 45mm heatsink.
The only other thing I can add is that the
Thermal Grizzly Carbon Pad* seems to offer thermal conductivity on par with Kryonaut, which is pretty incredible. The downside seems to be that the pad can tear easily, especially if the heatsink is removed. Some users of the pad have said it should be a single use pad. But the upside to the pad is that you would never need to change it, unlike thermal paste. The pad's 51x68mm size would need to be cut down to 45x45 with scissors, and then one of your heatsink clips would need to be used with the gold 45x45x10mm heatsink. Your heatsink clip would need to pull the heatsink down quite firmly and flat onto the CPU though, because the pad is only 0.2mm thick. That important detail is pointed out at
17:20 in this video review. The 40mm Noctua fan could then be mounted on top using two bolts as shown in
my video here.
The ultimate aim here is to achieve the best cooling possible within the space constraints of each Mac. In my case, that is a Color Classic, which means the total height of a heatsink + fan stack cannot be much more than 20mm. Even now, my floppy drive ribbon cable almost touches the top of the fan.
One thing I found in August (the hottest month of the year in Japan), is that I was getting screen artifacts that I didn't get in the cooler months of the year (when running at 50MHz). True,
I added an Apple IIe Card in August which I didn't have earlier in the year, so maybe that is heating things up inside. The artifacts got so bad I had to drop the clock speed down to 49.0MHz. Those are the same pixel artifacts shown in my Spicy videos, when the clock speed is too high. I had previously thought it was the slowness of the 60ns VRAM, but now I believe that the actual temperature of the CPU may be a part of the problem too.
This is why I asked how to buy your heatsink clip so I could experiment with Thermal Grizzly Kryonaut and possibly that carbon pad too. Without the heatsink clip, those ways to improve thermal conductivity cannot be used. The effectiveness of the fan atop my heatsink is limited by the thermal conductivity of the
2-sided tape* I use now between the the CPU & heatsink. I have no idea the specs of my tape, but a similar MADE IN CHINA
tape here* claims
1.5 W/M-K. The Carbon pad claims
62.5 W/mk. That's an enormous difference!
* affiliate links


