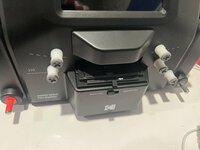
It took me a minute to realize what was going on, that's the front and back view of the knob that is some sort of speed control. I was looking at it and thinking why's there a spare reel holder on your unit.
Probably not easy or useful, but the other one, the one that drops in from the top, it would be useful to have keying on it since it's so almost just a square it's easy to install the wrong way.Dumb mistake on my part. I made the channel between the two walls of this design too narrow for the film to pass through. It's been resolved and updated as a v2 part in my original post.
OK didn't realize they weren't good to use, seems like some people had success with them.Don't use iris lens caps, as that introduces vignetting.
The issue is the plastic camera mount, the thread is too easily messed up, I had trouble with it too. Maybe on my next unit, I will print my own extension tube in TPU, soft enough to thread the lens onto, fill customizable length.
I did order that pack of lens mounts from Amazon and might try switching mine out. You're right about the threads, it's like they were never intended to be used once the original lens was removed. It feels like the plastic "shrinks" some from the molding and makes it harder to go in like a taper. But could just be bad threads. Looks like I got some dust on the sensor too in the process
 minor cloudy/dark spots on my preview images. Also ordered some micro screw kits so I can put all four screws in the lower and upper mounts going forward. After playing with the focus I see how even just a touch is enough pressure to shift the camera so making the board mount as secure as possible seems like a good idea. Ten pounds of junk drawer screws and nothing that small!
 Thank you for that!