@KnobsNSwitches , I'd also be willing to print one and ship it to you at cost, assuming you aren't using this to justify said purchase of a new 3d printer!

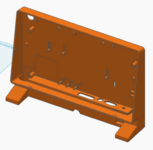
I got back from my trip and I'm trying to get this project across the finish line. I re-worked it to move the ESFloppy LCD to the front of the case (although I seem to have broken my LCD during the removal process, so if you choose to do this, be careful with the LCD when you're removing it from the L:isaFPGA). I also have moved the ESFloppy buttons to the chin of the case, right under the LCD so you can manipulate it from the front of the machine more easily.
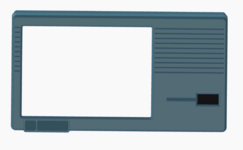
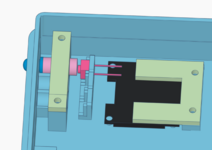
Unfortunately, moving the LCD and the buttons (and the power LED) aren't necessarily for the faint of heart. You need to remove the existing power LED (under the power button), then solder wires to those pads, as well as two legs for the power switch, the left, select, and right ESFloppy switches. Then you need to solder on some header pins in the place of the removed LCD. I'm just using Dupont wires for connecting things. All these cables need to be removable because the LisaFPGA is screwed to the back case, and the ESFloppy buttons and the LCD will be screwed to the front case.
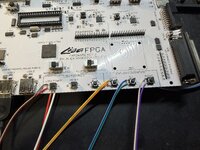
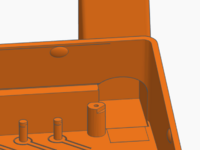
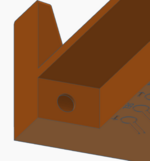
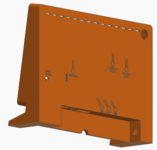
I've done a test print of just that section of the case and it worked well in terms of button fit and LCD position. I'm waiting for my replacement LCD and the switches to arrive before I print my official case pieces. With the ESFloppy LCD and buttons moving to the front, I now have a new back case that removes those buttons and the screen cut-out. It also relocates the power jack input to one of the legs (because the lighted power button needs to be placed where the old power button was) and adds the lighted power button that I used for the Pi version. The new bump for the power button makes the back no longer symmetrical, which I don't love, but I think it's a good compromise - the sideways oriented jack means my 12v USB-C power adapter won't be bent as harshly, and I added a master power rocker switch to the upper corner on the back so you can cut power to the LCD when not in use. That means multiple power switches/buttons (one master power switch, one switch on the LisaFPGA, and the Lisa power button).
I also added a few zip tie rings around the inside of the case to help with cable management. Flexible and basically free. Optional for people who want the wires to be better secured.
Once my new LCD arrives, as well as the momentary switches, I should be able to call it a wrap on this.