A takky Mac…..

retr01

Senior Tinkerer
Jun 6, 2022
2,474
1
796
113
Utah, USA
retr01.com
It's great to know that, take a look at my screenshots!

img_1844-jpeg.6035

Whoa, @Kay K.M.Mods! 😁😂🤣😀 Another coincidence! Cool!🤘
 
Last edited:

-SE40-

Tinkerer
Apr 30, 2022
422
168
43
The Netherlands
pin.it
Change of plan,…….

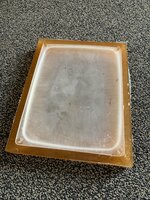
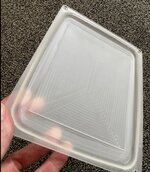
The concept to use and fill the original CRT with resin did optically work very well.
(No internal reflections or whasoever)
Setback I could only create one piece,
and is still a lot of work.

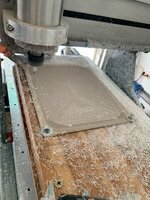
As Ive drawn the CRT glass section a while back, the idea came to me to recreate the complete CRT frontsection in optical glassclear resin.
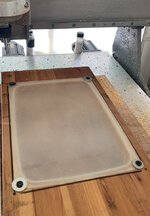
That would involve creating a full mould.
This is a lot of work…..

Combining the CRT glass with a supportmould will create an accurate CRT shape and save time in the process.

Here the steps made sofar….

B463F47A-D457-4417-8F91-F1C7674823B6.jpeg


….more next week.

🍀
 
  • Like
Reactions: Kay K.M.Mods

-SE40-

Tinkerer
Apr 30, 2022
422
168
43
The Netherlands
pin.it
1C8E0CED-4EA9-4A50-9C36-FE531AB78533.jpeg

the mould came out perfectly fine this morning….

1FED39AB-A882-4555-861B-81E6D6F1509D.jpeg

About five weeks ago ive bought two packages of one liter UV resistant clear resin sets (for another project)
The first bottle only had a 100grams of resin left was ok, mixed it up and poured that in the mould.
Opening the new bottle showed it did crystallize…..or something like that….so this is the end for the joy of today 😥
 
  • Sad
Reactions: markyb86

retr01

Senior Tinkerer
Jun 6, 2022
2,474
1
796
113
Utah, USA
retr01.com
Hey @-SE40-, that is awesome using clear resin to mold a front to put the LCD behind. Looks cool! :D (y)

I am confused about how you developed the right curvate of the transparent resin plastic front by molding? Can you please explain? 🤔
 

-SE40-

Tinkerer
Apr 30, 2022
422
168
43
The Netherlands
pin.it
Hi, Thanks!
Hope it works out ok….🙈
This stuff is pricy.

For the making of the master mould,
check post 63.
As I used the original CRT glass in the master, the curvature cant be far off.
Less than 1% as I understand👍

🍀
 

-SE40-

Tinkerer
Apr 30, 2022
422
168
43
The Netherlands
pin.it
Update….
BCE2AFA2-174F-43F4-8A25-5C8A1F9E22E4.jpeg


1% shrinkage……Well, this true.
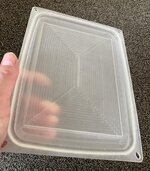
Unfortunately the material is thicker in the middle and so additional causes a slight surface deformation, aswell causing a light bend.
On itself not a real problem, only that I actually need a higher mould.
This way I can cut a slice off the lens and flatten it out.

Hopefully getting to that this weekend.

🍀
 

-SE40-

Tinkerer
Apr 30, 2022
422
168
43
The Netherlands
pin.it
Those processes can indeed be applied…
but its very time consuming.

The frontside and the material as a whole is pretty smooth (like the original) and crystal clear.
Its the backside that needs the additional work.
Ive roughly sanded it flat for now.

66CE0850-6A57-4601-B058-2316FCA9DEB0.jpeg


My aim is to cut out a chunk,
to get the display as far forward as possible.
More next!

🍀

(added pic for clarification)
 
Last edited:
  • Like
Reactions: retr01

-SE40-

Tinkerer
Apr 30, 2022
422
168
43
The Netherlands
pin.it
Next…..👍
5050DAD4-CAF0-47E2-9934-2746F12946DC.jpeg


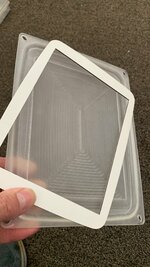
Cutting a flat surface and border for the display went well.
The display gets mounted to the
(white-later black) border with double sided tape.
The subassembly then fits the curved glass.
This way it can be disassembled if needed.
Now some polishing to do……
 

Attachments

  • 48C1EFA6-A259-4D53-9448-6F4A56636B36.jpeg
    48C1EFA6-A259-4D53-9448-6F4A56636B36.jpeg
    1.6 MB · Views: 85
  • 60B7672A-63F9-471F-92AE-C4F8370CB6B2.jpeg
    60B7672A-63F9-471F-92AE-C4F8370CB6B2.jpeg
    82.4 KB · Views: 82
  • 3AE8C092-742A-49F7-AEC8-E7AF535568AE.jpeg
    3AE8C092-742A-49F7-AEC8-E7AF535568AE.jpeg
    148.7 KB · Views: 82
  • B903E271-C66C-4A37-B869-E2DAFFD5A727.jpeg
    B903E271-C66C-4A37-B869-E2DAFFD5A727.jpeg
    1,001 KB · Views: 89
  • 82D910E8-B8B7-4D6E-85AB-C9803C04507C.jpeg
    82D910E8-B8B7-4D6E-85AB-C9803C04507C.jpeg
    1.3 MB · Views: 79

Trash80toG4

Active Tinkerer
Apr 1, 2022
967
280
63
Bermuda Triangle, NC USA
Following with great interest, best of luck getting this worked out. Wondering if milling a convex back surface for a two part mold might be an approach to try. smoothing and polishing a convex surface is oh so much easier than concave surface work. :)

Just in case:
I've got a thread about vacuum forming plexi using the CRT itself as the buck (mold) but was using the plexi scrap I have on hand. Results almost there, excellent, if not perfect. Material needs to be a much thinner sheet to work. There's info about that over at the MLA. Results were amazing, but don't recall offhand who pulled that off or if the process used was vacuum forming or drooping?
 

-SE40-

Tinkerer
Apr 30, 2022
422
168
43
The Netherlands
pin.it
Glad you and maybe others enjoy following my trials here.

Best of luck, indeed,…
…………….thats what we need in life!
😇

If this effort does not work as expected,
I (and youall!) may have learned
a few interresting thinKs.

Next to that I can still use my initial CRT-to-LCD
real-glass conversion.
No problem👍

A two part mould would be great indeed.
For now overkill, just and only to see / experience using this new concept in real life.

As for vacuumforming, its proven that it works,
if done right.
Makers are selling those on etsy at a fair price.


🍀
 
Last edited:
  • Like
Reactions: retr01

-SE40-

Tinkerer
Apr 30, 2022
422
168
43
The Netherlands
pin.it
Yes. Only the visible section.
The rest should become black.

Vacuum forming is a good solution for many products. Transparent is bit harder to keep the thickness overall about the same.
The trouble with some thermoplastics is that these are mostly realively soft.
And so scratches/damages more quickly.

PLEXIGLAS®- cast resinsheetmaterial is a bit more durable and more scratch resistant.
Thats why ive gone this route/exploration.

Real glass, model pressed is actually the final and only superior solution in this matter. Just like the CRT ….

Any members here running a glass shop?😇

🍀
 
Nov 4, 2021
126
99
28
Tucson, AZ
Something you might want to try is aquarium background adhesive, an optically clear gel for sticking decorative backgrounds on fish tank. It really makes the backgrounds pop compared to just taping the background on. It might make the LCD look shaper by filling the tiny air gap between the panel and the resin piece. I think it's viscous enough that it won't seep anywhere you don't want it and cause damage.

 
  • Like
Reactions: -SE40-