Hi, new forum user here, joined specifically for this Kodak Reels discussion. I just received my Reels digitizer, s/n H2324148BK01819. Since I have quite a few films to do that are important to me and I'm now aware of the limitations of the stock machine, I would like to try the modified firmware, and likely change the lens too. There seems to be still quite a bit of change going on by you absolutely amazing rockstar hackers in this regard (I'm deeply impressed with your creativity, generosity, and persistence). As such, at this point do ye think I should wait a bit until 'the way' has been stabilized a bit more?
Hacking the Kodak Reels 8mm Film Digitizer (New Thread)
- Thread starter Mac84
- Start date
You are using an out of date browser. It may not display this or other websites correctly.
You should upgrade or use an alternative browser.
You should upgrade or use an alternative browser.

@WowIndescribable H2324148BKxxxxx is a type C, so you have no need to wait. While the firmware hacks are is still changing, but the quality improvements are slowing. If you can swap the lens, with any recent firmware, you will be good.
Version 7.7 for Type A, B and C (and stock FW recovery for D users.) So nothing for Type D yet, at least now unit can be recovered if the wrong firmware is installed.
New to v7.7
- stats and controllable field are written off the video image (bottom right corner.)
- there is now an ISO Max control, supporting 100,200 & 400 ISO settings. Defaults to 100.
The code has had a lot of clean up, to it is get easier for other to start contributing. github: https://github.com/0dan0/4reels
Donations:
This project of reverse engineering a consumer product is in the grey area legally, but it shouldn't be. We own this hardware, we should be free to modify it as we want, and share those modifications without any concern. A charity that I donate to every year, Electronic Frontier Foundation (EFF), deals with customer rights like these. So if you want support projects like this one, please donate to the EFF.
You can thank me in your donation via:
https://supporters.eff.org/donate/tribute
Use this contact info.
Attachments
Hello Everyone
I too am very impressed by this very activ Forum, which inspired me to order a Kodak reel. I am based in Europe and sadly I received a D-Typ yesterday.
(H2825148BKxxxxx). So I guess I will have to wait a while till I can install the new Firmware, is that correct?
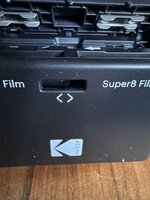
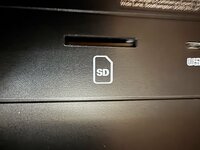
Also after unpacking I noticed that the 8mm to super8mm handle was stuck about 1/2 cm under the opening and also the SD card reader was not aligned with the slit of the cover. After opening everything, I could shift the loose mechanics into the correct position. It works all fine now, but has anyone had the same issue?
Best Regards
Roderick
I too am very impressed by this very activ Forum, which inspired me to order a Kodak reel. I am based in Europe and sadly I received a D-Typ yesterday.
(H2825148BKxxxxx). So I guess I will have to wait a while till I can install the new Firmware, is that correct?
Also after unpacking I noticed that the 8mm to super8mm handle was stuck about 1/2 cm under the opening and also the SD card reader was not aligned with the slit of the cover. After opening everything, I could shift the loose mechanics into the correct position. It works all fine now, but has anyone had the same issue?
Best Regards
Roderick
Attachments

@0dan0, thanks for the v7.7 update. It seems to be working well on my Type C scanner.
I like having the stats/settings over on the right side, to not obscure the scan preview - well done!
ISO Max setting works well. As you you had mentioned previously, the ISO does not exceed 400 during encoding, but I do find it slightly curious that during preview it will register as high as 800. Not sure if that's intentional or useful. I might suggest setting the preview mode ISO to be consistent with the encoding process (do not exceed 400, unless the max setting is lower).
Another minor suggestion is to move the ev setting down in the list, below the Qp since that would fit better with the other exposure-related settings.
Finally, I will report one instance after an appropriate auto-stop where the interface appeared frozen and non-functional, but after potentially 15 seconds, it eventually returned to the Home screen and my previous button presses quickly "caught up." I power cycled and haven't had the issue recur since. I will note that I did do a power cycle *after* the update had completed.
For everyone else, here's a quick plug for the User Guide I continue to revise alongside 0Dan0's firmware updates.
Last edited:
v7.7 is getting close to all the features I would want for MP4 encoding film scanner. The main remaining fix is to either prevent or at least detect the jitter, so that scanning hours aren't wasted. For this I will need your help. This v7.7.1 build only add a hidden debug feature, if not enabled, it will run just like 7.7.0.
To enabled start a capture, navigate to the exposure control [A], and change it to [D] for Debug (by pressing + twice).

Then stop the capture. It is all the next captures that will now contain some debug information written into the two left corner of each MP4 frame (except the first.) This is what the debug looks like:

I looking for all sample captures that have obvious jitter, where the scanner if grabbing while the film is still moving.
Jitter with debug:
I only have this one example (so far) as jitter is rare for me. This is the over-exposed first frame type, but the frame cadence in the debug is also off.
So if you have time, please share some jittery captures with me. I only need 60-80 frames of capture (from the start), just enough to see the jitter, and I can see which frame the scanner encoded (via the metadata).


Let me know if you want an explanation of the metadata.
To enabled start a capture, navigate to the exposure control [A], and change it to [D] for Debug (by pressing + twice).
Then stop the capture. It is all the next captures that will now contain some debug information written into the two left corner of each MP4 frame (except the first.) This is what the debug looks like:
I looking for all sample captures that have obvious jitter, where the scanner if grabbing while the film is still moving.
Jitter with debug:
I only have this one example (so far) as jitter is rare for me. This is the over-exposed first frame type, but the frame cadence in the debug is also off.
So if you have time, please share some jittery captures with me. I only need 60-80 frames of capture (from the start), just enough to see the jitter, and I can see which frame the scanner encoded (via the metadata).
Let me know if you want an explanation of the metadata.
Attachments
Hi. Just bought this device; it appears it’s a “D” variant.

Have any of yinz seen a problem where the scanner luminance “pulses” bright and dark? Seems to do it when Exposure is set to 0 or -1 and when there’s bright images on the film, such as sky. If I bring the exposure down further it seems to stop the fluctuation.
Have any of yinz seen a problem where the scanner luminance “pulses” bright and dark? Seems to do it when Exposure is set to 0 or -1 and when there’s bright images on the film, such as sky. If I bring the exposure down further it seems to stop the fluctuation.
Yes, that is a type D. The exposure flicking is one of the many problems the firmware hacks help address (and hopefully/eventually for type D too.)Hi. Just bought this device; it appears it’s a “D” variant. View attachment 25718
Have any of yinz seen a problem where the scanner luminance “pulses” bright and dark? Seems to do it when Exposure is set to 0 or -1 and when there’s bright images on the film, such as sky. If I bring the exposure down further it seems to stop the fluctuation.
Excellent! Thank you so much for your efforts, this is wonderful!
That's good to know about the LCD way in, my LCD didn't want to be removed properly, so I assumed other units were just as picky. I've never had to solder the v3.3 pin, but I guess if your adapter supports it, it won't cause you any trouble.
I think the "DUMPCODE.BIN" also dumps any temporary data (settings, etc) stored in the memory chip. So it could be possible that it does differ. Although usually that data is in another partition and can be removed using the unpack/repack firmware tools.
Here's a comparison between C and D, lots of code changes!
View attachment 25626
Let's see if the above solves the issue for @JKCalhoun...

Hi @Mac84 what are your thoughts now? I’d really prefer to ship and pay someone who knows what they’re doing to get me the optimal update and set up.Excellent! Thank you so much for your efforts, this is wonderful!
That's good to know about the LCD way in, my LCD didn't want to be removed properly, so I assumed other units were just as picky. I've never had to solder the v3.3 pin, but I guess if your adapter supports it, it won't cause you any trouble.
I think the "DUMPCODE.BIN" also dumps any temporary data (settings, etc) stored in the memory chip. So it could be possible that it does differ. Although usually that data is in another partition and can be removed using the unpack/repack firmware tools.
Here's a comparison between C and D, lots of code changes!
View attachment 25626
Let's see if the above solves the issue for @JKCalhoun
Not to bad? I didn’t change the frame rate… thoughts? https://photos.app.goo.gl/ep34mMWpzXUjhbai6
I too have a "D" version but my luminance pulses when the scene is very dark.Hi. Just bought this device; it appears it’s a “D” variant. View attachment 25718
Have any of yinz seen a problem where the scanner luminance “pulses” bright and dark? Seems to do it when Exposure is set to 0 or -1 and when there’s bright images on the film, such as sky. If I bring the exposure down further it seems to stop the fluctuation.
Hi - New Forum user (so be gentle).
Love the "hacking" you have done, but question the value of some of the efforts.
First - the sensor is a CMOS 3280x2464 which really means a 1640x1232 pixel image capability after combining the 4 color cells (R-Gb-Gr-B) which can either integrate to 10 or 12 bits/pixel typically A-Law companded to make 24 bit RGB (Assuming typical cmos image sensor operations). But this then needs to be mangled into 720p ( 1280x720) or 1080p (1920 x 1080) and time slapped from 18fps or 16fps to 24fps to be playable. Throwing a $90 lens at the problem seems like pig cosmetics, however, optics is always the bane of good scanning.
Eliminating and stabilizing the color and white balance are great - but the goal should be to get the best image out of the sensor without adding all manner of conversion artifacts in the process. This means keeping a 720p output based on a 1280x720 sensor window judiciously selected from the sensor view; attempting to up-convert or compress frames simply adds artifacts, not detail.
If you REALLY want 1080p, a 12MP sensor (e.g. Sony IMX477) will provide an output of 2028x1520 which can produce a "real" 1080p output and worthy of the 12mm Macro lens. That would require a processor upgrade, say a Raspberry Pi CM4 and a carrier suitably equipped with some integration to the screen, buttons, and motor; definitely not for the faint of heart, but reasonably doable. This also pushes the limits of the film's resolution but does "honestly" double the scanning quality.
The goal, in any case, should be a true one-to-one raw sequence of digitalized frames without any 720p/1080p conversion or speed artifacts (e.g. inserted frames); i.e., RAW. Finagling color balance and speed in a later digital stage is far less frustrating than trying to crowbar an underpowered SOC to do more than it was ever designed to do. If you're going to use the full capabilities of the existing sensor, then find a way to pad the image to fill the 1080p frame, or stick to 720p with an under scan optically selected from the frame. That is 2.8 (720) or 6.2 (1080) MB/Frame uncompressed that may reasonably compressed - i.e. keep the largest bitrate possible.
One thing I never saw in the thread (sorry - it is WAY too long; maybe a wiki is needed to separate the journey from the results/recommendations) is modifying the light source to allow adjustment of the illumination color balance, rather than trying to constantly apply conversions during scanning. This can be done with a three color led light source tuning or optical filters. Catching and analyzing the sprocket hole leakage would allow dynamic adjustment against source illumination as well, but probably not possible on this platform (especially with ONLY 128MB frame buffer : did I read that correctly?).
However - the results of this team's efforts is phenomenal given the base material! I will be looking for a unit to modify given the head start available herein.
T
Hmmm.. not quite how it works. While there is some disagreement on the resolution resolved for CFA Bayer sensor, it is not half as you theorized, and we aren't get 4:4:4 color from H264 (there would be very little benefit). The sensor has a photo readout mode (not used) and a video read-out (used here) that is a native center crop of 1920x1440 from the tiny sensor (it is a 12bit linear light readout. ) The 1600x1200 is windowed from that. There is a plan to reduce to a native 1440x1080, as I recently determined that there is some read-out noise at 1600x1200. Using a conservative 75% (luma res) for what a CFA Bayer image can resolve, 1440x1080 will resolve a tad more than 8mm film can deliver at an estimated 4000dpi maximum. This is only achieved with the 12mm lens swap. Story is sadder with the stock lens.Hi - New Forum user (so be gentle).
Love the "hacking" you have done, but question the value of some of the efforts.
First - the sensor is a CMOS 3280x2464 which really means a 1640x1232 pixel image capability after combining the 4 color cells (R-Gb-Gr-B) which can either integrate to 10 or 12 bits/pixel typically A-Law companded to make 24 bit RGB (Assuming typical cmos image sensor operations). But this then needs to be mangled into 720p ( 1280x720) or 1080p (1920 x 1080) and time slapped from 18fps or 16fps to 24fps to be playable. Throwing a $90 lens at the problem seems like pig cosmetics, however, optics is always the bane of good scanning.
Eliminating and stabilizing the color and white balance are great - but the goal should be to get the best image out of the sensor without adding all manner of conversion artifacts in the process. This means keeping a 720p output based on a 1280x720 sensor window judiciously selected from the sensor view; attempting to up-convert or compress frames simply adds artifacts, not detail.
If you REALLY want 1080p, a 12MP sensor (e.g. Sony IMX477) will provide an output of 2028x1520 which can produce a "real" 1080p output and worthy of the 12mm Macro lens. That would require a processor upgrade, say a Raspberry Pi CM4 and a carrier suitably equipped with some integration to the screen, buttons, and motor; definitely not for the faint of heart, but reasonably doable. This also pushes the limits of the film's resolution but does "honestly" double the scanning quality.
The goal, in any case, should be a true one-to-one raw sequence of digitalized frames without any 720p/1080p conversion or speed artifacts (e.g. inserted frames); i.e., RAW. Finagling color balance and speed in a later digital stage is far less frustrating than trying to crowbar an underpowered SOC to do more than it was ever designed to do. If you're going to use the full capabilities of the existing sensor, then find a way to pad the image to fill the 1080p frame, or stick to 720p with an under scan optically selected from the frame. That is 2.8 (720) or 6.2 (1080) MB/Frame uncompressed that may reasonably compressed - i.e. keep the largest bitrate possible.
One thing I never saw in the thread (sorry - it is WAY too long; maybe a wiki is needed to separate the journey from the results/recommendations) is modifying the light source to allow adjustment of the illumination color balance, rather than trying to constantly apply conversions during scanning. This can be done with a three color led light source tuning or optical filters. Catching and analyzing the sprocket hole leakage would allow dynamic adjustment against source illumination as well, but probably not possible on this platform (especially with ONLY 128MB frame buffer : did I read that correctly?).
However - the results of this team's efforts is phenomenal given the base material! I will be looking for a unit to modify given the head start available herein.
T
I do agree that change in the light could be a benefit, that would be a great hardware hack, as the firmware hack already supports disabling all RGB gains.
In the firmware side, I still need to find where the black level is controlled, as that is wrong for red channel for many film stocks. It will help with negative scanning, which the current set-up is near hopeless for.
Last edited:
v7.7 is getting close to all the features I would want for MP4 encoding film scanner. The main remaining fix is to either prevent or at least detect the jitter, so that scanning hours aren't wasted. For this I will need your help. This v7.7.1 build only add a hidden debug feature, if not enabled, it will run just like 7.7.0.
Hi @0dan0, I'm attaching 2 slightly jittery captures using the debug feature on my lens modified Model C scanner. I haven't had jitter quite as dramatic as the one you just posted, so these ones will hopefully suffice for now.
Movie0014: Moderate bottom jitter
Notably, the second jittery video (Movie0016) seems to have an encoding error starting at the 4th frame for several frames. I've had this happen on the 7.7.1 about every 5th scan or so. I've uploaded here, but it can't seem to play in the web interface (due to the encoding error), but you should be able to "save as" and download the original MP4.
Attachments
Last edited:
Thank you, these are helpful. I wanted to see if the frame cadence was different when there is jitter. These two show the same cadence as good captures. So detecting cadence alone will not be sufficient. I have added a crude frame buffer difference test the seems to work, now I have to see if that can be used to control which frame buffer is selected for encoding. There are six 1600x1200 frame buffers, storing video from the camera at 25fps, that are then sampled every 12 or 13 frames for selected encoding.Hi @0dan0, I'm attaching 2 slightly jittery captures using the debug feature on my lens modified Model C scanner. I haven't had jitter quite as dramatic as the one you just posted, so these ones will hopefully suffice for now.
Movie0014: Moderate bottom jitter
View attachment 25774
Notably, the second jittery video (Movie0016) seems to have an encoding error starting at the 4th frame for several frames. I've had this happen on the 7.7.1 about every 5th scan or so. I've uploaded here, but it can't seem to play in the web interface (due to the encoding error), but you should be able to "save as" and download the original MP4.
I got my new lenses and parts. I'll be busy the next week or two but then I'll mod my unit and document it as I go along.
Hey all! I've been working on a stand for the Reelz and Wolverine.. There will be a 3 varients for you to choose from. First one is 2-3 wedges for you to place wherever you see fit. The other 2 are for 300+mm print beds and one angle is about 35 the other is about 20. These wedges make it much easier to face you while working on it. Personally i like the 20 degree one, but if you're taller you may prefer the 35. Pictured below is the 35 and the wedges.. 20 is on the printer now.. Stand by, should have these ready tomorrow or so.
-t


-t
Here you go.. It's live. If you don't have a 3d printer, DM me, pay for shipping and the filament, and I'll happily print you one in your choice of colors.
Hi @WowIndescribable, a few of my thoughts...Hi, new forum user here, joined specifically for this Kodak Reels discussion. I just received my Reels digitizer, s/n H2324148BK01819. Since I have quite a few films to do that are important to me and I'm now aware of the limitations of the stock machine, I would like to try the modified firmware, and likely change the lens too. There seems to be still quite a bit of change going on by you absolutely amazing rockstar hackers in this regard (I'm deeply impressed with your creativity, generosity, and persistence). As such, at this point do ye think I should wait a bit until 'the way' has been stabilized a bit more?
Based on a recent post, it seems as though is 0dan0 is starting to wrap up his work on this firmware. My opinion is that since version 7.3 or so, the firmware features have gotten "good enough" for use to start using on a big "family film archive" project. While there may be more improvements beyond the current version, the current firmware is quite beyond what the stock firmware provided. Note that the lens replacement, if done successfully, will result is a substantial improvement in image detail.
It's probably worth spending some time doing a test scan or two (maybe one on the stock firmware and a second pass of that same reel with a recent modified firmware (based on your S/N your unit is likely a Model C version, but double check the various guides/instructions available before flashing the firmware). Learn how the various settings in the custom firmware affect your scans. Also, there are all of the other things about the scanner and the quality of your film reels that you'll want to get acquainted with to determine the best steps for YOU (including proper footage care/cleaning/repair, use of take-up reel vs a loose bin, post/editing workflow, final delivery, etc). This may take you some time to dial in your process, so do some "proof-of-concept" work while taking note of newer firmware releases and if they'd be of benefit for you.
Good luck!